We are more connected to the work we do if its an enjoyable experience.
Read on for details on how to configure Ubuntu with zsh, ohmyzsh and powerlevel9k theme.
Ubuntu has a package for zsh
so its easy to install
1 | sudo apt install zsh |
You could try this new shell by typing zsh
in the terminal window, however its not going to be as nice without some configuration first. So lets add that next.
Oh-My-Zsh is an open source, community-driven framework for managing your ZSH configuration. It comes bundled with a ton of helpful functions, helpers, plugins and lots of themes to make your command line look fancy!
Install ohmyzsh
with either wget or curl. I prefer wget on Ubuntu as its installed by default
1 | sh -c "$(wget https://raw.githubusercontent.com/robbyrussell/oh-my-zsh/master/tools/install.sh -O -)" |
See the ohmyzsh website for alternative installation information.
Powerlevel9k is a theme for ZSH which is easy to customise and feature rich. The theme works for your own custom zsh setup as well as ohmyzsh, prezto and other configuration.
Clone the powerlevel9k theme into the existing ohmyzsh
project
1 | git clone https://github.com/bhilburn/powerlevel9k.git ~/.oh-my-zsh/custom/themes/powerlevel9k |
Edit the ./zshrc
file and set the theme to powerlevel9k
1 | ZSH_THEME="powerlevel9k/powerlevel9k" |
Ensure that there is only one theme set with this value.
The powerlevel9k theme uses Powerline Fonts so we need to install them too.
There are several powerline packages in the ubuntu archives, so either install the powerline fonts or use the powerline meta-package to include powerline support for python too.
1 | ## just the fonts |
To find the packages I simply searched the Ubuntu archives using the command
apt-cache search --names-only powerline
Once you are happy with your new setup, you can make zsh the default for the Ubuntu terminal. Run terminal
and edit the profile you are using to run zsh:
Profile Preferences > Command > Custom command > /usr/bin/zsh
Change the default login shell by running the chsh
command. This will prompt you for your login password and then show you the current login shell. Type /usr/bin/zsh
if the current shell is not zsh.
With a few Ubuntu packages and two cloned repositories you can quickly create an enhanced experience in your command line.
Take a look at how others have configured the powerlevel9k theme for there own needs
Thank you.
@jr0cket
Using animated gifs are a lightweight way to show Emacs in action, as can be seen at Emacs Gifs.
I am creating a workshop on developing Clojure with Spacemacs, so here is a little guide as to how I create animated gifs and videos for this workshop directly from Emacs itself using camcorder.el.
There are several different ways to create animated gifs and so far I have found camcorder.el to be the easiest. This approach has been tested on Ubuntu Linux 16.10.
Being an image format, animated gifs can be used like any other image. So they are easy to include in websites. They will also play continually without any additional code.
Animated gifs are typically smaller in size, so are quicker to download than video and use less resources too.
Some small amount of quality is lost when converting to an animated gif. However, using the optimised and hence slower conversion gives a reasonable quality. I am still experimenting with the setting though to see if I can make the conversion better.
camcorder.el enables you to create a screen capture specifically of Emacs. When run, a new Emacs frame is created with the contents of the current buffer and your actions in that frame are recorded as a video.
Then camcorder.el can convert the video to an animated gif.
The camcorder.el
package itself does not actually do the recording or even the converting, its simply a convienient way to manage other tools without having to leave Emacs.
For a quick and simple conversion from video to animated gif you can select ffmpeg. If you want to optimise the size of the resulting animated gif then select the combination of mplayer and imagemagick.
1 | sudo apt-get install recordmydesktop mplayer imagemagick |
As far as I am aware there is not yet a Spacemacs layer that includes camcorder.el
. So instead we add camcorder.el
as an additional package.
Edit your ~/.spacemacs
configuration file and find dotspacemacs-additional-packages
. Then add camcorder
to that list of packages:
1 | dotspacemacs-additional-packages '(camcorder) |
You will need to either reload your Spacemacs configuration with SPC f e R
or restart Emacs.
Run either camcorder-record
or camcorder-mode
to record Emacs. You are first prompted to give the file name of the video output (ogv
video format).
Once you have specified the video name, a 3 second countdown will run before starting the recording.
Command | Description |
---|---|
M-x camcorder-record | Open a new Emacs frame and record |
M-x camcorder-mode | Record current Emacs frame |
F11 | Toggle pause pause |
F12 | Stop recording and save video |
Screencasts are generated in ogv format, although if you hack camcorder.el
you could change the video format used and even the video capture tool (recordmydesktop).
As capturing creates a video file, you can edit that file with tools such as OpenShot or Blender video editors. So if you make a small error or want to shorten (or lengthen) a part of the video, then edit it before you convert it to gif.
You can convert the videos you generated during capturing, or any other supported video type. So you can also used camcorder.el
if you recorded Emacs (or other tools) separately.
Run the M-x camcorder-convert-to-gif
and you are prompted for the video file to convert to an animated gif.
I initially made one tweak to camcorder.el
, to change the size of the frame created for the capture. I fount the frame too small to work with on a high resolution monitor. The only challenge with this is it creates a larger file for the animated gif.
I changed the height from 20 to 32 and the width from 65 to 120. These sizes provided more space to see the Spacemacs menu as I demonstrate features. When creating screen captures I run my desktop at a resolution of 1360x768 and a Spacemacs font size of 16 (Ubuntu Mono).
1 | (defcustom frame-parameters |
After some testing I have now reverted back to the original height of 20 and width of 32. I have also reduced the font settings in Spacemacs to us Ubuntu Mono with a font size of 12.
The package camcorder.el provides a simple 2-step process to create animated gif images of Emacs demos. You can tweak the script easily and can also use different tools to do the screen capture.
Animated gifs are very easy to distribute, especially on web pages and github pages sites. With this process you also have a video version of the demo too.
Keeping your demos short, between 10 and 20 seconds, typically makes the animated gifs easy to follow. So think about what the most important point you are trying to convey when you are creating a new animated gif.
]]>A Kanban board is a way to visualise your work and help you get more work done. You organise your work into tasks that need completeing and use the board to show the state of each card. Kanban encourages you to get work finished before starting new work.
The amazing Emacs Org-mode can be used to create a very fast and easy to use Kanban board that is with you where ever you are.
Update: Using Org-mode doesnt give me everything I want from a Kanban board, but it was an interesting exersice. For now, I am just sticking to my list view of a Kanban board.
Org-mode is built into Emacs / Spacemacs so there is no need to install any packages or layers for any of the following.
The columns on your kanban board represent the state of work and represent your typical workflow. You can represent the states as the most generic todo, doing, done workflow, or anything more specific that adds value to how you manage work.
I have been using kanban for a while, so I am using a five stage workflow: planning, in progress, blocked, review, done
Its easy to create your own Org-mode stages, to represent the state of work in your Kanban board. Please see my earlier article on Configuring Emacs Org-Mode to Managing Your Tasks
Create a new file by opening a new buffer M-x find-files
and type in the new file name, ending in .org
. Any files with a .org
filename extension will automatically set the Emacs major mode to Org-mode.
I use a file called kanban.org
for my kanban board.
Spacemacs | Emacs |
---|---|
SPC f f | C-x C-f |
M-x spacemacs/helm-find-files | M-x find-files |
Lets assume you created a file called kanban.org
. Edit this file and create a table for the kanban board. You can start creating ths manually by typing |
for the table layout or use M-x org-table-create
and enter the number of columns and rows for the table. For example, to create for a table with 5 columns and 3 rows, you would speciify 5x3
Add the names of the kanban board in the first row of the table. If you did not use M-x org-table-create
then add a header row with M-x org-table-insert-hline
.
In my kanban board, this gives
Each item on the board represents a task and we use the Org-mode interal link to jump from the board to the details of the task. To create a link of the same name as the task, simply type the name inside double square brakets [[]]
.
Its easy enough to move the columns around with Alt - <arrow-keys>
in org-mode, but there is not a single keybinding to move a cell.
To move the individual tasks between the columns use selective cut and paste:
C-c C-x C-w
TAB
to move to the new cellC-c C-x C-y
However, simply moving the task does not update the Org-mode stage. As each task is a link, I can click on that link and I am taken to the task and can easily update the task stage to match the board.
It would be great if moving the tasks on the board updated the associated task stage and vice versa.
I found the El Kanban package that will updated the kanban board based on the task org-mode stages. This uses the Org-mode table format directive that you run each time you want to update the board.
I installed this package and it did pull in my custom org-mode stages for the headers. Unfortunately it did not pull in the tasks to the board, so I will either need to fix the package or find another solution.
Any suggestions are more than welcome.
References
Thank you.
@jr0cket
December 2016 we celebrate the sixth birthday of ClojureX, a two-day conference organised by the London Clojurians and SkillsMatter. Submit your talk ideas by 30th August to take part in the fun.
Previous conferences have included a diverse range of topics and speakers in the areas of Clojure, Clojurescript and Functional Programming. At last years conference we were quite surprised how many people are already using Clojure at work. In 2014 we ran a poll of our audience and 18% were using Clojure on a daily basis. For the same poll in 2015, 78% were using Clojure for their daily work. What will the 2016 poll reveal?
The London Clojure community continues to grow and we want to hear all your stories and learn from your experiences, no matter how long you have been working with Clojure. So please consider submitting a talk (or several talks) to the ClojureX conference in London on the 1st & 2nd December.
If you have never spoken before or want some handy hints on presenting and getting your talk accepted for Clojure eXchange, then join our workshop on Giving your first Meetup or Clojure eXchange talk on 2nd August, 2016 (video coming soon).
Anyone accepted to speak at the Clojure eXchange conference gets a free ticket, or re-imbursed if you have already purchased a ticket. You also get a free ticket for a friend. A 25% discount on ticket purchase for anyone who submits to the CFP but does not get accepted.
The conference is a single track over two days. Each day starts with a 45 minute keynote and then 30 minute talks for the rest of the day, with 10 minute lightning talks after lunch. There is also the option of having a discussion panel at the end of each day.
Of course we try and get a wide range of excellent talks for you to absorb during the two days. As well as new speakers, we also get many well known speakers and developers from the community and its a chance to ask them all your burning questions in person.
There is a chance to hack along with other developers and plenty of space at the venue to create your own adhoc hacking area. Last year we also had an improptu lunchtime hack session where a challenge was set and we paired and grouped up to see how far we could get solving that challenge.
Actually being at the event also allows you to talk with other developers about their experiences with Clojure, swapping tips and tricks, discussing libraries and whether your web frameworks should implement the whole of the HTTP specification.
Many of the conference sponsors are hiring as are many of the developers attending, so its also a chance to look for new opportunities with companies and development teams using Clojure and functional programming
As organisers we alway look to make it as easy as possible to make new friends and meet others from the London Clojurian community. We are a friendly group and welcome anyone at any level (if you have had experences otherwise, please let me know and we will fix it).
Apart from getting a free ticket if you get accepted, its a great opportunity to discover what ideas and topics interest you the most. What do you care about? What challenges do you have at work? What iches do you want to (programmatically) scratch? These questions are ways to focus on things you would like to talk about.
If you want more talk ideas, then take a look at our past conferences to see the kinds of talks we have had before. You may find something interesting to trigger your own ideas or find something that we havent talked about enough.
Public speaking is a great way to ground your understanding of a topic and give you more confidence. Its also great for your career and getting you noticed with prospective employers.
If you want to do a talk but need some help or a confidence boost (its scary for everyone at first) then come along to the London Clojurian meetup on 2nd August where we are running a workshop on speaking at meetups and conferences.
Anyone can give an interesting talk and some of the most valuable are based on your own experiences and that of your team.
Last year we had a great talk by William Hamilton, a lead developer at Funding Circle who took the decision to re-architect all their software using Clojure and Clojurescript, coming from mainly a Ruby background. William talked about why such a change was valuable to the company, what the challenges were, how they trained people and helped them make the switch. William also discussed the new Clojure & Kafka based architect for their back-end services. It was a facinating way to round of the conference.
All the content from our previous conferences are available via the ClojureX Conference page on the SkillsMatter website. This includes videos of the sessions and pictures from the event to help you get a sense of what it will be like.
Help make ClojureX 2016 our best conference so far by submitting a talk (or as many talks as you want).
If you have never spoken before or want some handy hints on presenting and getting your talk accepted for Clojure eXchange, then join our workshop on Giving your first Meetup or Clojure eXchange talk on 2nd August, 2016.
Anyone accepted to speak at the Clojure eXchange conference gets a free ticket, or re-imbursed if you have already purchased a ticket. If accepted you also get a free ticket for someone else.
There is a 25% discount on tickets for anyone who submits a session but does not get accepted.
Thank you.
@jr0cket
Using yasnippet saves time by avoiding the need to write boilerplate code and minimising other commonly typed content. YASnippet contains mode-specific snippets that expand to anything from a simple text replacement to a code block structure that allows you to skip through parameters and other sections of the code block. See YASnippet in action in this Emacs Yasnippet video.
To use a specific snippet simply type the alias and press M-/
. For example, in html-mode typing div
and pressing M-/
expands to <div id="▮" class="▯">▯</div>
and places the cursor so you can type in the id
name, then TAB
to the class
name, finally TAB
to the contents of the div.
You can also combine yasnippets with autocompletion select snippets from the autocompletion menu.
Spacemacs has lots of snippets for most of the languages and modes it supports. However, YASnippets also uses a simple template system in plain text, so its pretty easy to learn. Lets look at how to add your own snippets with Spacemacs.
In regular Emacs, yasnippets expand funciton is usually bound to
TAB
, but that key is used already in Spacemacs soM-/
is used instead.
If you just want text replacement you can also use Emacs Abbrev mode.
The easiest place to add your own snippet definitions is in the ~/.emacs.d/private/snippets
directory. Under this directory structure you should create a folder named after the relevant mode for your snippets, eg markdown-mode
. Inside this mode folder, create files whos names are based on the snippet alias you wish.
So for a work in progress snipped called wip
in markdown mode I created ~/.emacs.d/private/snippets/markdown-mode/wip
file.
You need to load this new snippet into Spacemacs by either restarting or using the command M-x yas-load-snippet-buffer
command in the buffer of the new snippet you have just written. Ths snippet with then work within any markdown mode buffer.
Although the private snippets directory is easy to use, it is not under version control. So although its not over-riddend by Spacemacs it also means your private snippets are not backed up anywhere.
If you use the ~/.spacemacs.d/snippets/modename-mode/
directory structure for your snippets then you can version them with Git or similar versioning tools.
Typically each snippet template is contained in its own file, named after the alias of the snippet. So a snippet called wip
will be in a filename wip, in a directory named after the relevant Emacs mode.
The basic structure of a snippet template is:
1 | #key : the name of the snippet you type |
The content can be anything, simple text or more usefully a code strucuture with placeholders for tab stops. You can even include Emacs lisp (elisp) code in there too.
I use markdown mode for writing a lot of content, especially for technical workshops. As I am developing these workshops its useful to highlight which sections are still work in progress. Rather than type the common message I use, I’ve created a simple snippet called wip
.
1 | #key : wip |
When you expand this snippet with M-/
then the snippet name is replaced by the content.
Lets look at an existing snippet called form
in the html-mode
. This expands into a html form, but also helps you jump from method, id, action and content.1
2
3
4
5
6#contributor : Jimmy Wu <frozenthrone88@gmail.com>
#name :<form method="..." id="..." action="..."></form>
# --
<form method="$1" id="$2" action="$3">
$0
</form>
This snippet is the same as the simpler example, except we have added tab stops using the $
sign and a number. When you expand this snippet, the snippet name is replaced by the content as usual but the cursor is placed at the first tab stop $1
. Each time you press TAB
you move to the next tab stop.
$0
is our exit point from the snippet, so pressing TAB
reverts to the usual behaviour outside of YASnippet.
A really fast way of creating a new snippet is to use a finished version of what you would like the snippet to expand to. For a simple text replacement you just hightlight all the text and call helm-yas-create-snippet-on-region
, save the snippet and you are done.
For a code structure with tab stops, simply hightlhght a completed code stucture, call helm-yas-create-snippet-on-region
and edit the body of your snippet to replace the specific names and values with tab stop placeholders, $1
$2
, $3
, etc.
When I write blogs I include a image thumbnail that gives a visual clue as to the topic of the article. Rather than type this in I created a snippet.
First I mark the text I want my new snippet to expand too, in this example: {% img img-thumbnail /images/spacemacs.png %} .
Then I call the function helm-yas-create-snippet-on-region
. This prompts me for the mode for the snippet, in this case markdown-mode, then prompts for the location for the snippet file, ~/.emacs/private/snippets/markdown-mode/imgtmb-spacemacs
. A new buffer is created with my snippet already filled in.
1 | # -*- mode: snippet -*- |
The new snippet buffer already has the name and key values populated from the filename I gave for the snippet, imgtmb-spacemacs
. The snippet body is also populated automatically from the text I had highlighted. So all I need to do is save the new snippet and try it out.
Once you have written your snippet, you can quickly test it using M-x yas-tryout-snippet
. This opens a new empty buffer in the appropriate major mode and inserts the snippet so you can then test it with M-/
.
If you just want to try the snippet in an existing buffer, then use M-x yas-load-snippet-buffer
to load this new snippet into the correct mode. M-x yas-load-snippet-buffer
does exactly the same except it kills the snippet buffer (prompting to save first if neccessary).
There are no default keybindings for these commands in Spacemacs, so you could create a binding under
C-o
, for exampleC-o C-s t
to try a snippet andC-o C-s l
to load a snippet.
By adding the autocompletion
layer in Spacemacs the YASnippets can be shown in the autocompletion menu as you type.
By default, snippets are not shown in the auto-completion popup, so set the variable auto-completion-enable-snippets-in-popup
to t
.
1 | (setq-default dotspacemacs-configuration-layers |
Find out more about YASnippets and autocompletion from the Github repository for Spacemacs autocompletion layer.
For more details and examples on writing your own snipplets, take a look at:
Thank you.
@jr0cket
The June 2016 edition of the London Clojurians coding dojo set the challenge of building a celebrity name smash, taking two “celebrities” and smashing their names together to make a weird or ammusing gestalt name.
For bonus points the challenge would include this celebrity name smash as a service and even more bonus points if using the new clojure.spec
library to put specifications around data structures and functions.
Bonus points are non-redeemable, sorry!
Although our group didnt get get any of the bonus levels, here is the blow by blow development of our code for the Celebrity Name Smash.
We created a default Clojure project to start using the following leiningen command
1 | lein new celebrity-name-smash |
This created a simple project using Clojure 1.8.0. If we had chosen to use clojure.spec
as well then we would have updated the project.clj
file to use Clojure 1.9.x as a dependency instead.
The simplest way to represent a celebrity name is in a string. So we bount a name called celebrities
to a string containing the first celebrity we could think of
1 | (def celbrties "Brad Pitt") |
As we want to have two celebrties then we changed the data structure into a Clojure vector. A vector is the most flexible data structure in Clojure. So we redefined the name celebrities
to be bound to a vector of strings containing the first celebrity couple we could think of.
1 | (def celebrities ["Brad Pitt" "Angelina Jolie"]) |
Each celebrity has a first and last name, so we need to split them into individual strings first.
We decided to exclude celebrities with just a single name.
From a quick Google we found the clojure.string/split function that will split a string on a given pattern, that pattern being a regular expression (regex).
1 | (clojure.string/split "Clojure is awesome!" #" ") |
The regular expression pattern " "
matches the space characters. We could have also used #"+s"
for the same results in this example, although it was felt that the space was clearer in intent.
So we wrote a function called name-split
to take a first and last name as a string and return two seperate strings, one for the first name and one for the last name.
1 | (defn name-split |
We tested the name-split
function in the repl
1 | (name-split "Brad Pitt") |
We could now succesfully split the full name of a celebrity into their first and last names.
A more advanced example of splitting up words would be to use re-seq with a regex patter, as in the HHGTTG book processing example in clojure-through-code.
As the aim of our code is to create silly and weird names from celebrity names, we wont get the desired results with just the first and last names. So we take those and split them.
At first we decided to split them in half, rounding down for odd lenght names.
As a Clojure String can be used like a collection of characters, we could simply take
the first x number of characters.
1 | (take 2 "Brad") |
The value returned is a list of characters, so we would have to combine them back into a string. Just using the str
function on the result of the take
function returned a lazy sequence. To get a string we needed to apply
or reduce
with the str
function
1 | ;; (str (take 2 "Brad")) |
To do this for a name of any length we would need to count
the string characters and divide by 2.
1 | (take (/ (count "Brad") 2) "Brad") |
This code also works for names that have an odd number of characters. When the odd number of characters is divided by two, a Clojure ratio type is used to hold the result rather than return a decimal value. The take
function calculated the value of the ratio type and rounds it to the nearest whole number.
Here is a breakdown of how this code works with a name containing an odd number of characters.
1 | (count "Bradley") |
After reviewing this code it seemed a little complex for what we wanted, so a quick Google gave us the subs
function. The subs
function takes a string and a starting point for the split, with an optional end point
1 | (subs "Brad" 0 2) |
So when we want the first part of the name we give the subs
function a start point and an end point for the sub-division. For the last part of a name we simply give the start point for the sub-division.
Hint If the
take
orsubs
function did not deal with odd numbers of characters, then instead of dividing by 2 we could have used thequot
function. Thequote
function divides the first argument by the second argument, returning the result as a whole number.
We created a function that takes the name as a argument and returns the substring for the first half of the name
1 | (defn first-celeb-subname [name] |
We used the let
function to create a local name (symbol) called end
that points to the end position in the string, based on dividing the name by 2. Then we call the subs
fuction to get the substring from 0 to the value of end
.
Just talking the half way point for our substring only gives one result. If we add a random element to creating our substring then we should get many more variations in results.
1 | (defn first-celeb-subname [name] |
A slight refinement can be made by replacing + 1
with the inc
function
1 | (defn first-celeb-subname [name] |
We wanted to combine two first names and two last names to make a new first & last name. So we need a similar function to create the lastname subname
1 | (defn last-celeb-subname [name] |
This function is almost identical to the first function, however only a start position is provided to subs
function, creating a substring from the start
position to the end of the name.
Finally we call these functions from a main function named celeb-name-smash
, which takes two celebrity names as string arguments and returns a string containing the smashed name.
1 | (defn celeb-name-smash |
The celeb-name-smash
function has a lot of duplication, so should probably be refactored to make it more elegant. However, we ran out of time at the dojo, so I will have a look at refactoring this function as homework.
Thanks to everyone that took part in the London Clojurians dojo at Thoughworks in June 2016, especially to the organisers for getting us together and feeding us lots of pizza.
Thank you.
@jr0cket
Git version 2.9 has been released and it brings some new features and performance benefits when using git submodules.
Here is how to install Git version 2.9 on the latest release of Ubuntu (16.04)
Ubuntu 16.04 comes with Git 2.7.x, which is a little old now. As versions 2.8 & 2.9 are not part of the Ubuntu repositories, you need to add the git-core personal package archive.
Open up a terminal and run the following commands, supplying your password when prompted.
1 | sudo add-apt-repository ppa:git-core/ppa |
To check the new version of Git is working, use the following command:
1 | git --version |
Rather than copy everything here, there is a very good overview of the Git 2.9 release on the Github blog. Or take a look at the in-depth release notes.
Thank you.
@jr0cket
Transducers are built upon the design princlple in Clojure of composing functions together, allowing you to elegantly abstract functional composition and create a workflow that will transform data without being tied to a specific context. So what does that actually mean and what does the code look like? Is there a transducer function or is it just extensions to existing functions. These are the questions we will explore and answer.
If you are in the early stages of learning Clojure, then I suggest getting your head around functions such as map & reduce and composing functions with the threading macros before diving into Transducers.
This is my interpretation of the really great introduction to Transducers from Clojurescript Unraveled, expanded with additional code and my own comments.
Defining a data structure that will represent our fruit, including whether that fruit is rotten or clean. We have two collections of grapes, one green, one black. Each cluster has 2 grapes on it (not a very big cluster in this example)
1 | (def grape-clusters |
Each grape cluster has the following structure
1 | {:grapes [{:rotten? false :clean? false} |
We want to split the grape clusters into individual grapes, discarding the rotten grapes. The remaing grapes will be checked to see if they are clean. We should be left with one green and one black grape.
First lets define a function that returns a collection of grapes, given a specific grape cluster.
1 | (defn split-cluster |
The body of this function returns the value pointed to by the :grapes
keyword, which will be a collection of grapes. We do not ask for the value of :colours as in this case the colour of the grape is irelevant.
The grape-clusters data structure is a vector of two grape clusters. To see what a grape cluster is, get the first element of that data structure
1 | (first grape-clusters) |
For each cluster in grape-clusters, return just the :grapes data, ignoring the colour information
1 | (split-cluster {:grapes [{:rotten? false :clean? false} |
We dont want to include any rotten grapes after we have processed all our clusters, so here we define a simple filter to only return grapes where :rotten?
is false.
This filter will be used on each individual grape extracted from the cluster.
1 | (defn not-rotten |
Any grapes we have left should be cleaned. Rather than model the cleaning process, we have simply written a function that updates all the grapes with a value of true
for the key :clean?
1 | (defn clean-grape |
Lets give our clean grape function a quick test in the REPL.
1 | (clean-grape {:rotten? false :clean? false}) |
Each line passes its evaluate value to the next line as its last argument. Here is the algorithm we want to create with our code:
1 | (->> grape-clusters |
Composing functions are read in the lisp way, so we pass the grape-clusters collection to the last composed function first
1 | (def process-clusters |
Now lets call this composite function again…
1 | (process-clusters grape-clusters) |
The process-clusters
definition above uses the lisp way of evaluation - inside-out.
Here is a simple example of evaluating a maths expression from inside-out. Each line is the same expression, but with the innermost expression replaced by its value.
1 | (+ 2 3 (+ 4 5 (/ 24 6))) ;; (/ 24 6) => 4 |
There are several functions that work on sequences (collections) which will return what is refered to as a transducer if they are not passed a sequence as an argument. For example, if you only pass map a function and not a collector, it returns a transducer that can be used with a collection that is passed to it later.
Using the transduce feature of each of the functions in process-clusters, we can actually remove the partial function from our code and redefine a simpler version of process-clusters
1 | (def process-clusters |
A few things changed since our previous definition process-clusters. First of all, we are using the transducer-returning versions of mapcat, filter and map instead of partially applying them for working on sequences.
Also you may have noticed that the order in which they are composed is reversed, they appear in the order they are executed. Note that all map, filter and mapcat return a transducer. filter transforms the reducing function returned by map, applying the filtering before proceeding; mapcat transforms the reducing function returned by filter, applying the mapping and catenation before proceeding.
One of the powerful properties of transducers is that they are combined using regular function composition. What’s even more elegant is that the composition of various transducers is itself a transducer! This means that our process-cluster is a transducer too, so we have defined a composable and context-independent algorithmic transformation.
Many of the core ClojureScript functions accept a transducer, let’s look at some examples with our newly defined version of process-cluster
:
1 | (into [] process-clusters grape-clusters) |
Since using reduce with the reducing function returned from a transducer is so common, there is a function for reducing with a transformation called transduce. We can now rewrite the previous call to reduce using transduce:
1 | (transduce process-clusters conj [] grape-clusters) |
This was just a brief taste of Transducers in Clojure and I hope to create more examples of their use over time. I dont see Transducers being used too much for my own code initially, but its a useful way to abstract functional composition and make your code more reusable within your project.
If you need more time for this concept to sink in, its quite alright to stay with threading macros and the partial function, or even just applying map. I find Clojure more rewarding when you first get more comfortable with the core concepts and build on them when you are ready.
Thank you.
@jr0cket
Many languages new and old provide a way to write code using functional programming concepts, however learning those concepts can take a little time especially when they are joined with OO concepts in the same language.
As Clojure has a simple syntax, many find it easier to focus on learning the concepts and design of functional programming. Then either taking those concepts back to other languages or continuing with Clojure.
At DevoxxUK 2016 I have the pleasure of running a workshop where I can help developers understand the core functional concepts, using Clojure (and Spacemacs) as simple tools.
Any developer starting to learning functional programing or interested to understand the concepts should join in. No prior experience of Clojure is required, although you should get even more out of the workshop if you have a little experience with the language.
As its DevoxxUK I’m assuming most people will have a Java background, but this is not a requirement either.
The requirements for the “Thinking functional” workshop are quite small and setup is relatively simple. You will need:
See my simple Clojure development environment guide for details on setting up Java 8, Leiningen & LightTable.
With plenty of opportunity to try code out for yourself, this workshop will discuss and provide examples of the following functional programming concepts.
By the end of this workshop you should know much more about Functional Programming, wether you decide to continue with Clojure or take these concepts to another language.
Update: The workshop is now available online, so please take a look at the thinking functionally section.
There are plenty of follow-on resources for Clojure & functional programming included in the workshop and all code will be available in the Practicalli Github organization.
Thank you.
@jr0cket
The tools for writing books and workshops have become so much easier and open. Even some enlightened publishing companies are moving with the times and not forcing you to write books in seperate word files. However, having to manage the expectations of a publisher can make book writing very unattractive.
Self publishing is much more fun and can be done at your own pace, using tools a developer can understand. Its also much easier to talk to a publisher when the book is mostly done.
I use GithubIO/gitbook, a node.js project to create my books and workshops. Gitbook generated a responsive design website as well as ebook formats in pdf, epub, etc.
All the content is written in markdown and can be managed with Git. There are also a range of Gitbook.io plugins that enhance the readers experience in terms of content style and user interaction.
You can also distribute your books via the self-publishing platform of Gitbook.io where you can sell your books on its marketplace.
Lets set up Gitbook.io and go through the content workflow.
Gitbook is a node package so install the latest version of node.js, version 4.x and 6.x work with Gitbook.
install GitBook via the nodejs package manager (npm) using the command line:
1 | $ sudo npm install gitbook-cli -g |
gitbook-cli
is an utility to install and use multiple versions of GitBook on the same system. It will automatically install the required version of GitBook to build a book.
You should use
sudo
or install gitbook-cli as an administrator, unless you have installed node.js in your personal file space. The-g
option makes the gitbook commands global, so you can use them anywhere on the command line.
To create a new book, simply create two files:
README.md
- introdution page to the bookSUMMARY.md
- the structure of the bookThen run the Gitbook initialisation command in the directory containing these two files
1 | $ gitbook init |
If you wish to create the book into a new directory, you can do so by running gitbook init ./directory
The README.md
file should have a description or introduction to the book, written in markdown. If its a workshop you are writing, its good to state what people will learn and what the prerequisites are.
The SUMMARY.md
file defines the structure of the book, it too is written in markdown. Here is a sort example of a SUMMARY.md
file
1 | # Summary |
If you add new sections to the SUMMARY.md
file, then running gitbook init
again will create the relevant directories and create files including the section tiles.
Using Spacemacs / Emacs allows you to easily re-order the sections of the book in the summary.md file by usig the
Alt + Up Arrow
orAlt + Down Arrow
You can see what the website version of your book looks like by running the Gitbook server
1 | $ gitbook serve |
Or build the static website using the Gitbook build command and serve it up from whatever webserver you prefer.
1 | $ gitbook build |
I typically use Github Pages to serve my content. Its easy for developers to use, supports custom domains and is where I typically version the content I am writing so its convieninet to have it all in one service. Github also makes use of a content delivery network (CDN) so serving your book website is incredibly fast.
I havent seen a built-in way or plugin to deploy to Github Pages, so I use a very basic script(this could probably be done better).
1 | #!/bin/sh |
All the content can be written in markdown, even the book structure. As its markdown, each section and sub-section of the book is human readable and have really minimal notation for style
To create headings, use the hash, #
, character. A single hash represents the biggest heading, equivalent to a H1 in html.
1 | # This is a main H1 style heading |
The markdow to create hypertext link, a clickable link to another page in the book or external website.
1 | [Clickable Text for link](/path/to/linked-page.html) |
The markdown to include an image in your content is:
1 | ![Image description](/path/to/image.png) |
This markdown will include a centred image in your content. Positioning of the image is managed by the theme and can also be changed in the styles/website.css
for the website or styles/pdf
for the pdf version of the book.
Images can be put in the book filespace and saved in Git along with the other content. If you have very large images or thousands of images, it may be better to use an onlie image service , eg Amazon Web Services Bucket, especially if that service has a content delivery network (CDN) to provide a consistent download speed for images where ever someone is viewing your book website.
You can highlight short snippet of code inline with the content just by placing a single quote at the start and end of the code.
Or you can highlight a block of code with three consecutive single quotes at the start and end of the code.
There are over 300 plugins available which help give a better experience in reading the book.
toggle-chapters
- collapses all the sub-headings of the book in the website, except for the section you are currently viewing. Really good for books longer than 10 sections.
disqus
- an discussion platform for enabling comments from your audience in your book, in a way thats easy to control.
ga
- a simple way to add Google Analytics to your book website.
The hardest thing about writing a book should be writing something valuable and engaging, that is hard enough already. Everthing elese should be trivial to do or you will have more reason to become demotivated.
Using tools like Gitbook.io or ReadTheDocs can make writing books and technical content much more fun.
Thank you.
@jr0cket
Using a Static Site Generators like Hexo gives a developer a very fast blogging workflow, using familiar tools and giving the ability to write offline. Content is written in markdown, keeping it portable between any blog generators and making it easy to version in Git. You can also use Git to deploy your site quickly, even over slow networks.
Static sites can be hosted anywhere and are fast to serve and easy to cache. For example, Github Pages offers a very fast way to host your site.
Lets take a look at Hexo, my favourite static site generator.
Hexo has a very simple workflow. First you create a blog website:
1 | hexo init |
This gives you a new Hexo website with a responsive design theme, a working blog and a sample article.
Then simply create new posts with the command
1 | hexo new "blog post title" |
This creates a new file under sources/_posts/blog-post-title.md
. Edit this file and write your blog in markdown.
You can view your blog at any time via a local hexo server.
1 | hexo serve |
As you save the blog posts you are writing you can see the changes via this local server, so you know what the site looks like before you deploy your posts.
As Hexo creates a set of HTML, JavaScript & CSS files for your blog can deploy it on any web server.
I use Github Pages to host my blog as its incredibly fast and easy to use. Using a repository called jr0cket.github.io
on my jr0cket account, Github Pages serves up the content at [http://jr0cket.github.io] from the master
branch. Hexo is configured to deploy to this repository.
Read my getting started with Hexo article to create your first Hexo website and start writing blogs
Each post is created from a template, which you can also customise in scaffolds/post.md
or create new templates in scafolds
.
Here is an example template I created when writing blog posts about hexo. It sets the category and tags as well as the topic image. I create a new blog post with hexo new hexo "blog post title"
:
1 | title: {{ title }} |
Landscape is the default Hexo theme and was created with responsive design principles, so it works well on all devices. You can also use one of the many Hexo themes or create your own theme.
See how I created my own version of the Hexo Landscape theme.
As the markdown you write is text-based then its easy to use Git to manage versions of your content effectively. Git can also be used to manage any theme you create.
I created my own theme and rather than keep it in the same repository, I used Git submodules to manage theme and content changes seperately.
Read in more detail how I used Git Submodules for managing content seperately from a custom theme.
There are a large number of blogging platforms (wordpress, blogger, etc) that initially seem quick and simple to use. However, you soon discover their limitations and how slow they can be. If you want to customise themes then it becomes challenging or event impossible due to restrictions.
These services require you to create your content online which depends on you having a fast internet connection as you write. Most platforms were built several years ago, so are not always the most efficient and as they are typically database driven you end up with lots of round trip requests. So these platforms are not great if you are traveling into work, on your way to an event or at a conference where the WiFi is not great.
There are also proprietary plugins with some of these services that tie you into them and it is not always easy to migrate to another service.
Thank you.
@jr0cket
When you clone, push and pull changes between Github repositories and your computer there are two network protocols to choose from, HTTPS & SSH. But which one should you use and why does it matter?
Here is a quick guide to both HTTPS & SSH and the reasons why you may want to choose one over the other.
Regardless of which network protocol you use with Github, you need to identify yourself to git first. You can identify yourself by using the two following git commands:
1 | git config --global user.name "YOUR NAME" |
The email address should be the same used to create your Github account
For more details on this, see the Github help article on seting up git.
HTTPS is recommended by Github because its a port that is open in all network firewalls, therefore Github is universally accessible when using HTTPS. There is also very little setup involved, so using HTTPS is very easy. All you need is a Github account and to configure Git with your name and email address (as detailed above in the common requirements section).
However, each time you clone, fetch, pull or push to a remote Github repository using HTTPS you need to supply your GitHub username and password. This means either typing them on the command line each time or adding them to your favorite Github tool (which hopefully caches them in an encrypted form on the filespace).
It is possible to cache your username and password for a period of time, so you only have to enter them once in a while.
1 | # Set git to use the credential memory cache |
You can of course use a much higher timeout value if needed.
See the Github help article on caching your Github password in Git
It is also possible to permenatly store your credentials on disk using git config credential.helper store
, however this is a bad option as it will save your password in plain text so anyone that gets access to your computer account can read it. If you use 2Factor authentication for your Github account (I hope you do) then you will also need to create a personal access token and use that instead of your password.
With HTTPS you are using the same username and password for your account, so if those details are seen or copied by someone, then that person has access to your entire account. They can change your account password and lock you out of not just your repositories but everything you have done on Github. They can also be malicious and submit pull requests or issues as your identity, tainting your online presence.
As long as you look after your SSH keys, specifically your private key, then I find SSH more secure and convienient that HTTPS. Although SSH can be blocked, nearly all of the networks I’ve used in the last 5 years have had the SSH port open.
With SSH you create a public/private key pair for each computer you are going to use to connect to Github. You copy the public key to your Github account and when you push a change to github it is signed with your private key so Github knows that its you that is pushing it. This does add a little setup, but then you never have to provide your username and password when accessing Github repositories.
SSH Keys are more secure in that they do not provide access to your Github account. If someone does get hold of your private key (ie. they stole your computer & hacked into your account) then they could so some nasty things to your repositories (eg. a force push of an empty repository that wipes your change history).
If your key is stolen you can still access your Github account and update your Github profile to delete any lost or stolen keys.
Its easy to generate a new public/private key pair for SSH using the command ssh-keygen
that is available on all good operating systems. When creating a key pair for SSH I recommend adding a comment that is the email address from your Github account
1 | ssh-keygen -t rsa -C my-github@email.com |
See my article on creating password protected SHH keys for more details
SSH can be tunneled over HTTPS if the network you are on blocks the SSH port. Simply edit your ~/.ssh/config
file and add this section:
1 | Host github.com |
Now every time you use SSH to connect to Github it will use the HTTPS port (443).
For more details, se the Github help arcticle on using SSH over HTTP
My preference is to use SSH with a passphrase protected key. It only takes a couple of minutes to set up and you have a secure way to use Github that does not expose your account credentials. Adding 2Factor authentication is simpler with SSH too. Even if SSH is blocked on your network its easy to configure SSH to work over HTTPS, giving you the best of both types of connections.
If you use HTTPS its essential to use 2Factor authentication to protect your Github account. If you want to store your credentials for HTTPS permenatly, ensure your password is stored in an encrypted form.
You should use 2Factor authentication for your Github account to give an added layer of protection regardless of if you use SSH or HTTPS
Thank you.
@jr0cket
Github Gists are really useful when you want to share a piece of code or configuration without setting up a version control project. Rather than copy & paste into a Github Gists website, you can create a Gist from any Spacemacs buffer with a single command.
All you need is to add the github
layer to your ~/.spacemacs
configuration file and reload your configuration M-m f e R
or restart Spacemacs. Lets see just how easy it is to use Gists with Spacemacs.
You can also use gist.el with your own Emacs configuration
When you first run any of the Gist or Github commands you will be prompted for your username, password and 2Factor code. The Gist.el code will create a personal access token on your Github account, avoiding the need to prompt for your Github login details each time.
If you are prompted to enter your personal access token in Emacs, then visit your Github profile page and view the personal acccess tokens section. Edit the token named git.el
and regenerated the token. This will take you back to the personal access tokens page and display the new token for git.el. Copy this token into the [github]
section of your ~/.gitconfig
as follows
1 | [github] |
If
git.el
adds a password line to the[github]
section of your~/.gitconfig
you should remove that password line. These Github actions only require your username and token.
The current buffer can be copied into a Github Gist using the command M-x gist-buffer
.
You can also create a gist just from a selected region of the buffer. First select the region using C-SPC
and run the command M-x gist-region
.
If this is the first time using Github from Spacemacs, you will be prompted for your Github username & password. If you have already used Github from Spacemacs, then your account details will have been saved so you do not need to enter them each time.
Keyboard shortcuts
M-m g g b
: create a public gist from the current Spacemacs bufferM-m g g B
: create a private gist from the current Spacemacs bufferM-m g g r
: create a public gist from the highlighted regionM-m g g R
: create a private gist from the highlighted regionM-m g g l
: list all gists on your github accountReplace
M-m
withSPC
if you are using Spacemacs evil mode
When you create a Gist from a buffer there is no direct link between your buffer and the Gist. So if you make changes to your buffer you want to share, you can generate a new gist using M-x gist-buffer
& delete the original one (see listing & managing gists below).
Alternatively, once you have created a Gist, you can open that Gist in a buffer and make changes. When you save your changes in the Gist buffer, C-x C-s
, the gist on gist.github.com is updated.
Use the command M-x gist-list
or keybinding M-m g g l
to show a list of your current Gists.
In the buffer containing the list of your gists, you can use the following commands
RETURN
: opens the gist in a new bufferg
: reload the gist list from servere
: edit the gist description, so you know what this gist is aboutk
: delete current gistb
: opens the gist in the current web browser y
: show current gist url & copies it into the clipboard*
: star gist (stars do not show in gist list, only when browsing them on github)^
: unstar gistf
: fork gist - create a copy of your gist on gist.github.com+
: add a file to the current gist, creating an additional snippet on the gist-
: remove a file from the current gist If you open a dired buffer you can make gists from marked files, m
, by pressing @
. This will make a public gist out of marked files (or if you use with a prefix, it will make private gists)
Its really easy to share code and configuration with Github Gists. Its even easier when you use Spacemacs) to create and manages gists for you. Have fun sharing your code & configurations with others via gists.
Thank you.
@jr0cket
At the March 2016 London Clojurians code dojo at uSwitch our group created a Clacks Interpreter in honor of Terry Pratchett, the author of the amazing Discworld series of books (and a few TV shows of those books too).
In the 33rd Discworld novel called Going Postal, messages are sent faster than a speeding horse via the Clacks system. This composes of a series of towers that cross a continent and pass messages on via combinations of lights. Each tower sees a grid of lights from a distant tower and sends the message on to the next tower.
The Clacks system was actually introduced in the 24th Discworld novel called “The Fith Elephant”, however its the “Going Postal” book where we learn the full history of the Clacks system.
We created a Clacks Interpreter that converts any English message into its corresponding clacks signal, based on the Clacks alphabet as defined by the board game of the same name. The board game defines the alphabet as a 2 by 3 grid (although in the Discworld its actually 8 large squares). Naturally, the interpreter also converts the Clacks signal back into an English message too.
The code is available on Github at: https://github.com/liamjtaylor/clacks-messenger and read on for a walk through of how we came up with the solution.
We wanted to be able to take any English language messages and transmit it across the clacks network, then
For each clack, we read the pattern from the top of the first column to the botton, then from the top of the second column to the bottom. A light in a position represents a 1 value and no light represents a 0 value. This gives us our 6 number pattern for each clack in the alphabet.
The initial data structure chosen was essentially just modelling each individual clack. Since a clack is a 2x3 structure, the simplest way to represent a clacks is to have a vector that contains 2 vectors, each with three elements.
So a simple expression of the letter a in the clacks alphabet would be:
1 | [[0 1 0][0 0 1]] |
Therefore we could define a single letter of our alphabet as follows:
1 | (def a [[0 1 0][0 0 1]]) |
Before we define the complete alphabet using this data structure, lets test if we have the right data structure for our conversion process.
Lets try the simplest way to convert a character into a clack:
1 | (defn character->clack [character] |
Calling the function converts a string into the corresponding clack
1 | (character->clack "a") |
Although the code is simple for 1 character, it does hightlight the problem of converting the whole alphabet. We would need either a deeply nested set of if statements or a very long case statement, neither of which seems to be a particularly functional approach or idiomatic Clojure.
Even if we did use a case statement, how would we convert a clack back into a character?
So perhaps we need to change the data structure, one that provides an easy way to map to values together.
Also, there seems no value in mapping values to a 2x3 grid as long as we consistently express a clack.
A map data structure in Clojure is a hash map (a key & value paring) for example I could define myself as a map
1 | {:name "john" :age "21" :twitter "jr0cket"} |
Its very common to use Clojure keywords for the keys, to make it easy to look up a particular value by refering to the keyword.
So the new design for our clacks data structure is as follows
1 | {:a [0 1 0 0 0 1]} |
To help with testing this new data structure desing, we crated enough letters of the clacks alphabet to make some simple words, i.e bat
1 | (def alphabet {:a [0 1 0 0 0 1] |
We can use the keyword to lookup the value of its clack code
1 | (alphabet :a) |
Then we created a simple function to convert a string to a sequence of clacks
1 | (defn character->clack [letter] |
The
->
character is part of the function name. This is a Clojure naming convention used when the function you are defining converts from one type to another.
And call the function as follows
1 | (character->clack "a") |
Now we want to convert a whole word to a clacks sequence. It seemed the easiest way to convert a whole word was to convert each letter at a time using the map to look up each clack code, returning all the clacks codes in a sequence.
So we redefined the string->clacks
function to take in a whole word.
We used the map
function to apply a conversion function over each element in the word (each element of the string). This conversion function called clacksify
.
1 | (defn clacksify [letter] |
Now we could convert any workd that used the letters of our limted alphabet. We chose bat as a simple word.
1 | (string->clacks "bat") |
As we are passing a string and not a keyword to the
clacksify
function, then we first convert the string to a keyword using thekeyword
function.
Is there a simple way to look up a key given a value that is unique in the map?
All Clack codes are unique in the map, but there did not seem to be a simple expression to find the key when given a value.
We could have created a second mapping, however having two maps seemed redundant and a potential cause for silly bugs.
The answer was simple once we found it. As the clack codes are unique, they could be used as keys for the letter values, we just needed to swap the map around. Swapping a map’s keys and values was done by writing a reverse-map
function.
1 | (defn reverse-map |
So we defined the function declacksify
which takes a clack code and returns its corresponding character. The clack code returns the corresponding keyword rather than a character, so we use the name
function to convert the keyword into a character name.
1 | (defn declacksify [clack] |
So calling these functions with a clacks
1 | (declacksify [1 0 0 1 1 1]) |
Its probably at this point we should have realised that we didnt need to use keywords to represent the characters of the alphabet. In fact, using keywords made a little more work for us.
Our clacks->string
function returns the right result, but not quite in the format we want. Rather than a single string, we get the individual characters.
Using the reduce
function we can apply the str
function over the resulting characters to give a single string. So our function becomes
1 | (defn clacks->string [clacks] |
Thanks to a flexible design with no side effects or side causes then its really easy to replace the English language alphabet with another language that can be encoded into Clack codes. So languages based on the greek, latin or cyrilic alphabet could be send if a suitable alphabet with clack codes is supplied.
We were quite happy with the code produced in this dojo. The code is pretty readable we believe and we have taken a fairly simple approach to the design. In hindsight we could have made the code even easier if we had tested out the map data structure a little more and used a string character for each letter in the alphabet.
Working in an editor attached to a REPL worke well (Vim in this case, but not relevant to the development of the code). The behaviour of the code was tested with almost every expression, so we gained a good understanding of each line of code.
There are ideas to take this further and show a visual representation of a message passing through a chain of clack tower, showing how the message would pass through the system at a human speed. This woud assume a fixed time to show a clacks between each clack tower and a minimum level of speed by the human part of the clacks tower.
No REPL’s were harmed in the making of this code, although one REPL was heavily used.
Thank you.
@jr0cket
It is not just recruiters & human resources departments that can get you a job, but more and more it is other developers that bring you in to their teams. The more developers who know who you are, the more opportunities will be presented to you.
Activities you can do to boost your career include:
I will walk through this aspects to help you understand them in more detail and describe my experiences and any tips I have to share
Previously I covered aspects of creating your digital self previously, covering a range of social media and developer community websites.
Most of the recruitment companies out there are not particularly progressive, essentially providing little more than collecting and shuffling CV’s. These types of recruiters are solely focused on their own goals and you are just a name in their database.
We will look at why these recruiters are considered evil and why community engaged recruiters are often a much better service.
While recruiters themselves are typically not evil, the system that they work within makes them seem so. Most recruitement consultancies are all about the numbers, usually leaving a bad experience for all involved.
Typically these recruitement companies engage with their clients (employers) to deliver results based on numbers (eg. 20 CV’s within 5 working days). This leads to brute-force searches of all the CV’s they have collected for any relevant keywords for a particular job specification.
If not enough results are found, then recruitment consultants will carry out similar brute-force searches on LinkedIn and Github to try and find possible candidates. These searches are sometimes also used to find people who do not have a CV on file with the company.
It may still be worth dealing with a specific recruitment consultancy if they have the sole contract for a particular company you are interested in working with.
I suggest that you send your CV as a pdf document to ensure that recruitement consultancy does not edit the document. If they insist on a word document, include a reference to an online version and place it in a prominent place on your website (should the employer Google who you are).
Companies such as RecWorks & eSynergy Solutions actively engage with technical communities in order to understand more effectively how the developer role continues to evolve. Typically these companies deal with more forward thinking companies that have more progressive roles.
They will probably not cover as wide a scope as evil recruiters, however it is usually a case of quality over quantity.
These community engaged recruiters usually have a better relationship with you and are more open with their processes. They also give back to the community and are in a better position to understand the trends in our industry.
The more enlightened companies realise that developers are much more effective at finding good developers than the classic recruitment process. In fact, many IT organisations and development teams are frustrated by the speed and quality of their own HR process and it can be seen as a blocker.
I have join several companies via initial contact from the development team. Often this is from meeting them at developer events either as an attendee or a speaker. I also get recognition from blog posts.
By spending a day with the company is a very effective way for them to understand what it will be like working with you. It also gives you a great experience of what it would be like working with their developers.
You may pair with one person all day, however its preferably to pair with different people during the day.
My first experience with this was at a company that built online games. They effectively hired me for 2 days as the recruitment process. On paper it looked a great match and the first couple of hours were all positive. However, as we got into the detail of what they were doing I grew concerned about their approach and didnt feel like I would be a good cultural fit. In the end we parted after the first day as both sided realised it was not a great match. I gained many interesting insights into how I think that day, which made it easier for me to assess any other potential roles.
I am weary of tests that do not let you access the Internet for answers. Shutting you away from the tools you use regularly only testing your memory and not your ability to apply what you can learn. Everyone writes code with the help of Google, Stack Exchange, etc and there is just too much to remember and from my point of view its more important to see how we can learn something new and apply it.
Instead, setting a challenge and building it with a candidate is much more effective. Having an exercise or challenge that you have recently done at work it a very valuable approach at it also lets the candidate understand the team they will be working with a little more. There are also many kata-style challenges on the Internet to choose from if you cant come up with your own exercises.
Some companies will even publish how to approach them via Github, eg Vzaar, a video hosting company publishes a note to recruiters
Its very common for you to be sent a coding challenge, so one way to improve your chances it to practice similar kinds of challenges. Most sane challenges will probably be similar to one of the many coding kata challenges. Many of these are published on the Internet and if you get really stuck you may be able to find some suggested solutions (but its more effective to do as much as you can first).
Another excellent way is to attend a code dojo, usually a couple of hours on an evening where you get into small groups and code up a challenge. At the end you demonstrate what you have done, covering any challenges and lessons learned. Code dojos are always welcoming to new starters and its a very collaborative event, all you need is a willingness to try.
Examples of code dojo events include
If you want to start you own Code Dojo, take a look at “How to run an awesome code dojo“ by Nicholas Tollervey.
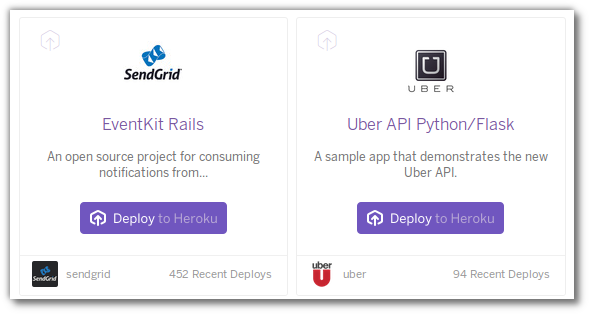
By making the applications you build available via the Internet, with services like [Heroku], enables anyone to see what you can do and a chance to experience your work. Think of this like an artist or model creating a portfolio of work.
Actually having people use your work is a very powerful way to get attention. If the developers you meet have used your apps then they will give you a lot of trust and have plenty of questions to ask you about, on a subject that you should be fairly comfortable with.
If user experience (UX) is not your strongest area (and you dont want to create just another Twitter bootstrap site), then you can create a [webservice] or [API]. or that is either very useful or very funny (but be careful to not offend here).
Examples of an API….
There are hundreds more you can find on Google or go to any hackathon event and the sponsors usually have API’s you can try out.
Another way to create something different is to take part in a Hackathon. This is typically a weekend event where you have 24-36 hours to create something, usually as a small group (eg. 2-6 people). Each group builds a web app, a mobile app or even something physical connected to a software service or app. At the end of the hack each team usually has a few minutes to show off what they have built.
Many hackathons have prizes for the teams they judge the best. Event sponsors have their own prizes that they give out prizes for the team they like the most. Prizes can range from cool gadgets & toys to large cash prizes. Because of prizes, there is more of a competition aspect to some hackathons, however, most remain collaborative regardless of the prizes on offer.
Visit the meetup.com group called Hackathons & Jams that lists many of the events happening in the United Kingdom.
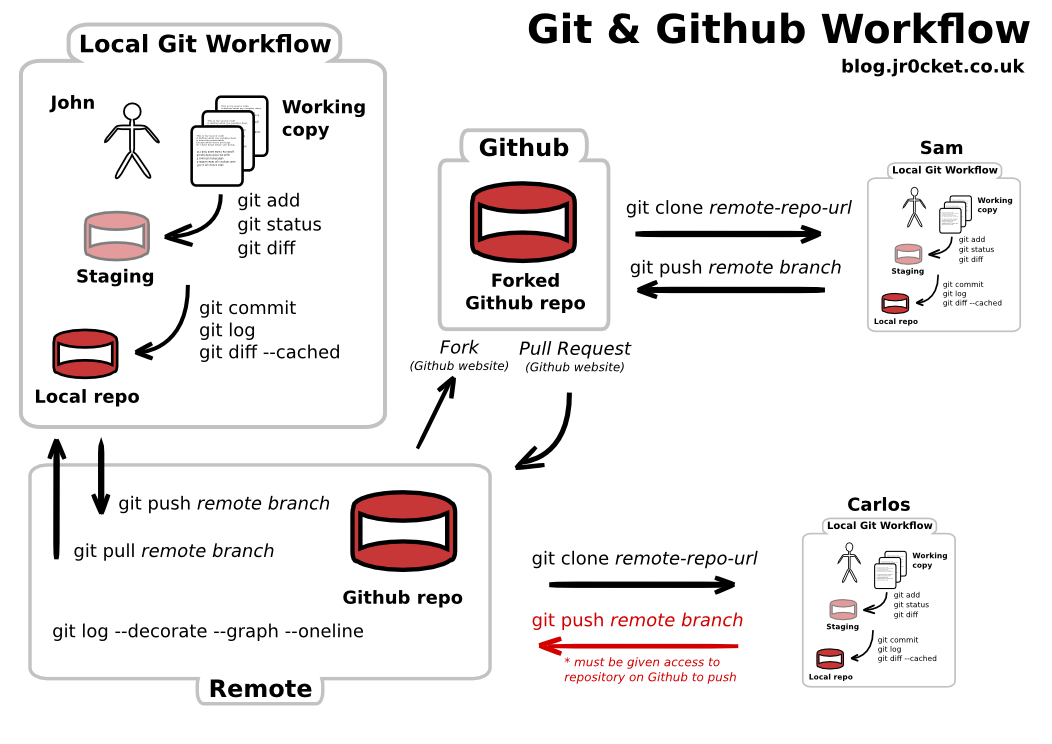
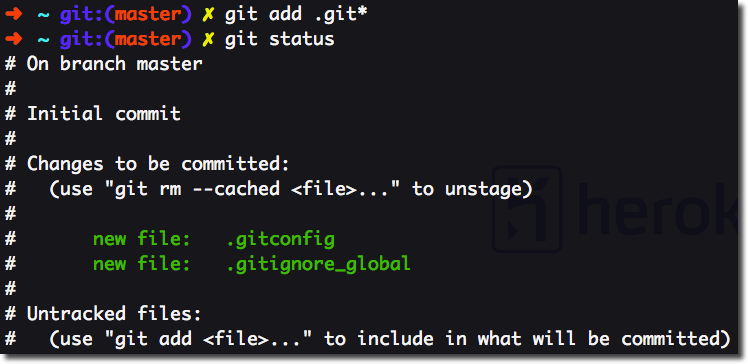
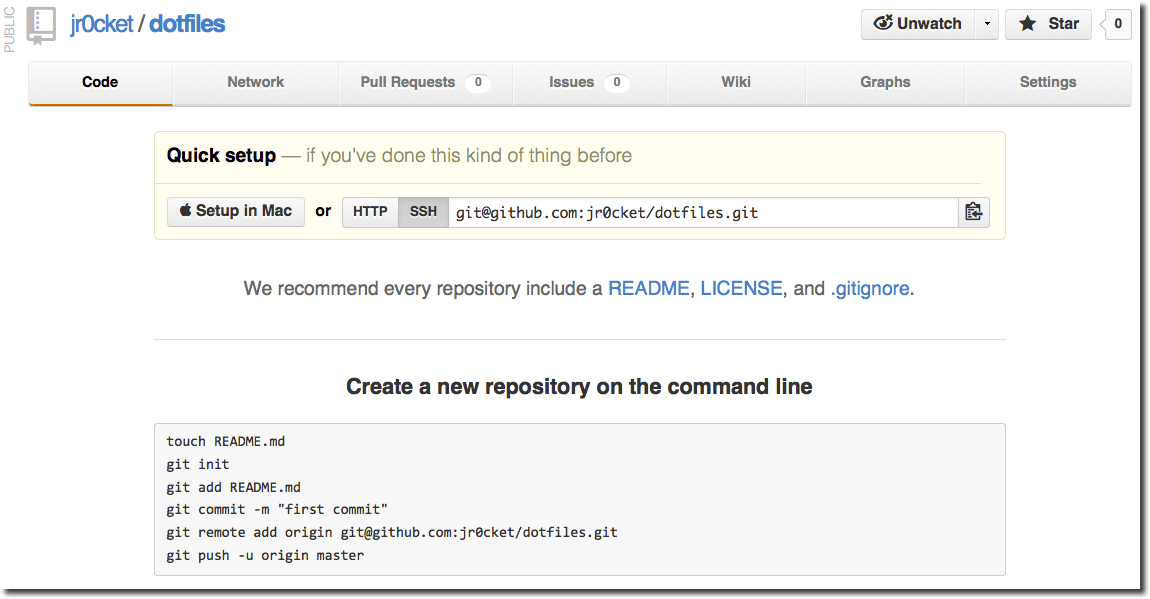
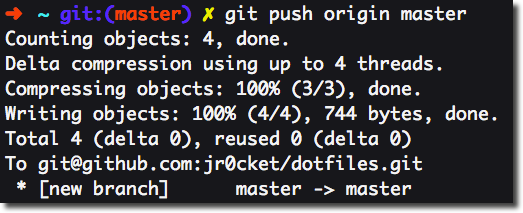
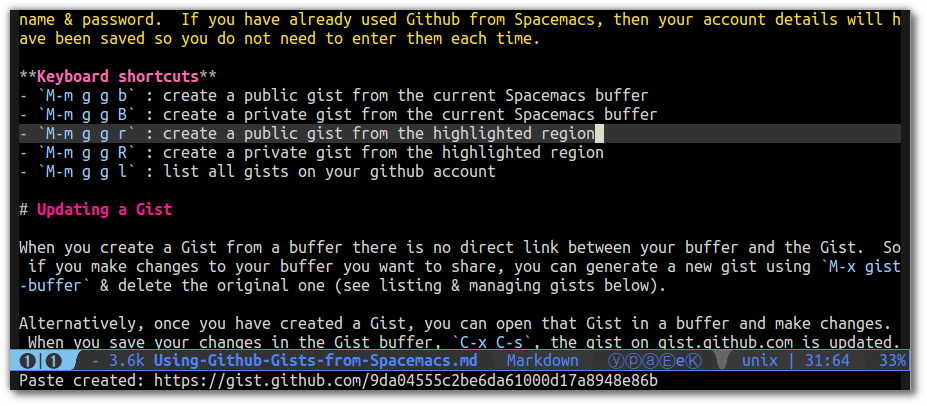
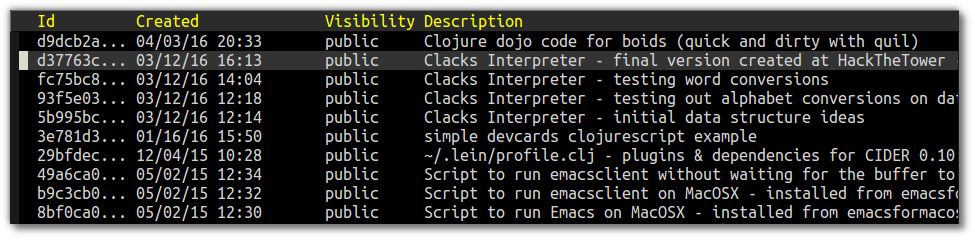
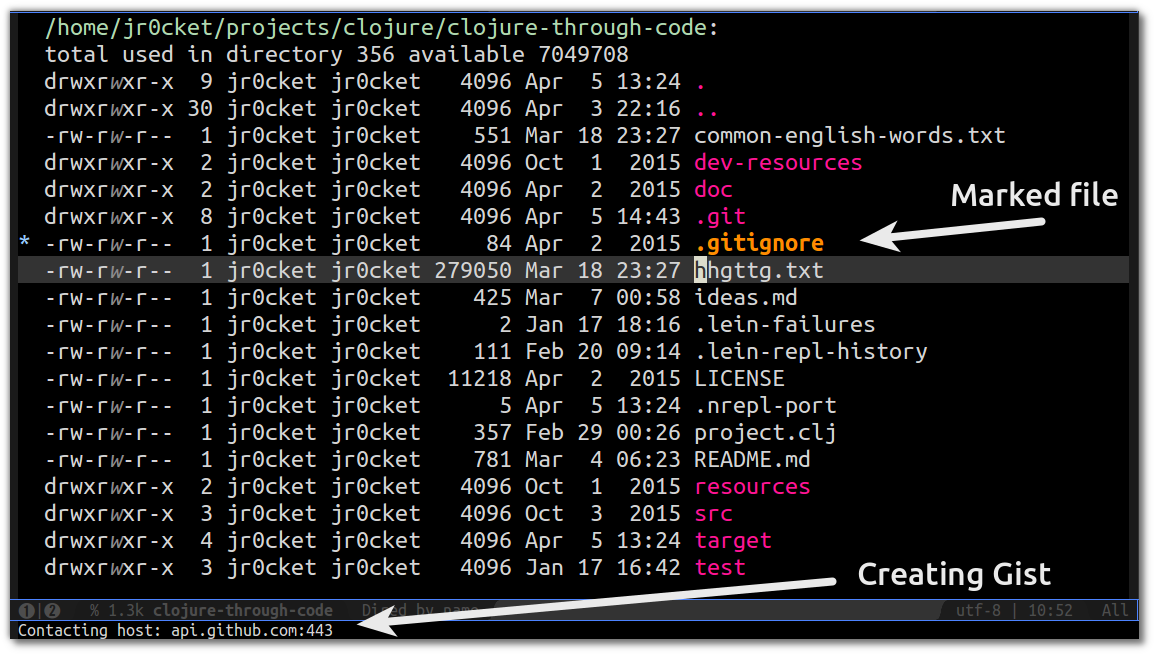
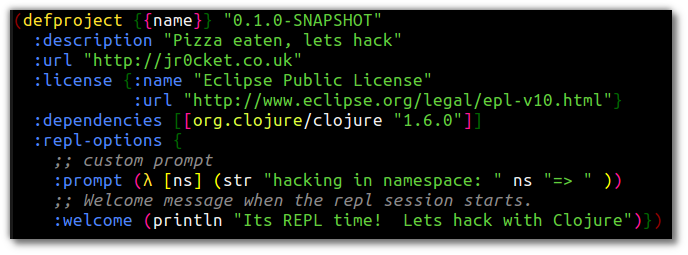
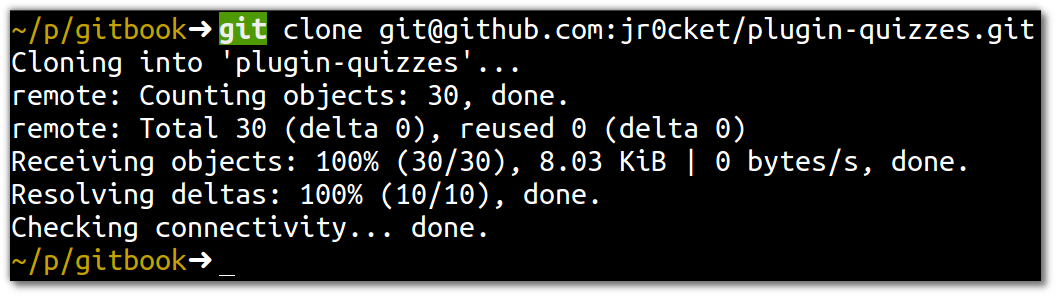
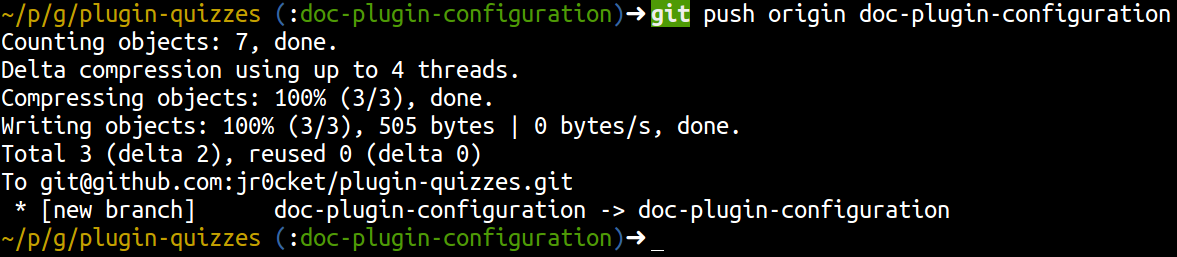
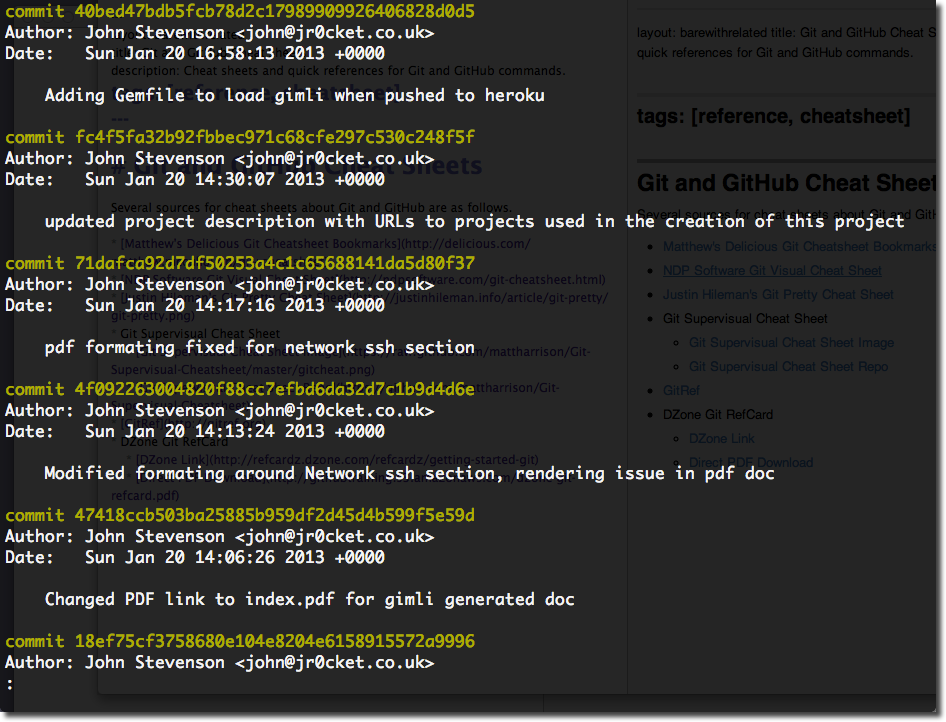
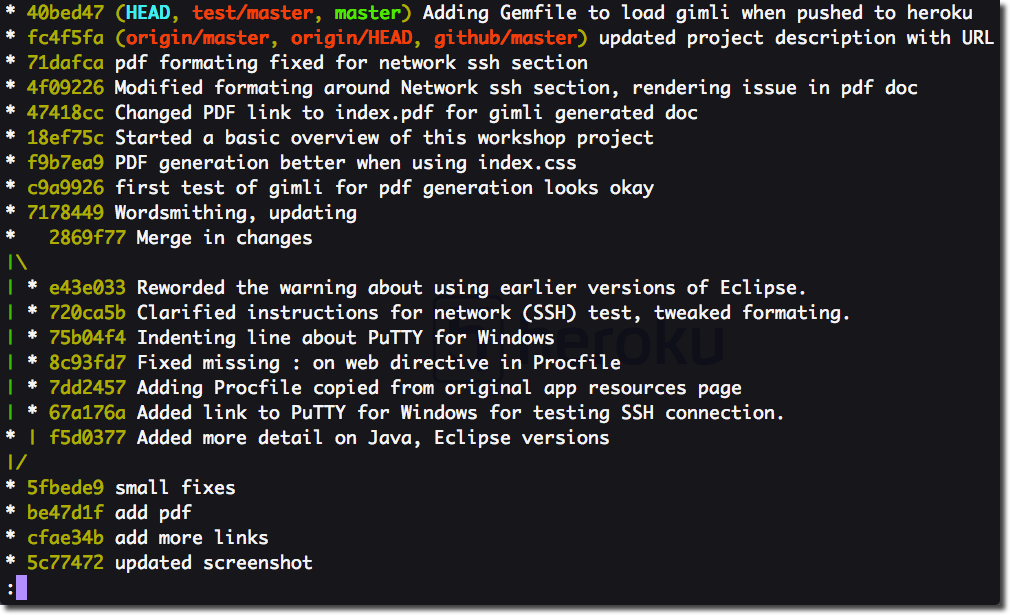
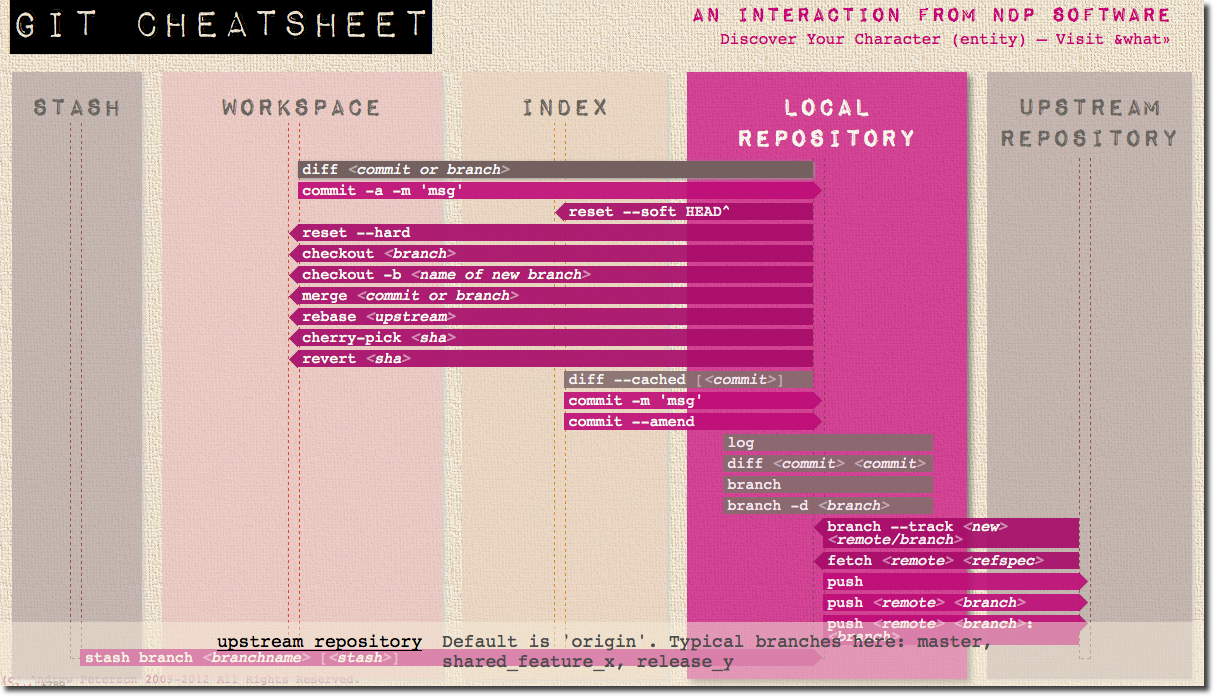
If you want to show how good a developer you are to other developers, then share your code on Github. If you create sometihng interesting then develops may star your project or follow you
Here are some useful resources if you are still learning Git / Github
Some interesting articles on the subject of recruiting from Github, including details of what recruiters may be looking for include:
Once developers have gained solid experience in there first language, many look to enhance their skills by trying a very different language. A common choice is JavaScript, especially for those developers working on web user interfaces or needing to build lightweight services / API’s.
More and more developers are learning a second or third major language, making them what we term Polyglot developers, in that they are comfortable coding with more than one language.
A polyglot developer is very valuable as they can use the most appropriate language for the project at hand. They understand the characteristics of a language and know why that language would be the best fit.
A good starting point for this is by reading Seven Languages in Seven Weeks. This book teaches you the characteristics of seven languages, rather than trying to make you proficient in seven languages.
Most of the software world now runs on open source software, so there are a great many projects out there you can contribute to. Many of these project can be found on Github
If you are interested in getting involved, choose a project you really like or some software you use often. Check the project README file for details of how to contribute. Projects on Github have a built in Issue Tracker where you can check for bugs that need fixing and any features requested. If you start with one of these issues then let the project team know about it, either in the issue itself or in the chat room if the project has one.
Many projects have IRC, Slack or Gitter based chat rooms to talk about the developent of a project. Introduce yourself and let them know you are interested in helping out.
If you are looking for projects to contribute, talk at look at Your First PR on Twitter.
Open Source Projects usually have a license, defining the terms of use for the software. By UK law, the authors of the sorouce retain copywrite of that software, unless specifically over-ridden by the license. The Open Source Initiative has a list of Open Source licenses
Creative Commons is a similar license usually for creative works such as images, videos, blogs & books
Writing a tutorials & blog posts are a great way to review how much you understand about a topic. Its also a great way to get feedback from the community, who can offer additional technologies & approached to try out.
A great tool for writing tutorials and ebooks is Gitbook. You can write your content in [Markdown] and Gitbook will generate a fully navigable website and a range of ebook formats.
There are lots of opportunities to help other developers at websites such as StackExchange. Find a topic you have experience in or even something you are currently learning. There are lots of questions at various skill levels and so there should be some you can answer.
Actually for some questions you can practice Googl’ing for the answer. Its amazing how many answers you can find out there, either in one post or accross a few different posts. You can also help keep StackExchange useful by idenifying duplicate questions.
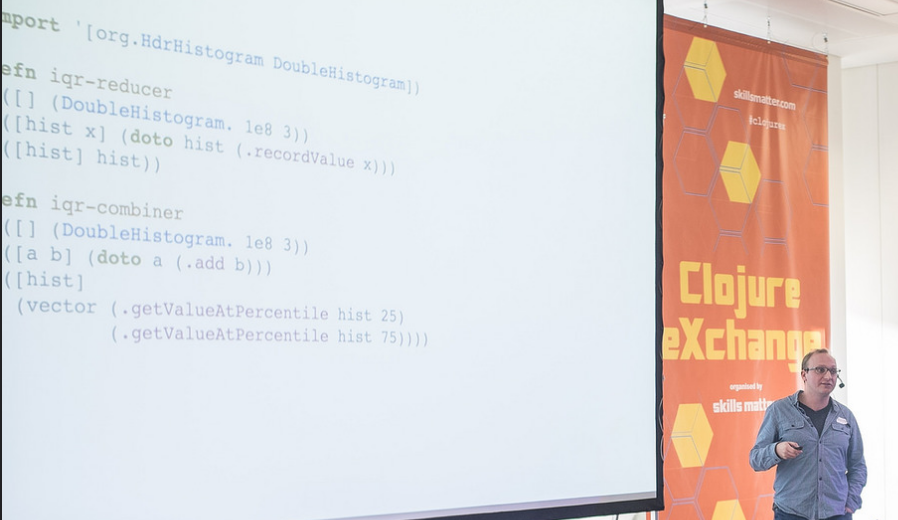
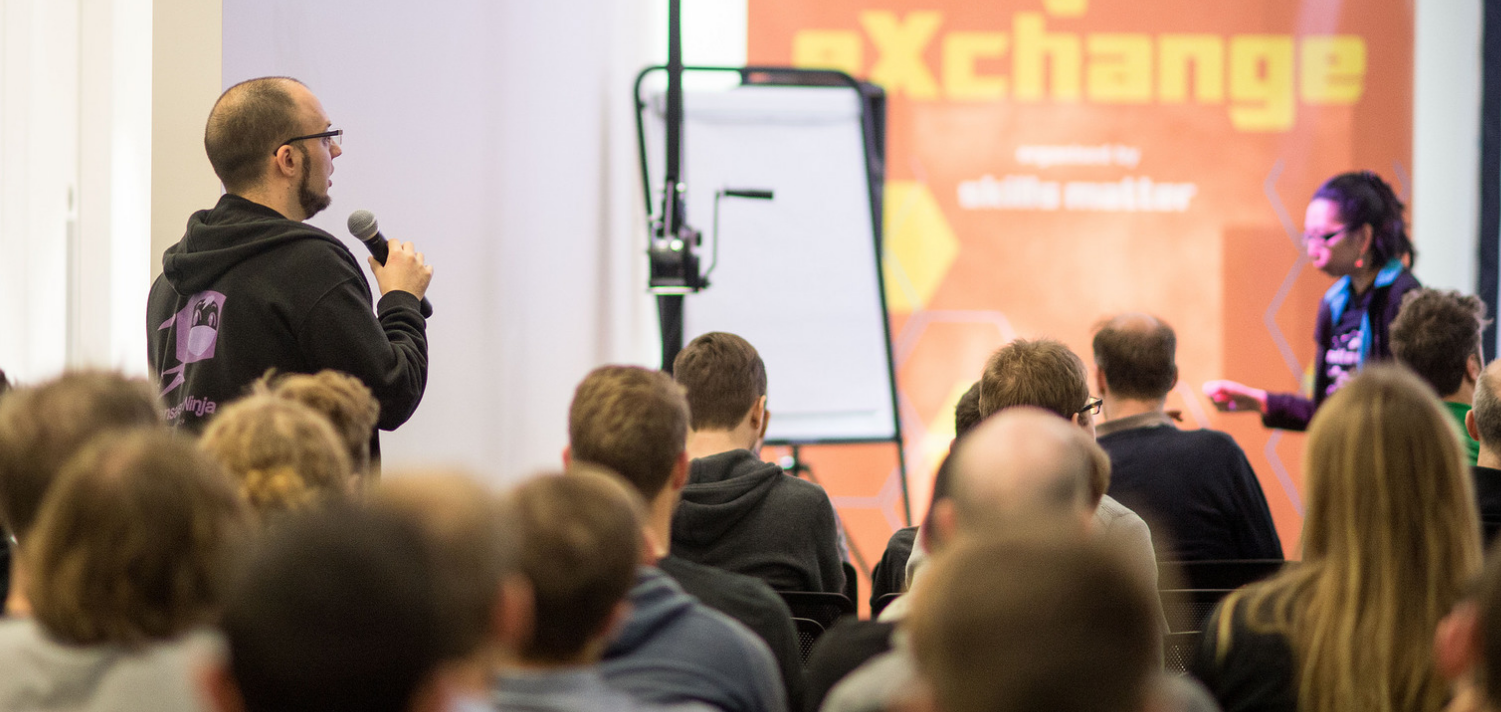
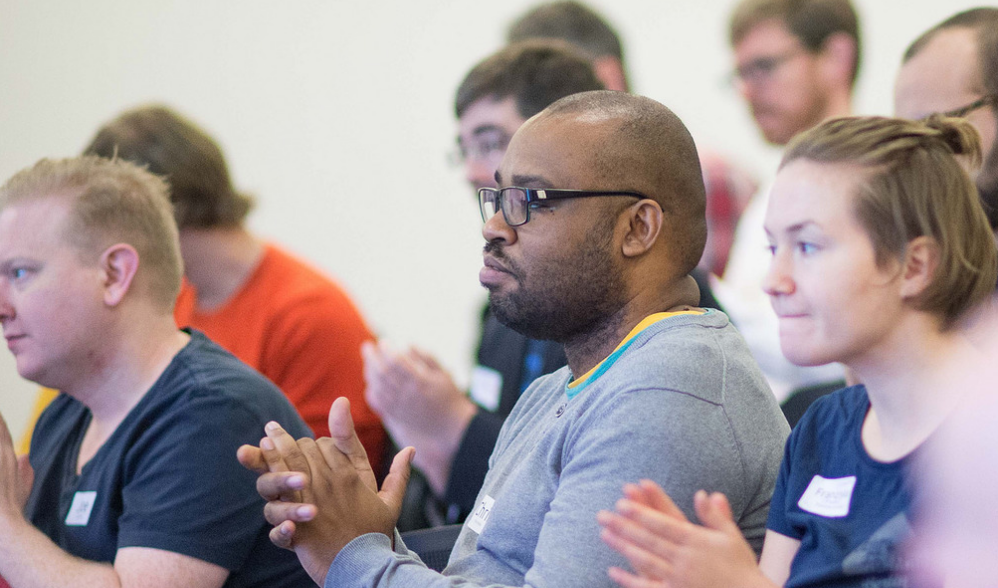
Speaking at conferences can seem quite dawnting, but its invaluable experience. If you can talk to an audience of 50 people you can easily talk to your team and the rest of the business you work for.
Obviously speaking at events helps you get noticed and gives you a good standing with employers. When you are speaking you are also helping to promote your employer too, even if you are not directly talking about anything your employer does.
I suggest starting small with a local meetup and giving what is called a Lightning Talk. This is a 5 to 10 minute talk on a specific topic and is a good way to start to build up some confidence.
There are plenty of expert speakers out there, but everyone had to start small and work their way up to bigger talks
Everyone has something they do that is of interest to others, it can be as simple as sharing your experiences of a language feature or new technology.
My first talk was on Personal Kanban, it was an agile technique I had been using for a few months and it had made a big difference to the way I worked. I did a 30 minute talk on the subject and although it felt like hard work and not very good, I got lots of positive feedback from the audience.
Have a point (or three) you want to get across - its good to be focused in your talk, trying to cover too many things in a talk can be quite confusing for an audience.
Tell a story around the point you want to make, as context makes it easier for people to relate and remember your point.
Draw from your own experiences. Nothing is more powerful for an audience than someone sharing their own challenges & solutions.
Practice your talk - either with yourself or with others. If you have a talk for a conference, then get some colleagues together at lunchtime or find a meetup a few weeks before your talk and give a shorter version of your talk. This is a great way to get feedback and refine your presentation.
Thank you
https://twitter.com/jr0cket
Creating your digital self helps you express who you are and what you are about online in a way that enhances your career and also help you in your daily work. Having a recognizable digital self also allow others to reach out to you and include you in the wider community.
Here are some tips and tools to help you create a consistent expression of your digital self.
By creating a single name for your presence across all the communication channels you use makes it easier for people to find you and know that its really you.
I created the short name jr0cket, based on my real name John Stevenson. Robert Stephenson created the Rocket, the steam locamotive that set the standard for the first railway network. As my name is John and at the time I was doing a lot of Java development I added j to the rocket to create jrocket. However, when I tried to get this name on Twitter, it was already taken (although not used), so I changed the o to a zero and created jr0cket.
At the same time I created a new domain, jr0cket.co.uk and ensured all my other social media and websites about me used jr0cket in some way.
Domain names are relatively cheap (£5-£10 a year) and allow you to have a consistent name for your email, blog and any other websites you use. You should be able to create sub-domains for each of your websites I recommend domain name providers such as NameCheap or Gandi.
Using a real picture of yourself is very valuable as it allows your digital presence to easily extend to the physical world. People are much more likely to talk to you and feel comfortable around you if they have seen your face online. Having a real picture of you helps make your digital presence unique and makes people feel like they are talking to a real person.
Try and use the same picture everywhere and update that picture every few years so its a realistic image of yourself (this is a good motivation to keep healthy).
I find twitter one of the simplest and most effective ways of reaching out to people. Twitter can also be an invaluable research tool, allowing you to easily find interesting articles to read by following a particular topic - ie. a hash tag. For example, I am learning a programming language called Clojure, so I use Twitter to follow the hashtag #clojure. This keeps me up to date with new features of the language, events relating to Clojure and interesting articles people have shared.
As you follow more people on twitter your main feed can get very noisy and move too fast to follow effectively. Therefore the idea of following users, hashtags or lists of people you have created makes using Twitter more effective.
I recommend using tools like TweetDeck that allow you to watch several things at once, all of which should move in a more reasonable pace to keep up with.
To be successful at blogging, you should write about things that are of most interest to you or the activities you are involved in every week. Having a strong connection to the topic you blog about helps you attain a regular cadence in your writing.
Writing regularly is a simple and effective way to build up an audience and give you more credibility with developers and potential employers. One article a week is a good cadence for most individual blogs, more than one if its a larger team blogging and there is enough meaningful content to share.
If there are special events you are engaged, such as product releases or conferences, then there can be value in blogging more. By understanding who is visiting your sites and how often you can get a feeling of an appropriate cadence for new posts.
I often Google for answers to specific development challenges, or simply to look for some good examples and tutorials. If I am lucky I find the the answer I am looking for, described in an easy way for me to understand. However most of the time I discover the solution by reviewing several websites and combining their information. By writing my own article to cover the challenge & solution I took, the next time I come across this challenge I have the answer available in a way I can easily understand and apply.
By writing a blog on the specific challenge or writing my own version of a tutorial helps me in the long run in two ways
The title and first 2 lines of your blog post will determine if most people read the rest of your article. It can take some practice to convey what an article is about in such a short amount of words. Take a look at other blogs and consider if the title and initial words make you want to read the article (or at least help you understand the value of reading the article).
It can be useful to use a thumbnail image as a visual representation of the topic or main theme of your blog post. Images in your articles should support and re-enforce the concepts you are trying to convey.
There are many blog platforms out there, all with their pro’s and con’s. Choose one that suits your needs and if not sure just pick the one that is easiest to use and re-evaluate that decision later on.
Many people use WordPress.com, however there are others such as Typepad, Ghost and many many more.
Google Analytics has a free plan that will allow you to see a lot of valuable information about the visitors to your website or blog.
You can use Google Analytics for your blog to see when you get the most visitors and have a better insight into the best time to post new articles.
LinkedIn is a very useful service for defining your previous work history, acting as an online CV that you have full control over (recruitment consultants have been know to change or re-organise the information in an off-line document before sending to their customers).
Getting a good reference from your manager is not always possible, so its useful to encourage your colleagues to give you recommendations via LinkedIn. A good time to ask is when your colleagues have just benefited from some work you have done for them. You can review the recommendation they have given you before it is published on your LinkedIn profile.
Github is a great way to use the code others have created as well as sharing your own (or even just using Github as a backup for your code). Many employers are looking at a persons contributions via Github to help them assess development skills.
Typically it will be other developers or development mangers that will review a candidates activity on Github. There are many things they could be looking for, including
It is also common to look for project documentation or blog posts that describe in more detail the design choices taken in a project.
In many development communities your contributions to Stack Exchange are seen in a very positive light. If you are quite active on certain parts of Stack Exchange you are quickly perceived as an experienced person on that subject, even if you feel you still have a lot to learn.
The best way to learn it to try and teach another. Stack Exchange is a fun and engaging way to help others whilst helping you validate how much you have learned about a particular subject.
Services like Slack and Gitter provide a way for you to interact with the community in real time. This is most useful if you are actively involved in the community (or are wanting to become more involved).
Gitter is especially useful when you are collaborating around a code repository on Github. It also can show notifications of commits and pull requests made to the repository.
Creating and managing a consistent and realistic digital presence is a very valuable way of reaching out to the wider community. It also helps you make connections that are invaluable for your career as well as your daily life.
If you have a significant change in what you do or how you want to be percieved, dont forget to update your entire digital presence to reflect this.
]]>Adding the Clojure layer to Spacemacs provides great support for the language via CIDER, Clojure-mode, clj-refactor and lots of useful tools.
The Clojure layer also adds to the auto-completion layer, providing matches for anything currently defined in the current namespace. The yasnippets package also allows you to expand shortcuts for common Clojure code structures, eg. def, defn, let, require.
Clojure support in Spacemacs is configured by adding the clojure layer. Edit ./spacemacs
and add clojure
to the list of layers defined in dotspacemacs-configuration-layers` function
1 | (dotspacemacs-configuration-layers '(clojure) |
For an example, see my spacemacs configuration on github. Please note that there are more configuration options added to this file than required for Clojure, only add the ones you understand.
Restarting Emacs will download by the related packages for Clojure.
You can also use
SPC f e R
(evil mode) orM-m f e R
(holy mode) to reload the Spacemacs configuration and download packages, however for a big layer I have found a restart of Emacs is needed to load in all the new configuration.
You can configure the Clojure layer to use pretty symbols to represent a few things in Clojure, such as:
1 | (λ [a](+ a 5)) ;; anonymous function (fn ...) |
To enable this feature, edit the ./spacemacs
file and add the following snippet to the dotspacemacs/user-config
function:
1 | (setq clojure-enable-fancify-symbols t) |
Install Leiningen using the instructions on Leiningen.org, or if you already have Leiningen installed then check you have the latest version via lein upgrade
Leiningen should be version 2.6.x or greater as of 22nd February 2015
If you are using CIDER 0.11 or greater then you are done, as from this version the Leiningen dependencies are automatically injected when you start cider-jack-in
.
Edit the Leiningen profile configuration for your useer, eg. ~/.lein/profiles.clj
and add the following plugins and dependencies:
1 | {:user {:plugins [[cider/cider-nrepl "0.11.0-SNAPSHOT"] |
Plugin versions are the latest as of 28th December 2015.
You can also check for the latest versions of cider-nrepl, refactor-nrepl, alembic & tools.nrepl
The cider-nrepl
plugin should match the version of CIDER used in Spacemacs, found by using M-x cider-version
. You will see a warning message in the REPL buffer if the versions do not match, for example:
Now you have the Clojure layer and Leiningen configured so you can create your Clojure apps with ease. Next time we will show how to use the REPL to evaluate code, giving you almost instant feedback on what you have created.
Thank you
jr0cket
Spacemacs is a community developed configuration for Emacs that makes it easier for anyone to use this amazing developer tool. Spacemacs is a well thought out way to apply the vast and diverse power of Emacs, making it more accessible especially to those who are used to using Vi.
Unless you’ve spent the last few years hand-crafting your own Emacs configuration, then I think you will enjoy Spacemacs. Here are some reasons why I love Spacemacs as an Emacs user.
The startup for Spacemacs is really quick, less than 2 seconds, even after adding a whole host of features (layers). Some of this speed may be due to the lazy loading approach that Spacemacs takes. In the best tradition of Lisp, some things are only loaded in Spacemacs when they are first used. For example, when you open a Clojure source code file for the first time, the Clojure layer is loaded and clojure mode is applied.
The init.el file has long been the entry point for your Emacs configuration with many different ways to setup an Emacs configuration. With Spacemacs you have the .spacemacs
file and layers, giving a very structured approach that is easy to follow.
The .spacemacs
file has three sections
The (emacs) keybindings for dotspacemacs are
M-m f e d
- open the ~/.spacemacs
fileM-m f e R
- reload the configuration from ~/.spacemacs
Some changes in the
~/.spacemacs
file still require a restart of Emacs , especially when pulling in a large number of packages in a layer.
Developers drive Emacs with keybindings or use commands via M-x
. The more features you add to Emacs, the more keybindings and commands you have at your fingertips. So to manage all this power, Spacemacs uses Helm to organise these keybindings & commands into groups. Helm also helps you navigate the file system too, minimising the need to type directory and file names in full.
Commands are grouped by their nemonic character, for example
S
- spellingT
- themesa
- applicationsb
- buffersf
- filesg
- git/version controlHelm is an incremental completion and selection
narrowing framework. Its the central control tower of Spacemacs, it is used to manage buffers, projects, search results, configuration layers, toggles and more.
Once you have learnt the Spacemacs groupings for Helm its really fast to do anything, so take a look at the Helm documentation wiki.
You can still type in command names using M-x command-name
too, if you know the name of the command you are looking for.
ido mode is still available in Spacemacs but by default it is over-ridden by Helm. You can enable ido using
dotspacemacs-use-ido t
in thedotspacemacs/init
section of.spacemacs
, however this only replaces a few commands.
numbered buffers - each buffer gets a number in the status bar, allowing you to jump to any buffer using the M-m
or SPC
and the buffer number, eg. M-n 3
jumps to buffer number 3.
smartparens and symbol balancing/highlighting - speeding up typing and reducing errors due to unmatched symbols. For most symbols in most modes a matching symbol is created. So if you type (
then a matching )
is created too. If you want to surround some existing text with a symbol pair, then simply highlight the text and press the opening symbol. A closing symbol is also highlighted when the cursor is at the opening symbol. Spacemacs also highlights the surrounding symbols, including any parents. So if you are in a nested list, (parent code (nested code))
, then if the cursor is on the nested code, both nested & parent symbols are highlighted.
smooth scrolling - unlike the traditional jump-scrolling of Emacs, Spacemacs uses smooth scrolling as you fing in most other text editors.
Here are a few basic steps I took when starting Spacemacs
With Emacs 24 installed I simply clone the Spacemacs configuration (first moving any existing Emacs configuration out of the way)
1 | git clone --recursive https://github.com/syl20bnr/spacemacs ~/.emacs.d |
Before running Emacs I switched to the develop
branch so I would have all the latest additions to Spacemacs (it seems pretty stable so far)
1 | git checkout develop |
Then I just ran Emacs as normal and saw Spacemacs taking shape. There were a number of Emacs packages to download, so this bit took about a minute.
I’ve been using Emacs for several years as my main browser so am very familiar with the Emacs bindings. So when first starting Spacemacs I naturally chose the holy mode (aka Emacs mode)
Spacemacs has only a few layers by default so I added auto-completion, clojure, git, html, javascript, markdown, org-mode, syntax-checking and version control to the dotspacemacs/layers
function in ~/.spacemacs
After saving the changes to ~/.spacemacs
the configuration was reloaded with M-m f e R
. As I installed a lot of packages, I also restarted Emacs once everything had finished.
1 | dotspacemacs-configuration-layers |
Using Helm is an easy way to see what layers are already available in Spacemacs, using the keyboard combo M-m f e h
. This gives you a list of all layers and if you hit return on any of the layer names you are taken to the docs for that layer.
You can also create your own layers with M-m configuration-layer/create-layer
. See http://thume.ca/howto/2015/03/07/configuring-spacemacs-a-tutorial/ for more info as well as the Spacemacs docs.
I set the default font to Ubuntu 16, the smallest usable font for my laptop for my own use.
1 | dotspacemacs-default-font '("Ubuntu Mono" |
I often share my laptop with others or give a presentation using Emacs. So I’ve added two keyboard bindings I commonly used to increase & decrease the font size in the current buffer. This was added to the dotspacemacs/config
function in ~/.spacemacs
1 | (define-key global-map (kbd "C-+") 'text-scale-increase) |
I like to see Emacs in full screen mode for minimum distraction, so I changed the following option in the dotspacemacs/init
function of ~/.spacemacs
1 | dotspacemacs-fullscreen-at-startup t |
I really like the way Spacemacs is organised and have not felt the need to change anything, other than adding a few keybindings. Its obvious right from the start that Spacemacs has been well thought out. There is also a great community behind Spacemacs and there is always plenty of help.
There is still a lot to learn to get the most out of Spacemacs, but after a day I am pretty comfortable and productive. The biggest thing to try is probably the modal editing approach you get with Vi and other eVIl features of Spacemacs. This could make development with Emacs even faster.
It is well worth reading the Spacemacs guide, which I found easy to follow.
Thank you.
]]>Time at a hackathon runs much faster that you think, so you can use Heroku to kickstart your app and get database services up and running instantly. Heroku also provides an easy way for a team to collaborate and let the judges see there app in action.
Here are a few tips on how to get going with Heroku and you can also use this Heroku commands cheetsheet for as a quick reference.
Each Heroku Button gives you sample projects you can run on Heroku straight away. Using Git you can clone that project and build your own app on top.
Or take a look at the getting started guides that give you a sample project that you can configure to run on Heroku in a few simple steps.
If none of those appeal, then Googling for a good tutorial on your favourite framework & Heroku will give you a lot of information to kickstart your project.
If you are starting from scratch with your app, then create a local Git repository and commit your code as usual:
1 | git init |
Then create an Heroku app, seting up a git remote alias called heroku that you push your code to
1 | heroku create |
When you add new features to your app, commit them locally and then push those changes to Heroku as follows:
1 | git add . |
Installing & configuring databases can be slow. Using Heroku Posgres, Heroku Redis or 3rd party services for MongoDB, Neo4j and Hadoop gives you can have a data store in seconds with a click of the button or a simple command.
To add an Heroku postgres database to your app, use the following command
1 | heroku addons:add heroku-postgresql |
An environment variable is created called DATABASE_URL
, which contains the username, password, server and database name.
You can also add databases and other services via your Heroku dashboard. Go to the Resources page of your Heroku app and select the Edit button next to Addons. Matching addons with list as you type in the name of the addon you want.
Note: 3rd party databases and services require a validated Heroku account to minimise abuse on our platform. A verified Heroku account requires credit card details.
Should something go wrong when deploying your app, take a look at the logs by running the heroku logs
command. Using the --tail
option will display any new log entries as they happen.
1 | heroku logs --tail |
When you are not testing your app, you can switch it off easily and save your free credits for the day using the heroku ps:scale
command. Scaling your active process to zero swiches your application off completely, so scale down your web process as follows:
1 | heroku ps:scale web=0 |
When you are ready to use your app again, start your web process up with the same heroku ps:scale
command, for example
1 | heroku ps:scale web=1 |
If you have a worker process, then simply use
worker
instead ofweb
in the above commands.
You can also switch your app off using the Heroku dashboard. On the Resources tab of your app, edit the dyno’s section and switch the running dyno off.
Hopefully you can see that using Heroku will help speed up a lot of tasks at a hackathon and give you more time to develop your idea and create a great demo for the judges.
Good luck with your hack!
]]>Using templates to create your Clojure projects can save you a lot of setup time and ensure your team is using the same base configuration and dependencies. There are templates on Clojars.org, however I’ll show you how easy it is to create your own with Leiningen.
I’ll create a simple template based on the leiningen default template, adding a section in the project.clj to give a custom propmt when run in the repl.
Templates used to be a Leinigen pluging called lein-newnew and its repo was the only doucmentation I found and was a little outdated. The plugin is now part of Leiningen and there are a few built in templates. There is also information via
lein help new
.
If you want to create a template in a more automatic way from a more complete project you created, take a look at the lein-create-template Leinignen plugin.
A Clojure template is created in the same was as a Clojure project, however a template called template
is used
1 | lein new template your-template-name |
I created a new template called jr0cket-prompt
, so where you see this name in the following commands, substitue your own template name
1 | lein new template jr0cket-prompt |
The documentation for lein-newnew uses the
--to-dir
to specify the name of a directory to create the template in. This is only useful if you want to give the directory a different name to the template name.
project.clj
- this is the same as any other project.clj file, except the project name has /lein-template
after it. This allows leiningen find it on Clojars.org.
source/leiningen/new/clj_jr0cket_dojo_template.clj
- defines how a project is created from this template. For example, defining which files the template generates and how it creates them.
resources/leiningen/new/clj_jr0cket_dojo/
- this is where you put all the source & project files that make up your template, using tags where the name of a new project should be substituted.
My template will have a customised project.clj file
. The rest of the template is the same as the default Leiningen template. So I edited the src/leiningen/new/jr0cket_prompt.clj
and added code to create the threee files for my project, in the correct paths.
The project contains a
project.clj
file containing my prompt modifications and thecore.clj
file for thesrc
andtest
branch.
The
sanitized
tag is used to change any-
characters in the project name to_
characters, so the directory names do not cause issues for Java. Therender
specifies which file in theresources
directory a new file is generated from.
I now add the files to the resources
directory that my new project files are generated from, configuring each file to substitute the namespace and any other project specific information.
From a project I previosly created with lein new
, I copied over a project.clj
file along with a core.clj
file for src
and core_test.clj
for test
directories. These files all reside under resources/leiningen/new/jr0cket_prompt/
.
When a new Clojure project is created with your template, in this case using lein new jr0cket-prompt new-project
, the name needs to be substitued into the new Clojure files so they have the correct namespace for the project. The new project.clj
file also needs to use the name of the new Clojure project.
I edited the project.clj
file to add the custom prompt information and a placeholder for the new project name.
For the src/project/core.clj
and test/project/core.clj
I add the name tag to the namespace definition.
Build the template project into a .jar
file using leiningen by running the following command within the template directory:
lein jar
Now change to the target
directory and create a new project using leiningen.
1 | cd target |
By changing into the target directory, you are placing the jar file of the template onto the Java class path and therefore making it avaialble to leiningen.
Once you are happy with the template, you can use it locally by installing it into your library cache - ~/.m2/repository/
. From the root of the template project, run the following command:
lein install
Once the template is ready to share with others, you can publish the jar on Clojars.org using the following command from the root of the template project:
lein deploy clojars
You should clean the project and rebuild it before publishing to Clojars to make sure there are no testing files remaining -
lein clean ; lein jar
This has been just the simplest template I could think of. There are many useful helper functions as part of Leiningen templates
Templates others have created can be found on Clojars.org. For example, Splat is a template to create a ClojureScript single page web applications by James Hendersons. Malcolm Sparks has templates for his Modularity.org projects.
Got and create your own templates and contribute them back via Clojars.org.
Thank you.
@jr0cket
An effective way to have a clean and valuable commit history is to create the smallest valuable commit each time, with a descriptive commit message. This sounds obvious, but when you are in the midst of work things can get messy. Using Emacs Magit you can be highly selective as to what changes you include in each commit, down to individual characters.
This follows on from staging patches for cleaner commits with the command line,
git add -p
. Also see how to drive Git with Emacs and Magit for more background.
Magit is an amazing tool for managing Git repositories, providing all the standard features of a graphical tool. It is part of the Emacs Live and available via the useual Emacs package managers.
To run magit, I typically open a file under version control and hit C-x g
or M-x magit-status
.
Magit keeps track of the changes in your project and the status can be updated using g
in the magit buffer.
To stage all the changes in a file you can move the cursor to the unstaged file you want to add and press s
, or stage all changes using S
.
To unstage a file, again move the cursor against its name and press u
or unstage all files added using U
.
Its easy to be more selective than just staging everything in a file. Move the cursor against the filename and press tab
to show the hunks within a file.
A hunk is the name Git gives to continuous lines that contain changes in a file. So if all your changes are made line after line, there will be one hunk. If you have unchanged lines between the lines you have changed, you will have more than one hunk.
Move the cusor to the hunk you want to add and pres s
to stage that hunk. Using n
& p
to move to the next or previous hunks if they exist.
Sometimes Git organised the changed lines into hunks that have too many changes in, or to few changes. You can change hunk sizes using +
or -
to expand or shrink the hunk (shrinking is essentially splitting a hunk where possible).
It may not always be possible to split a hunk enough for your commit.
If you really need to refine what you are committing, you can select a region to stage by selecting characters and lines.
Open a file that has unstaged changes using tab
Select a region of the text using C-SPC
or C-@
Hit s
to stage the selected region
Make sure you have not shrunk any hunks, or the region selection may not work.
You can check the correct text has been added by viewing the newly added entry in Staged changes section.
So Emacs Magit give a really easy way to stage changes in the size of commit that is most valuable. So take a few seconds longer to think about what you are committing and how useful it will be to others and yourself during the life of the project.
You dont want to be spending too much time unpicking commits to find a bug and applying a patch.
Thank you.
@jr0cket
Continuing my modeline customisation with powerline, I wanted to add colour to match the Cyberpunk theme of Emacs Live. To do this I copied the default them and custmised it, adding colours and chaning the style of seperatr. Here is how I customised the powerline code to make my own theme.
See how I previously tweaked Emacs modeline with powerline, as this article carries on from that. My modeline also includes an earlier tweak for the minor modes.
Although the arrows are nice way to seperate the different parts of the modeline, I tried out the different styles. My favorite was the wave
style.
To change the style, I edited the lib/powerline.el
file and change the powerline-default-separator
to the value to wave
. The choice list shows you all the styles of seperator available.
1 | (defcustom powerline-default-separator 'wave |
I restarted Emacs each time I changed the seperator style for it to take effect. I am not sure how to update the style without a restart.
I wanted to change the colours of the modeline to make it more personal to me and also help it stand out between all the text of the buffers.
Rather than mess up the default theme I simply edited the lib/powerline/powerline-theme.el
file and copied the default theme completely, called the new theme powerline-default-theme
. This allowed me to experiment whilst still having a working reference theme to fall back on.
To use my new theme, I edited the configuration file ~/.live-packs/jr0cket-pack/config/powerline.el
and changed the line defining the theme
1 | (require 'powerline) |
There are some of the elements I was not interested in, such as the size of buffer and mule-info. So I edited my jr0cket theme and removed the lines
1 | (powerline-buffer-size nil 'l) |
The default theme adds padding between some elements by adding a space character.
1 | (powerline-raw " ") |
There was aso padding around some elements on the modeline, specifically the line l
& column c
numbers and the percentage of buffer above the currently visible text p
. The default theme adds numbers in front of these caracters adds padding, which I didnt feel was needed so I deleted those numbers.
1 | (powerline-raw "%l" face1 'l) |
The powerline default theme is very grey, so I wanted to add some colours that would work with the Emacs Live Cyberpunk theme. Changing colours is done in the lib/powerline/powerline.el
file.
I changed the text colour using :foreground
, the background colour with :background
and made the text bold using :weight bold
.
1 | (defface powerline-active1 '((t (:foreground "#d0d0f0" :background "purple" :inherit mode-line))) |
The defalt powerline theme has two faces (styles) for inactive and active windows - powerline-active1
, powerline-active2
, powerline-inactive1
& powerline-inactive2
Different parts of the modeline are assigned to one of the faces and therefore display in different styles. There are a few parts of the modeline, like the buffer name, that are not assinged to a face and display in the colour of the Emacs theme (Emacs Live)
I wanted to change the style of the buffer name, so rather than change the Emacs theme I added a third face to the lib/powerline/powerline-theme.el
.
1 | (defface powerline-active0 '((t (:foreground "deep pink" :weight bold :background "black" :inherit mode-line))) |
I then tried out different colours for the buffer name and settled on the reverse of face0, so updated the lib/powerline/powerline.el
file by adding an active0
and inactive0
configuration as follows:
1 | (defface powerline-active0 '((t (:foreground "purple" :weight bold :background "#d0d0f0" :inherit mode-line))) |
Powerline is a really nice way to add that extra touch to the Emacs experience. Its also pretty easy to configure to give you your own personalised look to the Emacs modeline. Let me know if you have any interesting customisations to your Emacs setup.
Thank you.
@jr0cket
It important to enjoy the development tools you use day after day, so after seeing some of the great looking Emacs modeline customisations, I couldnt resist pimping my modeline (again).
Previously I tweaked the modeline for Clojure development, this time I’ve added styling to the modeline using powerline. I aim to create a modeline worthy of the rest of the Emacs Live experience.
There are several other versions of powerline listed on the EmacsWiki powerline page.
I use Emacs Live as my base configuration for Emacs, so I added the powerline project to my personal configuration ~/.live-packs/jr0cket-pack/
First I cloned the powerline Gitub repository into the lib
folder of my live pack
1 | cd ~/.live-packs/jr0cket-pack/lib |
Then I created a configuration file for the powerline project
1 | emacslcient ~/.live-packs/jr0cket-pack/config/powerline.el & |
Adding the following code to the powerline config file loads the files in lib/powerline
. I also state which theme I want to use.
1 | (require 'powerline) |
There are several other themes avaiable in powerline, including
(powerline-center-theme)
and(powerline-nano-theme)
Finally, I added a function to load the powerline library at startup in my Emacs Live live-pack init.el file, ~/.live-packs/jr0cket-pack/init.el
1 | (live-load-config-file "powerline.el") |
I restarted Emacs and was presented with my new modeline
In full screen with several windows open you can see the difference between active and inactive windows.
The powerline project is an easy way to tweak your modeline into something more stylised. Next I want to create my own powerline theme to have my own design touches and tailor it more to my needs.
Thank you.
@jr0cket
CIDER is the Clojure IDE and REPL for Emacs. It is built on top of nREPL, the Clojure networked REPL server and replaces the direct use of nREPL in Emacs.
In this article we are using CIDER that is packaged in Emacs Live, a very complete, well organised and extensible configuration for Clojure and many other things in Emacs.
CIDER includes the standard interactive code evaluation developers are used to. There are also many other features that I want to explore further, including error and warning highlighting, human-friendly stacktraces, smart code completion, definition & documentation lookup, value inspector & function tracing, interactive macroexpansion, Grimoire integration, clojure.test
integration, classpath browser, namespace browser, nREPL session management, scratchpad, minibuffer code evaluation, integration with company-mode and auto-complete-mode
CIDER is now the default in the latest version of Emacs Live, so there no set up to do if you already have the latest version. If you need to update, or are not sure you are on the latest version of Emacs live, simply run a git pull from within ~/.emacs.d
directory:
git pull origin master
If you dont have Emacs Live, you can install it from the Emacs Live Github repository and either clone the repository into ~/.emacs.d
(moving or deleting any existing directory) or preferably use the install script that also sets up a ~/.live-packs
extension directory.
1 | bash <(curl -fksSL https://raw.github.com/overtone/emacs-live/master/installer/install-emacs-live.sh) |
You can find the available versions of the cider-nrepl plugin on Clojars.org. The plugin version should be the same version of CIDER you are using in your Emacs configuration, which at the time of writing was 0.8.1.
Either create a new Clojure project using lein new my-project-name
or open an existing project in Emacs (either the project.clj
file or a .clj
file from src/my-project-name/
).
With your cursor in the Clojure file buffer, run CIDER using the keybinding C-c M-j
or the emacs command
M-x cider-jack-in
Alternatively, you could run a REPL using
lein repl
on the command line and connect to that REPL usingC-c M-c
orM-x cider
. You will be prompted for the connection details of the running repl, ie. host, port.
There are a number of Cider keyboard shortcuts (keybindings) already defined, here are some of the most common ones I use:
C-c C-e
- evaluates the form immediately before the cursor and shows the result in the minibuffer. So place your cursor right after the closing parentheses )
of your expression, hit the keybinding and see the minibuffer for the result.C-c M-e
- the same as above except the result is sent to the REPLC-c C-k
- evaluate the whole buffer. So with the cursor in a Clojure source file, all the forms / expressions are evaluate as if the code was loaded in from scratch.
C-c C-d d
- show the documentaion as you would with (doc function-name)
. Place the cursor over a function name, hit the keybinding and see the documenation for that funtion. This also works inside the REPL buffer, so no need to use (doc)
, which is not loaded by default.
C-c M-n
- switch to namespace of current Clojure buffer. So with the cursor in a Clojure source file, hit the keybinding and your REPL buffer will now be in the namespace for that Clojure code.
Changing into a namespace does not automatically evaluate the code in that namespace, so evaluate the whole buffer
C-c C-k
or evaluate specific expressions (forms)C-c M-e
. Once evaluated, you can evaluate that code in the REPL.
M->
or M-x cider-jump-to-var
prompts you for a var, a function (defn)
or symbol name (def)
and moves the cursor to its definition. If the cusor is already on a matching name the the cursor jumps straight to that definition.
C-c C-q
or M-x cider-quit
- close the REPL and its associated buffer.
There are many more things you can do within Clojure files and the REPL, so take a look at the Cider keyboard shortcuts (keybindings) once you have the basics mastered.
Some further reading around CIDER:
Clojure on Emacs - A CIDER workflow hack - Kris Jenkins
Have fun and be productive with CIDER, Emacs and Clojure. If you have any other suggestions on getting them most out of these tools, please let me know.
Thank you.
@jr0cket
Light Table provides a great development environment for Clojure, ClojureScript & JavaScript. With a few tweaks and some of the many plugins you can make Light Table do even more. Here are a few of the tweaks and plugins I use for my development with Light Table.
The Ubuntu fonts are very clear and easy on the eyes, so are great for coding with. I use the Ubuntu Mono font for all my editors by adding the following line to my user behaviors
Open the command panel in Light Table with Ctrl-Space
and type user behaviors
. Then edit the file that opens and add the following line
1 | [:editor :lt.objs.style/font-settings "Ubuntu Mono" 16 1.2] |
When I run workshops or other demos I increase the font size to 20, to make the code easier to read from a distance.
1 | [:editor :lt.objs.style/font-settings "Ubuntu Mono" 20 1.2] |
You can use Ubuntu Fonts with operating systems other than Ubuntu by downloading the fonts from font.ubuntu.com
The default theme for Light Table is pretty good, however my prefered Light Table font is called Tommorow Night and I configure my user behaviors to use this theme by adding the following line:
1 | [:editor :lt.objs.style/set-theme "tomorrow-night"] |
There is also an Ubuntu theme plugin that I have just spotted, so I am trying that out although I want to tweak some of the colours before I make the switch.
From Light Table 0.7.0 onwards parens are not auto-closed anymore, so when you type (
then you have to also type )
. Coming from Emacs, I find this limiting, so luckily you can add this behaviour back in by editing your user behaviors.
1 | [:app :lt.objs.settings/pair-keymap-diffs] |
The Emacs plugin is a wrapper around the Code Mirror keybindings for Emacs. Installing the Emacs plugin with give you many of the Emacs keybindings you enjoy and you can easily customise them by changing the keybindings mapping in the plugin.
See my previous post on how to use the Emacs plugin with Light Table.
The Git status bar plugin simply indicates the Git branch your current editors’ file is in, assuming it is under version control.
Install using the plugin manager and restart Light Table (you may just be able to select “Reload App Behaviours” from the Light Table commands). Then open a file under version control and you will see its Git branch in the right corner of the status bar (the bar at the bottom of Light Table).
Git branch / status will only show for files that are in repositories whose root is in your workspace.
Gitlight plugin provides a visual Git client that can stage and commit changes, push & pull changes with remote repositories and show visual diffs of changes. Install Gitlight from the Light Table plugin manager and restart Light Table (you may just be able to select “Reload App Behaviours” from the Light Table commands).
Use Gitlight by opening the command panel and type gitlight
, you will see a list of available commands
If you open a file from a project managed by git you can see the status of all the files in that project using the command gitlight-status
If you select diff for any of the files in the project, you get a nice visual comparison of the changes between what is committed and your working copy.
When you save a file, any changes you made since it was last commited to Git are marked by coloured lines at the left hand side of the editor window, also known as gutter marks.
modific example with red, green and yellow highlights
You can jump between changes using Ctrl+Shift+PageUp/PageDown
, show the original version by putting the cursor on a changed line and hit Ctrl+Alt+c
and revert a change by putting the cursor on a changed line and hit Ctrl+Alt+r
Install modific from the Light Table plugin manager and restart Light Table. Then open a file from workspace project that is under version control. Now any change you make will be highlighted.
There are lots of other plugins I have not tried yet. Many plugins also provide additional language support.
Here are a few plugins I plan to try next:
Light Table provides a lot of great features out of the box, expecially for Clojure, ClojureScript and JavaScript development. Using tweaks and plugins, Light Table is easy to tailor int a more personalised development experience.
Thank you.
@jr0cket
After upgrading to Java 8, Clojure development seemed faster due to quicker REPL startup times. So when I saw a snapshot of Java 9 had been released I was hopeful that startup performance would be even faster.
As Clojure runs on the Java Virtual machine (JVM), each time you start a REPL then you wait for a new JVM to start. Other than this REPL startup, Clojure feels faster than developing with Java directly.
Here is how I set up Java 9 Snapshot on my Linux laptop (Ubuntu 14.10), it should be the same for any decent operating system.
I could have built Java 9 from source and made a
.deb
file of it for a nice install, however the manual install is a lot quicker.
Download the Java 9 snapshot from the OpenJDK9 website.
I extracted the .tar.gz file into the directory ~/apps/openjdk
and created a symbolic link called current
that pointed to the extracted directory
1 | tar zvxf ~/Downloads/jdk-9-ea-bin-b44-linux-x64-23_dec_2014.tar.gz ~/apps/openjdk |
I currently have Java 8 installed and its picked up by the alternatives system in Ubuntu, which has java in the /usr/bin
path. So to run Java 9 without removing Java 8 or creating an Ubuntu package, I can simply add Java 9 executable to the start of the system path so it is picked up first.
To make the manual adding of Java to the path more robust, I use the environment vairable JAVA_HOME
and set that to the location pointed to by the current
symbolic link. If I want to try a new version of Java I can simply change the symbolic link.
Add the environment variable to your shell resource configuration, eg ~/.bashrc
or ~/.zshrc
as follows
### Java9 - from https://jdk9.java.net/download/export JAVA_HOME=/home/jr0cket/apps/openjdk/currentexport PATH=$JAVA_HOME/bin:$PATH
Now when ever I open a new command line terminal I can run Java 9 as the default Java. I could also use source ~/.bashrc
or source ~/.zshrc
command to update the path in the current command line terminal.
To test I have successfulling installed Java 9 I run the following commands:
java -versionjavac -version
To test the speed performance of Java 9 over Java 8 I used Light Table, a modern and easy to use development environment for Clojure. For my performance test I opened a small project in Light Table and opened its main Clojure file. I then started an Instarepl in Light Table for the current file.
Using Java 8 the Instarepl took 17 seconds to start up. Using Java 9 the Instarepl took 14 seconds to start up.
The time taken for the REPL to start included checking for dependencies each time I ran it. In each test the dependencies were all ready present so time difference is not due to downloading libraries. There are many more tests I could run, but the biggest difference for me is in REPL startup time.
So in this basic test there is a visible improvement in REPL startup time with Java 9. I hope that this startup time can be further reduced as Java 9 develops and the componentisation of Java via Project Jigsaw helps make Java smaller and quicker to start.
Thank you.
@jr0cket
When I teach people Clojure I use Light Table because it is really simple to use and its Instarepl gives instant feedback of the code as you type it. This feedback helps you understand Clojure quickly and gives you more confidence when coding.
As I do most of my Clojure development (and most everything else) in Emacs I really miss the excellent Emacs keybindings when I use Light Table. Luckily there is an Emacs plugin for Light Table, so here is a quick guide on how to install & use this Emacs plugin.
Light Table has many plugins available and the easiest way to install them is with the plugin manager. In Light Table, open the command bar with Ctrl-Space
(Cmd-Space
on MacOSX) and type plugin
Select the plugin manager and a new window opens, listing all the currently installed plugins. Select the available
tab in this window.
There are many plugins, so type emacs
to quickly find the plugin. Then select install
on the Emacs plugin
At the time of writing, installing this plugin generates a warning message due to a format change in Light Table 0.7.0. The plugin still works correctly however.
Finally, we need to edit the Light Table user behaviours to use the Emacs keybindings with the editor.
Open the command bar with Ctrl-Space
(Cmd-Space
on MacOSX) and type behavior
, selecting on the Settings: user Behaviours
command.
In the user behaviours window that opens, edit the configuration by adding the following line to the editor
section
[:editor :lt.plugins.emacs/activate-emacs]
The user behaviors configuration should look something like this:
The format of user.behaviour has changed from Light Table version 0.7.0 onwards. Configuration is now defined using vectors or maps, rather than lists as before. At the time of writing, the configuration line on the Github repository README.md is incorrect (a pull request has been created).
The Emacs keybindings seem to be exactly what you would expect in Emacs. Obviously there are a few differences between the design of Light Table and Emacs, although conceptually things seem to work the same.
Here are a few keybindings that may not be immediately obvious:
Alt-x
- opens the command bar so you can find the command you want by typing - in the same way as you use meta-x
in Emacs.
C-x f
- open a file using the system file manager (Ctrl-Shift-o in Light Table default keybinding)
C-x C-f
- select a file from those added to the Light Table workspace - the Light Table Navigate: Open Navigate
command is called.
C-x o
- switch to next window tab on the right - similar to the next buffer window in Emacs.
C-x k
- close the current tab - similar to killing a buffer, but without a choice.
Alt-g g
- go to line.
C-x h
- select all.
C-x C-e
- evaluate all the code in the current tab.
You can see all the Emacs keybindings at the Emacs Plugin Github repository.
Have fun with Light Table and Emacs keybindings. If you have any modifications of the Emacs keybindings you find useful, please share them in the comments.
Thank you.
@jr0cket
This holiday season give the gift of code… or anything else no matter how small to help out your favorite open source project. By joining the 24 pull requests website with your Github account, you can challenge yourself to contribute to 24 projects through December.
Here is a quick guide to creating pull requests on Github.
Find a project you want to contribute to on Github. On the top right of its page, press the fork button to create your own complete copy of the project in your own account. This allows you to add changes (commits) to your own fork, which you then share back to the original project.
Take a copy of your fork using the git clone
command:
git clone git@github.com:jr0cket/plugin-quizzes.git
Its very useful to create a branch for the change you are going to make. If there are project updates while you are creating your contribution or you just mess up so bad you just want to throw your contribution away, then a seperate branch makes this easy.
git checkout -b doc-plugin-configuration
Edit the files that make up your contribution and test your changes work before you do a local commit. Here I am updating the README.md file with some clearer instructions on how to add the plugin to your project.
git add README.md git commit -m "adding instructions on configuring the plugin"
Now copy your local commit back to your fork of the Github project. Remember to push the branch you created and not the master branch.
git push origin doc-plugin-configuration
Once you have pushed your branch to your fork, Github gives you the option to create a pull request.
When you create the pull request, it uses your commit message as the title of the pull request. You can also add further information if it helps the project maintainers understand what the change is about and why they should accept it.
Create the pull request and then wait for the project maintainters to talk a look at your change. If your change has a large green icon next to it, it means it can easily be merged into the project.
Its now time to wait for the project maintainers to review your pull request. If they like what they see and its easy to merge into the project then that may happen fairly quickly. However, as it’s their project then it is up to them what they accept. This is why small contributions are better than large, so you can develop good communication with the project maintainers with the minimum of effort.
If you want to are going to contribute to a project over time, its a good idea to create your own fork. Also, once you have cloned your fork, you should also add the original project repository.
git remote add upstream git://github.com/project/repository-name
Before you make any change or create a new branch for your change, you should get all the latest updates from the original project.
git pull upstream master
If your pull request is accepted then you can pull that commit into your own fork by pulling the changes from the original project and pushing them back to your fork.
git pull upstream master
If you have other changes in the working copy, you can always use
git stash
before you pull in order to keep your work safe. Once you have done a pull you can usegit stash pop
to restore the changes back to your working copy.
Thank you.
@jr0cket
This holiday season give the gift of code… or anything else no matter how small to help out your favorite open source project. By joining the 24 pull reuests website with your Github account, you can challenge yourself to contribute to 24 projects through December.
Here are some reasons why you should contribute to open source projects.
It can seem like a bit task to jump into any open source project, so start by looking for the smallest thing your could contribute.
Its simple really, as developers we all use open source projects and we would get less done without them. It is an opportunity to get more experience outside of your daily routine and is a great way to differentiate yourself should you look for another role.
Look at the open source projects you use regularly, which of those have issues you could help with?
You don’t need to be the best coder on the planet to contribute, find a simple bug in the issue tracker for the project and have a go. You should match any coding styles the project uses, even if you dont like them.
If you find something you dont understand in the docs, then write an improvement. I often start contributing by answering some of the simpler issues raised. Those issues are often from missunderstanding the docs for the project, so it can be an effective way to work out what needs improving.
All this frees up the time the project maintainers have to develop the code and tackle larger features and bugs.
There is no such thing as perfect code, so you shouldnt be afraid to share.
To help your code be more useful to the project, you should look out for coding styles used. Even if you have your own style that you love, you should use the styles already adopted by the project.
The smaller the code change you make, the less likely you will make any coding fubar’s and if you do then its easier for the project maintainers to tell you what they would like to see instead. If you have lots of changes over several files, if the maintainers dont like the first code they see they are likely to just reject the change.
One of the easiest way to contribute to an open source project is to create a small change and share it back to the original project. If the project is on Github, you can create a pull request. A pull request is a message to the original project to invite them to pull a change you made into the original project.
You can make a change directly on the projects Github page, or ifs a code change that you want to test then you can fork the project and have your own copy of the project on Github.
If you are not up to speed with Git yet, the most useful website I have found it try.github.com.
If you use the Git command line client, then git help <command>
is a great way to get help on specific commands. Alternatively, there is a great online help at git-scm.com/docs
There is a list of graphical Git clients on the git-scm.com website.
Thank you.
@jr0cket
Heroku Button provides a quick & easy way for anyone to deploy your apps, for free, with just a browser. Simply create a manifest file for your app and add the Heroku Button code to your Github repository or Website. Heroku takes care of the rest (server, database, deployment, scaling etc).
Experience Heroku Button for yourself with our simple NodeJS app.
Once you press the Heroku Button, you see a deployment page for you app. The name, description and logo come from the app.json
manifest file.
Once you press the Deploy for Free button, Heroku does the work and creates a new App for you live on the Internet
Now you can view your app as well as access your own copy of the code.
Here are just a few thoughts about why you may want to use Heroku Button.
Its easy to show off your work to prospective employers so they can be quickly impressed by your skills. You can also share your apps with your friends and co-workers as well as making it easy to test your app at any time.
Share demos that allow developers to understand the benefits of your framework quickly and show off what they could create.
Provide an easy way for judges to play around with your app, so they can get a better appreciation of what you have created
Creating an Heroku Button for your app is very simple and has 2 parts to it:
1) Create an app manifest file for your project - app.json
2) Add the Heroku Button to your Github Repository or any website (code provided)
The only requirement is that your code be available via a public repository on Github or other git repository
Create an app.json
file in the root of your project. This file contains the name, description and an image link for your app (eg. a logo). This should provide people with an understanding of what they are going to deploy.
The app.json
file should also contain any configuration (environment) variables and Heroku addons (databases, etc) your app needs.
The Heroku example NodeJS app is very easy to define in the manifest file, as it does not use any Heroku addons or require any environment variables. The app itself is assembled on Heroku using Node Pakage manager and Heroku support for NodeJS apps.
1 | { |
You could just use a URL link to deploy you app, however, Heroku has provided you with a button image and all the code you need to use it. Using a button makes it very obvious to see that your app is easily deployable.
Markdown
1 | [![Deploy my app to Heroku](https://www.herokucdn.com/deploy/button.png)] |
If you expect people to fork your Github repository and want them to deploy their own versions of the code, you can omit the template query parameter (everything after the
?
). Heroku Button will infer its the repository the button was clicked on if there is no parameter.
HTML
1 | <a href="https://heroku.com/deploy?template=https://github.com/heroku/node-js-sample"> |
If you are using HTML you can of course add any styles you want to the button using CSS.
Heroku Button enables anyone to play with your apps, encouraging them to give you meaningful feedback and showing them what they can create if they get involved with your project.
If you create an Heroku Button with your app, please tweet about it using #herokubutton.
Thank you.
@jr0cket
Some times you work on your code or configuration files and realise you have made more changes than sensibly fit into one commit. Using patches you can easily select only the changes want rather than adding all the changes in a file. You dont even have to create a seperate patch file.
You can use the git via the interactive mode git add -i
, however its just as easy to use the command git add --patch
or its short form git add -p
. The --patch
or -p
option allows you to select what git calls hunks, lines git sees as a change within a file. A hunk may be a change to one line or changes across several lines grouped together.
git add -p .
This command will prompt to you accept each hunk through all the files that have modifications since the last commit.
If you just want to pick out changes from a specific file or collection of files you can narrow the scope by specifying the filename or filename pattern
git add -p filenamegit add -p *.md git add -p config.*
In this example there are several lines of changes in the article.styl
file. Using the git add -p
command we are shown each hunk in turn as a diff, so we can compare the current version with the changes in the hunk. We then decide if we want to add the changed lines or not.
We say yes to the first hunk and no to the second.
Once we have added or ingnored all the hunks in the file the interactive staging ends. If we are ready we can then do a commit as normal.
Sometimes git chooses hunks that include too many changes. If we see a hunk we want to break down during the interactive staging, we can select the s
option. We are then shown the same hunk aft it has been split.
In the following example, our editor has added a new line to the file that we added a twitter account to. We only want to add the twitter account, so split the hunk to get the twitter line as its own hunk.
Then we add the hunk with the twitter change in it by selecting y
and do not include the new line change by skipping the next hunk by pressing n
.
There are many more options to help you when your are staging changes interactively. Using the ?
key at any time during interactive staging will show you a brief description of those options.
For more detailed descriptoin of interactive staging and the options available, see the git manpages via the command git help add
or git add documentation online.
By staging patches I can very easily see the exact changes I am assembling for my next commit. I can then include only the code & configuration changes that are ready to be part of the next commit.
Using this patch technique for staging avoids unstaging files (git reset -soft), editing them and then adding them again. That is a real pain.
And finally, staging patches keeps my commits nice and simple and focused. I get a detailed and accurate history of my changes and that makes its really easy for others to merge or cherry-pick my commits.
Read the Git-scm guide on Interactive Staging if you want to see more tooling around this topic.
Thank you.
@jr0cket
Once you have more buffers (files) open than windows in Emacs, then having a quick way to cycle through buffers is invaluable. Even with 4 windows open, I still find myself using IBuffer, C-c C-x
, many times.
Sometimes I just want to switch between the current and previous buffer in the same window. So this is how I tweaked my Emacs configuration (based on Emacs Live) to cycle through buffers.
Emacs has two functions to move through buffers in the current window, next-buffer
and previous-buffer
. These can be called in the usual way using Meta-x
:
M-x next-bufferM-x previous-buffer
Using these functions is quick than firing up an IBuffer, however if we create some good keybindings then we can cycle buffers even faster.
I already have several keybindings defined in my Emacs Live personal pack, so I simply add two more keybindings. The file I put my keybindings in is called ~/.live-packs/jr0cket-pack/config/keybindings.el
and these bindings are loaded by adding the following line to ~/.live-packs/jr0cket-pack/init.el
(live-load-config-file "keybindings.el")
The key combination I decided to use was Ctrl - PageUp
for previous button and Ctrl - PageDown
for the next buffer.
;; Set keybindings for cycling buffers(global-set-key [C-prior] 'previous-buffer)(global-set-key [C-next] 'next-buffer)
The PageUp key is referenced by the name prior and the PageDown key is referenced by the name next.
Thank you.
@jr0cket
Adding images to a blog post helps the audience undersand what the will get from reading the article and if it will be relevant for the. Images also aid the understanding of the topic you are covering, especially if you are explaining something technical or more complicated.
The default theme for hexo only provides a single image style, so here I will create several styles of image to help convey the topic and details of every post.
I like to have logos on images to provide a quick visual way to identify the topic of an article. This is similar to other sites such as Slashdot.
If I simply add an image then it will be placed in the middle of the article area, this does not look that great and takes up a lot of space.
To make better use of space and improve the design, I created a style called img-thumbnail
. The style ensures that each image displays on the left and be no bigger than 240 pixels wide and 96 pixels high.
1 | .img-thumbnail |
Here is an example of what the img-thumbnail
style looks like in the websites
Some images will be screenshots of the command line, code and developer tools in actoin. These images will be centrally placed as normal, but will have specific height and with contraints to make sure all the images are big enough to view yet stil fit on the page.
1 | .img-screenshot |
Here is an example of what the img-screenshot
style looks like in the websites
During an article I may talk about several different topics and what to visually highlight what topic is being disscussed. So again I created another image style, this time placing the image on the right hand side of the content and allowing a bigger size.
1 | .img-topic |
Here is an example of what the img-topic
style looks like in the websites
By setting up different styles it makes it very easy to layout images in an article, using just one style name. This helps me make each blog post more visually appealing to look at and therefore a better experience for the reader (and myself).
Thank you.
@jr0cket
The font that comes with the default hexo fault is quite nice, however, I like using the Ubuntu font especially for code. As the Hexo theme uses Google fonts in some places already, then it was really easy to change which one Hexo uses. Here I will show you how to change over to the Ubuntu font family for text and sorce code using Google Fonts.
As Hexo uses Google Fonts by default, then you can simply define which font you want by using the font name. The default Heox theme, landscape, uses a file called source/css/_variables.styl
to define common variables, such as fonts.
Viewing the _variables.styl
file you can see the fonts that Hexo uses by default, which are assigned to three variables:
Font-icon is configured to use Font Awesome to make it quick and simple to add logos such as twitter, facebook, linkedIn and RSS feeds. Using font icons is more efficient than using image files as they are scalable, so no need for multiple image files for the logos.
1 | // Fonts |
This is what the fonts in the hexo default theme look like:
I prefer to use the Ubunt fonts, for text and for source code. So I updated the source/css/_variables.styl
file with Ubuntu for the font-sans and font-serif variables and Ubuntu Mono for the font-mono variable.
1 | // Fonts |
Using Ubuntu fonts just works on my laptop, as I use Ubuntu as my operating system and the Ubuntu fonts are just there. When I publish my Hexo website, I cant guarantee everyone is using Ubuntu so I use Google Fonts to spread the Ubuntu font love.
Google fonts are a wide range of open fonts hosted in the cloud and part of a content delivery network (CDN). This means that a whole range of fonts are freely availble to be used in your own websites and apps. The content delivery network ensures these fonts are loaded (relatively) quickly anywhere in the world.
You can browse the fonts avaible for use and see the code to include them in your websites by visiting google.com/fonts
To keep these fonts as lightweight as possible whilst loading into the browser, I chose only the Ubuntu fonts I needed. In this case, I chose the Ubuntu Normal and Italic fonts at 400 weight and bold at 700 weight
1 | <link href="http://fonts.googleapis.com/css?family=Ubuntu:400,700,400italic" rel="stylesheet" type="text/css"> |
I also want to show code in the Ubuntu Mono typeface at both 400 and 700 weight for normal and bold text respectively. Google Fonts website generates me the following link I can use in my Hexo website.
1 | <link href="http://fonts.googleapis.com/css?family=Ubuntu+Mono:400,700|Ubuntu:400,700,400italic" rel="stylesheet" type="text/css"> |
I updated my custom theme to use the Ubuntu Google fonts by editing the layout/_partial/head.ejs
file. This already had a Google Font for Source Code Pro, so I simply replaced that line with the new URL I got from Google Fonts as above.
1 | <title><% if (title){ %><%= title %> | <% } %><%= config.title %></title> |
Line 10: Ubuntu fonts included from Google Fonts
When Hexo generates all the theme files, the Google Docs URL for the Ubuntu fonts gets included in the head part of all pages. This ensures that even thought without Ubuntu fonts installed on their device will see the page with Ubuntu fonts.
Changes to the source/css/_variables.styl
file are picked up straight away if you are running the command hexo server
, so all you would need to do is refresh your browser.
Hexo with the Ubuntu fonts looks like:
Changing to Ubuntu fonts or any other Google font is pretty easy with Hexo. It may not seem a big change that I have made, but as I refer to my blog many times during the week (and sometime many times a day), its nice to have a font that I find pleasing to read.
Thank you.
@jr0cket
Hexo has a bit of a refactor from version 2.6 onwards to make it a bit more flexible with regard to the node modules it uses. So when you create a new Hexo project you have to add some module to that project before you can generate your site. This is an easy step as its managed by the Node package manager (npm).
There are more details about migration steps on the Hexo Github project.
Here are the essential details and options for upgrading to Hexo 2.6 onwards.
You can easily check the version of Hexo you are using with the following command:
hexo -v
This should give you output similar to:
1 | hexo: 2.5.3 |
Upgrading Hexo is as easy as installing Hexo in the first place. Simply use node package manager to install the latest version
npm install -g hexo
The above command uses the global option, -g, so anyone can run hexo. If you have installed Hexo in a directory not owned by your operating system account (eg.
/usr/local/
or/opt
) then you should usesudo
in front of this command, ie.sudo npm install -g hexo
As before, you can check you are running the latest version of hexo using the command:
hexo -v
This time you should have a newer version:
1 | hexo: 2.7.1 |
As I am only upgrading Hexo to a new vesion, only it has a new version. The other components are all the same version.
When you create a new Hexo project with the command hexo init
, the names of the extra node modules are written to the package.json
file. So all that is needed is to run the node package manager
hexo init my-projectcd my-projectnpm install
If you have a project that was created before Hexo version 2.6, you need to reinitialise the Hexo project. To do this, change into the hexo directory and run the command:
cd my-existing-projecthexo init
The hexo init
command updates the package.json
file with the names of the required modules. Then as with a new project you run the node package manager to fetch and install the modules:
npm install
If you want to control over what is being changed in your Hexo project nodejs packages, you can add each package seperately. Here we are using the npm
option --save
to ensure the package is added to the packages.json
file for the Hexo project.
1 | npm install hexo-renderer-ejs --save |
If all goes wrong then try uninstalling hexo and install again (the classic IT approach).
npm remove hexo npm install hexo -g
Then check the version again to see if the new hexo will run.
hexo -v
Thank you.
@jr0cket
The hexo theme shows code in a solid black box with syntax hightlghting to match. It gives a nice contrast to the rest of the content, however I wanted to add curves to the corner of the code boxes. I also wanted to add a margin / padding around the code box so it did not touch the edges of the post.
Values for commonly used styles are defined as variables in the file source/css/_variables.styl
. This makes it easy to redefine a style across the whole theme with a single change.
In this case, I defined a code-border-radius
variable and gave it a value of 10px.
1 | code-border-radius = 10px |
I edited the source/css/_partial/highlight.styl
file and added definitions to the $code-block
style:
boarder-radius
adds a cure to the corner using size defined in the variable code-border-radius
background: #333
- why did I add this ?margin: 1px 10px 1px 10px
puts a space of 10 pixels at the left and right of the code block, as well as a 1 pixel space above and belowborder: 3px solid #EEEEEE;
adds a discrete white boarder around the codeblock to make it blend into the page gracefully.The updated $code-block
style now looks like (added lines 11-14):
1 | $code-block |
I didnt make any further changes in to the theme in the highlight.styl
file. However, there are other things in this file you may want to modify.
The hexo theme makes the line numbers smaller in font size and makes the numbers look faded by using colour number 666. This looked good to me, so I didnt change these styles.
1 | $line-numbers |
There is a whole range of settings that affect the code-block and other highlighted areas of articles in the highlight.styl
file, however I did feel the need to make any changes here.
If I get tired of the black background for code I could change it here, although I’d need to check the colours used for syntax highlighting still worked with the new code background.
1 | .article-entry |
Whilst I like many aspects of the Hexo theme used to generate static websites, it does seem to have a lot of redundant space. So here are a few aspects of the them I have changes in order to get more of the actual content showing on the page.
The most obvious occurance is the header image, which takes up a huge part of the screen on the desktop.
The most obvious way to make your website look different from all the other Hexo generated websites is to change the header image.
Very personal, not neccessarily representative of the website content though.
Also not that easy to see the text in the top navigation bar, as the text and icons are white and the background image is light.
Boosting the opacity of the naviation text and icons makes them stand out better on the lighter background.
The CSS definition called nav-link contains an opacity value. This was changed from 0.6 (60 percent) to 0.8 (80 percent) to make the navbar links more visible when hovering over them with the mouse.
1 | $nav-link |
I change my logo to say “community developer” and wanted it to take up less room in the header. So I found the CSS declaration for logo-text
and increased the font weight from 300 to 700
1 | $logo-text |
The same for the main-nav-link text
1 | .main-nav-link |
1 | // Header |
// Header
logo-size = 40px
subtitle-size = 16px
banner-height = 300px
banner-url = “images/banner.jpg”
FontAwesome provides a lot of icons you can use in your website instead of including image logos of various sizes. There are icons for twitter, linkedin, Github and RSS feeds. Using these icons keeps your website fast on any device or network.
I’ll explain how I configured the standard Hexo Landscape theme to add icons in my blog website navigation bar, each icon linking to the developer related sites I use such as Github and Twitter.
FontAwesome is a font that has a wide range of icons, including logos from common websites such at Twitter, Github, LinkedIn, etc. Using a font for these logos is more efficient when it comes to load times of your website, as you only need to include one font which scales to different sizes.
The Hexo theme already had two CSS ID’s defined in the header styles, providing icons for the RSS feed and search button. I simpy copied these style definitions for the addtional icons I wanted, giving each icon its own unique CSS ID.
To get the correct code for the FontAwesome icon I wanted, I refered to this list of CSS content values.
I updated the source/css/_partial/header.styl
file to include the additional icon styles.
1 | #nav-rss-link |
Now the icon style are defined, we need to include them in the navigation bar layout. This navigation bar layout is defined in the file layout/_partial/header.ejs
, see lines 3,4,and 5 below:
1 | <nav id="sub-nav"> |
As soon as both files are saved, I can see the results as soon as I refresh the browser as I am running hexo server
.
My navigation bar now has more icons displayed, each icon linking to my other developer websites
The navigation bar has a link for my Github, LinkedIn, Twitter and Google plus profile pages.
Thank you
@jr0cket
You can use Git to manage version of your content effectively. You can also use Git to manage any changes you make to the theme you use.
Rather than keep all these seperate changes in one repository, you can use Git submodules to manage your theme and content changes seperately.
In have detailed how I used Git Submodules for managing content seperately from a custom theme and how to get started with Hexo
Thank you
jr0cket
Git is the version control system of choice by most developers, however when it comes to Git Submodules there is some contention as to their value. I have used them successfully and when you understand where they fit in you can use them to benefit your own projects too.
I’ll explain what Git Submodules as well as why some developers are using them and some developers warn you not to.
A submodule appears to be just a subdirectory of another git repository. Actually its a full and seperate git repository itself with its own commit history.
Submodules are not clones or branches of a single repository and I would advise against merging submodules into the main repository.
You can have many submodules within a git repository and even have submodules in a submodule.
Submodules are useful if you have a code or content in one git repository that you want to use with several other git managed projects, yet you still want to keep the change history seperate. For example, you may be using a library that is under active development and you need to develop you code along with any changes.
Git Submodules allow you to share two or more repositories as though they were one. Each repository maintains its own seperate change history and submodules are updated independently of the main repository. When you clone or pull a repository with a submodule, the repository has a link to where to get the submodle code from.
I use Hexo.io, a static site generator, to create this blog you are reading. I create all my content in markdown and push it to a github repository as a backup. The generated site is also deployed as a Github Pages site.
I started using a Git Submodule with my project as I wanted to make significant changes to the default theme that Hexo uses. However, I didnt want to add the theme or my changes to the repository I am managing all my content, as I dont want to tie the content to a particular platform.
So by forking the Hexo defalut theme into a seperate repository, I can then add the theme repository as a submodule of my content repository. I can create a history of changes to the theme and roll back if there are bugs without having to worry about dropping content changes.
I also have an existing repository for a series of developer guides I created, which I can also add as a sub-module and still keep that repository seperate for those who wish to only work with my guides (and not my full content).
I use a project calle Prezto which provides a great setup for using Zsh. The Prezto project pulls in several other projects, each of which configures specific features of Zsh. Rather than pull all the code into one repository, submodules means that updates from the other projects are easily incorporated into the main Prezto project.
To start using git submodules you first need a Git repository, this can be a new repository or an existing one. Lets call this the main repository.
In the root of the main repository, you add a submodule using the git submodule add
command as follows:
1 | git submodule add -b <branch> --name <name> <repository> |
In the man repository you can now see a directory called … [TODO: Is the directory named after
1 | git submodule [--quiet] status [--cached] [--recursive] [--] [<path>...] |
1 | git submodule [--quiet] init [--] [<path>...] |
1 | git submodule [--quiet] update [--init] [--remote] [-N|--no-fetch] |
1 | git submodule [--quiet] summary [--cached|--files] [(-n|--summary-limit) <n>] |
1 | git submodule [--quiet] sync [--] [<path>...] |
1 | git submodule [--quiet] foreach [--recursive] <command> |
To see the full list of options, please read the Git Submodules onlne man pages.
Git Submodules add complexity to your version control system and you should ensure using Submodules is more of a benefit than that complexity. If you ever plan on merging submodules into the main repository, this is possible but its probably better to not use submodules in the first place.
Git Submodules are a great way to distribute several repositories all as one. Each Submodule should be treated as a completely seperate repository to get the most sence out of using Git Submodules. Take the time to learn how to use Submodules and you will find them easy to use and very helpful in the right situations.
Thank you.
@jr0cket
I found writing articles with Blogger.com had become slow and a little frustrating. So I decided to switch to Hexo.io as I can write articles anywhere I have a text editor (usually Emacs). Hexo also creates a responsive and fast static website, so when people want to read the articles (including myself when I have forgotten something) then they can do so quickly and across multiple devices. As its a static site, I can deploy it anywhere.
So how do I get all of that content I created out of Blogger and into Hexo. Luckily Hexo has a migration tool to make things easier
Hexo has a seperate tool called hexo-migrator
to pull in content from an RSS feed and there is a more specific migrator for Wordpress. These migrators are installed as an npm package just like any other:
npm install hexo-migrator -g
Unforntunatley the npm packaged version of hexo-migrator failed when I tried to import from blogger, regardless of whether I used the blog URL or by downloading the XML file generated by the RSS feed. The error I got was already reported as an issue on the hexo-migrator Github site and a fix already applied. This fix had not yet been packaged up as a new npm version at the time of writing.
As a fix for the Blogger import problem exists in the Github repository, I installed the hexo migration tool directly from there. Node package manager allows you to install directly from a Github repository (handy when someone has not patch an npm package yet). So to install the latest version of hexo-migrator, I used the command:
npm install "git+https://github.com/hexojs/hexo-migrator-rss.git"
I used the https address for the Github repository as I dont have SSH access. However, to work you also have to put git+ infront of the repository address for npm to work. I am assuming git+ tells npm that we are pulling from a github repository rather than a regular file system.
The migration to is very simple to use, simply run hexo migrate
specifiying the type of input, rss
and the location of your content. In my case I just pulled the Blogger content directly from the website, although you could download the XML code generated by the RSS feed links and save them as a file for importing. following command and point it at the RSS feed of your website.
I created a new hexo site specifically to import blogger posts, so I would not interfeir whith the posts that I had already written using Hexo. So if everything went wrong I could easily delete the new site and still have my new posts running.
To import content directly from my blogger site into a new hexo project I used the following commands:
hexo init hexo-blogger-importcd hexo-blogger-importhexo migrate rss http://blog.jr0cket.co.uk/default?alt=rsshexo server
It worked, brilliant. I have a whole bunch of migrated articles in source/_posts/ folder. Running the hexo server
allowed my to quickly see the results.
Whilst the hexo migration tool successfully grabbed articles from my blog, it only got the first 25 posts. I have about 200 posts so my excitement was short lived. It turns out that this is not a problem with the hexo migration tool, but a problem with the RSS feed from blogger.
I clicked the RSS link on the blogger website and looking at the XML (a horible thing to do) I saw that it was only giving me the first 25 posts.
Checking on the sites I syndicate some of my blogs too, I noticed a different form for the RSS web address (URL). I share selective posts with Planet Clojure and Planet Emacsen. this is done using specific blogger labels (aka tags) (i.e. PlanetClojure, PlanetEmacsen). These RSS syndication sites were given the following RSS URL’s
http://blog.jr0cket.co.uk/feeds/posts/default/-/PlanetClojurehttp://blog.jr0cket.co.uk/feeds/posts/default/-/PlanetEmacsen
So by using the different labels (Blogger calls tags labels) I could pull out more posts from blogger, even though each request would only return a maximum of 25 posts. So instead of the default rss feed used in the first hexo migration, I used the following commands:
hexo migrate rss http://blog.jr0cket.co.uk/-/Clojurehexo migrate rss http://blog.jr0cket.co.uk/-/Emacshexo migrate rss http://blog.jr0cket.co.uk/-/Ubuntuhexo migrate rss http://blog.jr0cket.co.uk/-/Agilehexo migrate rss http://blog.jr0cket.co.uk/-/Kanban
So I carried on for each blogger label I had defined on my post until I thought I had most of the posts migrated. Not perfect, but until I know how to get blogger to give me more than 25 posts from its RSS feed that will have to do.
As I was already running hexo server
then I could see the results as I was importing each posts from a partiular blogger lable. All I needed to do was refresh the browser each time and click on the relevant tag in the tag cloud sidebar.
If you are not running the server during the migration, you can start it by using the following command in the root of your hexo project:
hexo server
Now open your browser at http://localhost:4000 and see the results of the migration.
Each of the posts I migrated is in my blog, although the tags need tidying up (I wasnt very consistent in blogger). The great thing is that all the posts are in date order, as the published date of each blog was put into each markdown file generated by the migration.
Whist my articles were copied over to markdown files okay, some of my post brought along with them additional styles (div’s, class styles, non-breaking spaces, etc) and other artefacts that messed up the styles that Hexo applies.
Some of the styling for headers and subheaders is using the markdown notation for bold, rather than heading. Headers in particular are a good thing to correct, as search engines base some of the articles relevance on those headers.
With some of the migrated posts I open them up in an editor and delete any offending styling that came with them. To tell which ones to open, I use the Unix command grep
to find which of my posts have <div in their text:
grep "<div" source/_posts/*
It turns out that most of my posts do, so if I want to see which ones I really need to fix then it probably easiest to look at the locally running website created by hexo server
. So I opened my browser at http://localhost:4000 and had a look at the posts to see which ones needed the most attention.
My basic strategy was to work from the most recent blog post, working backwards until I didnt care about any older posts.
The Hexo rss migrator pulled in all the tags (labels) form my posts on Blogger and listed them correctly in the frontmatter of each post.
Whilst editing the posts to remove the rogue style code, it was a chance to refine the tags I used and select a category for each post. Using the local hexo server, it was quite quick to refine the tags I used by looking all all the words in the tag cloud sidebar. Where I had used similar tags I could just pick one to make it easier and simpler to find the most relevant content on the site.
A nice feature of Hexo is that you can define how much of a summary view you want to have with each article. The summary view is the main view of the blog and shows the title and the first part of your article.
You define where the summary view ends by using the following syntax in the article markdown file:
<!-- more -->
This is something you need to add manually to each article [TODO: check if there is a tool to do this], so if you have a lot of posts it may take a little while. However it does help your audience (and yourself) scan through your content quickly.
If you have a lot of older posts you are importing, then its not going to be a big problem as they will be many pages into your blog summary view.
The migration is not yet finished, even after I tidy up my posts. Many of the images in my posts are stored in Blogger, which is actually Google picasa and now Google Plus photos. Again there is another hexo tool called hexo-migrator-image which will copy all the remote images to your local filesystem and fix your links (hopefully).
Install hexo-migrator-image using the following command:
npm install hexo-migrator-image
Then run the hexo-migrator-image command and wait for all the images to download.
The image migrator does not like https links and I had quite a lot of them. When the image migrator hits an https link it just crashes too.
Even after changing all the https links to http the results were not as expected. Whilst images had been copied to the local filespace, the names were all changed to long numbers rather than being the original descriptive filenames. To compound the issue, the links in the posts were not updated with to point to the local images.
I wonder if the hexo image migrator failed because the images were all within hypertext ancor links (a href’s).
Rather than wrestle with the hexo image migrator, I decided to leave the images where they were on Google Plus.
There is not a lot of advantage putting your images in Github, except that they are right there where the rest of your website is. However, using a good image repository that acts like a Content Delivery Network (CDN) should give you the same amount of speed and not waste space in the Github repository.
By keeping images out it also makes your Git repository quicker to fork and clone
So I will keep all my images on Google Plus. Any photos I take with my Android phone end up on Google Plus anyway, so it makes sense to keep all my images there.
As a final sanity check that everything has been migrated correctly, I ran the hexo-broken-link-checker. This Hexo plugin detects links that don’t work, missing images and redirects.
As I occasionally link to my own posts, it was good to check that these still links still worked.
Although I had a bit of editing of my blog posts after the migration, it was worth it to have all my blog content in markdown. Now I can manage my posts much easier and do any updates easily in my favourite editor, Emacs.
Thank you
@jr0cket
Hexo displays posts in a summary format by default, showing the title and content of the article up to the point where the more
marker is used:
I like this summary format for the main page as its where people tend to browse a little more and usually want a little more information to help them decide if they want to read the whole article.
[TODO: Insert picture of summary layout]
However when someone selects the archive, category or tags section, they are most likely looking for something specific and so just showing the titles of the posts helps them scan the articles quickly.
So this article we will cover how to modify the default Hexo theme, landscape, to show summar and title only views.
Layout of the page is defined mainly in EJS format and then imported via the theme/landscape/source/css/style.styl
file that is used to pull together a single style.css
file for the whole site (once the site is generated).
All pages use the default index.ejs
[is it index or layout - check the hexo docs] as a base template, over-riding it where desired. For the front page of the blog this is fine.
The archive, categories and tag pages all use the same code, however these are the files we are going to change
theme/landscape/layouts/_partial/archive.ejstheme/landscape/layouts/_partial/category.ejstheme/landscape/layouts/_partial/tag.ejs
Lets first find out what changes need to be made and in what file.
You can use the Chrome developer tools to find out the secion of CSS that controls the displaying of the summary part of the article.
It turns out this summary part of the content is managed by a section called article-entry
. This is included in the file theme/landscape/layouts/_partial/article.ejs
:
<div class="article-entry" itemprop="articleBody"> <% if (post.excerpt && index){ %> <%- post.excerpt %> <% if (theme.excerpt_link){ %> <p class="article-more-link"> <a href="<%- config.root %><%- post.path %>#more"><%= theme.excerpt_link %></a> </p> <% } %>
I tested that this was the code rendering the article summary using the Chrome developer tools. I right-clicked on the first line of the code, the opening div tag, and selected delete node
There may be better approaches than I have taken, however mine is fairly straight formward. I simply take a copy of the archive.ejs file and called it archive-titles.ejs.
I then remove the above code completely from the articles-titles.ejs
file and call that file instead from the archive.ejs
, category.ejs
and tag.ejs
files.
So the archive, catagory and tag files are changed calling the archive.ejs:
<%- partial('_partial/archive', {pagination: 2, index: true}) %>
and now call archive-titles.ejs
:
<%- partial('_partial/archive-titles', {pagination: config.archive, index: true}) %>
With hexo server
running these changes are picked up straight away, so we can easily see if the changes worked as expected
[TODO: image of changed archive]
]]>Hexo is a modern static website generator & bloging platform written in Node.js. It is a great way to create a blog or other content driven websites as all the content is written in markdown and can therefore be versioned with Git.
I am using Hexo for my developer blog (using blogger became very slow) and am also using Hexo for a series of online tutorials on developer tools.
Here is a quick guide to get going with Hexo.
If you havent already got node, go to nodejs.org and follow the instructions. My own preference is to install node into a directory called app in the root of my home directory.
This is not a requirement for Hexo, although Emacs and Emacs Live gives a fantastic experience when writing markdown content. Emacs is a very lightweight and full screen editor. Emacs Live syntactically highlights your markdown content, so headings, links, bold and italic styles are shown in as you type your content. Italic style content even displays in italic.
There is really good documentation on the hexo.io website, althought all you need to do to install is:
npm install hexo -g
If you install nodejs on the system path, you need to use the above command with sudo - i.e
sudo npm install hexo -g
Create a new hexo project, I usually do this in a folder called projects in my home folder:
hexo init my-project-namecd my-project-namenpm install
This creates a new hexo project in a folder called my-project-name
, so use what ever name you wish here.
The npm install
command adds tools for processing different content sources and languages used in the Hexo themes.
Your new hexo project is configured using a file called _config.yml
. In this configuration file you can set the basics of your website, eg title, authour, language, etc. You can also set the public address of your website (URL).
If you are creating a blog website, then you can define the structure used for your blog posts. Your posts can use any combination of year, month, day and title. By default the posts will use all 4 combined. I prefer to just use the year, month and title.
1 | permalink: :year/:month/:day/:title/ |
You can also set the default filename, layout template (scafold) for new blog posts, when created with the command hexo new
.
1 | new_post_name: :title.md # File name of new posts |
If you are deploying your website to Github pages then the generated content is versioned by Github. However, the markdown content for your websites and any configuration changes you make will not be versioned.
If you are going to use this site for any important content, I’d recommend putting the Hexo project into a github repository (or similar service). Using version control for your content helps you track changes effectively and gives an easy way for people to correct your content using Github pull reuests.
The directories and files to add to the version control system include:
_config.yml
for your project configurationsource
directory for all the content in markdown npm install
You could also version the theme
folder assuming you were going to make changes to the default hexo them. However, it is better to create a new theme which is a copy of the Hexo default change with your changes added. Then you can update the hexo project _config.yml
to use this new theme.
If you decide to make a lot of theme changes then it may be better to version the theme as a seperate project. This new theme can then be copied (cloned) in from the repository you are managing the theme with, or even set up the theme repository as a git submodule.
Although you wont have much content at this stage, you can still see what the website looks like by running Hexo server locally:
hexo server
By default this runs a node application on port 4000, so open your browser at: http://localhost:4000/
The easiest way to add a new blog post is to let Hexo generate it for you from its template, this will ensure your post picks up the current them and any blog specific styling:
hexo new "name of my blog post with full on SEO"
Hexo will return with the full path to the file it has created for you. Edit this file in your favourite editor (surely this is Emacs). Becareful to add your content after the frontmatter, this is the first few lines that define the title, date, style and tags used for the post. Add your markdown
If you are only going to have a few images in the Hexo project (a few hundred or so), then the easiest way is to keep them in a source/images
directory. Github pages has a content delivery network (CDN) that will help deliver you images quickly around the world. You can include these image files as you version the rest of your content for the project.
If you are going to use a great many images on your website (1,000’s), you may be better off keeping those images in some kind of image service (Google+ photos) or content delivery network(CDN).
Using a CDN will incure a small cost, but unless are using terrabytes of bandwidth to serve up your images this will only a few dollars a year. Examples of CDNs Amazon CloudFront, EdgeCast, or level3. Alternatively you could use an Amazon S3 bucket, but I suggest you find a good client for that service.
Just like with blog posts, you can create pages using the hexo new
command, simply by specifying the page template (scaffold).
hexo new page "page-name"
If you want a hierachy of pages then you would have to create them manually. It seems hexo new
does not know how to create pages underneath other pages. However, as its only simple markup it is generating then it is easy to copy out your own page structure using the command line or a graphical file manager.
Hexo is a lightweight and fun to use platform for bloggind and similar kinds of content driven sites. I am currently also building out developer workshop materials using Hexo.
To discover more about Hexo, visit the Hexo area of this site and the Hexo.io website.
Thank you.
@jr0cket
I’m using Hexo as my blogging platform and wanted to customise the theme, which is broken down into many different parts to make it easier to manage and customise. In order to understand what the different parts did I fired up Google Chrome deverloper tools to quickly explore the styles of Hexo’s default theme.
With Chrome developer tools you can explore the source code (HTML, CSS and JavaScript) of any web page and see which part of the page each line of code is responsible for. This is a great way for quickly seeing which CSS classes and ID’s are used to control styles, as well as seeing which block of JavaScript is providng dynamic behaviour on the page.
Right-click and select “Inspect Element” on any page you are browsing to bring up the developer tools console. You can navigate through
TODO: List any follow on tutorials & videos that help you make the most out of these developer tools.
Using the Chrome developer tools is a fast way to explore the elements that make up your web page and should help speed up testing and bug fixing. So get familiar with these tools and get even more productive.
Thank you.
@jr0cket
There are several static website & blogging platforms available, so why did I choose Hexo over things like Jekyll, Octopress, DocPad or writing my own? Let me elaborate.
Ruby is a great language but one I rarely use it for development anymore.
The languages I use the most are Clojure and JavaScript, so ideally the tools I use should be written in one of those languages. Why, well I already have the environment set up to support tools in those languages and if I need to extend the tool then I have the skills to do so relatively quickly.
I have had a lot of problems with Ruby on MacOSX and Ubuntu, with only compilation from source code being successful. This takes a bit of time and requires extra packages to be installed I otherwise wouldnt need. RVM did strange things to my bash resource files last time I tried it out and the install failed on both MacOSX and Ubuntu.
Hexo is relatively new and yet has learnt a lot from Octopres. So has the advantage of not baking in any technical debt or having language specific quirks. One example of why I like Hexo better is its simplicity. To create a new file for a blog post in Hexo you use the command:
hexo new "title of blog post"
With Octopress the command is similar but not as easy to remember and trickier to type:
rake new_post["Title of blog post"]
The differeces are relatively small, but in terms of usabiltity I feel a big difference especially as I write several blog posts a week.
Rather than using the command octopress
you have to remember that you are using the command rake
. This is fine if you are used to Ruby every day, but I am not. The form of the command also makes it difficult to rember (eg, that you have to use brackets and which ones were they again) and its actually harder to type, especially for a touch typist.
If you run the Hexo server then any changes you make, either to the content of your site or the design (CSS, theme, etc) is automatically picked up and rendered. So if you are curious about how your changes look, then you just need to point your browser to the hexo server, usually running on port 4000.
So to run the hexo server you use the command:
hexo server
Then to see the results you open the link http://localhost:4000/
When you make a change you get output in the console that is currently running the Hexo server, for example
This allows me to work locally on my laptop and see the results instantaineously. Only when I am ready to share my changes with the world do I need to generate the static content and push it to Github pages.
This simple process should support me event when I have hundereds of blog posts and pages of content. I wont have to wait for the generation of the site (although Hexo is pretty quick anyway, generating the site as it is in about 5 seconds).
There is a healthy community around Hexo. There are already lots of articles about configuring Hexo and creating your own themes. I have found the project itself very responsive to issues and I even had several pull requests accepted.
As I plan to use one platform for all my static web content, blogging, tutorials, slides and technology micro-sites, then I need something that works pretty quick.
Hexo has also added a cache system to speed up the generation time even further. The cache can be used with headers, footers or anywhere where the same content is generated repeatedly.
I also want to be able to put my own look onto my websites. Most tools of this kind provide some nice sites, but I dont want something that just looks exactly like every other site out there.
However, I dont want to spend a long time configuring themes, so it should be really easy to tweak exiting themes.
So far I have found Hexo easier to understand the theme structure from reading the default landscape theme. Although I dont believe there is a vast difference between Hexo and Octopress themes. It just seems a little easier to work with than the Octopress themes, but I guess it depends which themes you work with in the end.
Hexo is a great choice for any blog or static website you want to create, I highly recommend switching to it and deploying your websites on Github pages.
Thank you.
@jr0cket
Welcome to Hexo! This is your very first post. Check documentation for more info. If you get any problems when using Hexo, you can find the answer in trobuleshooting or you can ask me on GitHub.
1 | $ hexo new "My New Post" |
More info: Writing
1 | $ hexo server |
More info: Server
1 | $ hexo generate |
More info: Generating
1 | $ hexo deploy |
More info: Deployment
]]>Hexo is a great way to create a blog or static website and comes with some responsive and great looking themes. However, so your site doesnt look like everyone elses, you may want to customise the look and the easiest way is to modify an existing theme.
There are a wide range of themes to choose from, althought Landscape is one of the newest and is also the default so you dont need to instal it.
In the themes folder of your hexo project
hexo init new-projectcd new-project
You will now see a themes/landscape
directory structure in your new hexo project. Inside this landscape directory are a collection of files that generate the theme when you run ethier hexo server
or hexo generate
.
If you have already generated or deployed your site with a theme and then you modify it. it seems hexo does not pick up those changes. First you need to run the command
hexo clean
This will remove the cache and the .deploy folders. So now when you do
hexo generate
all new files are added to public.
]]>This is a simple post to see if there are any differences in the style of code when defined in a { % codeblock % }
or using markdown notation (tripple backticks / indentation). In this case I am just using some simple Clojure code.
I have wrapped the following lines by three backtick characters on the line before and line after the code. These tripple backtick characters to instruct the Hexo markdown processor that the containing lines should be rendered as a code block.
1 | (defn clojure-function [paramter] |
That should be a simple Clojure example using markdown indentation.
Hexo has several plugin types from Swig that you can use in your post. Lets try out codeblock
to see if there is any difference in how it renders compared to the above markdown.
1 | (def authors [:name "John Stevenson"]) |
The rendering of both pieces of code is pretty much the same, except with the code block I added language and a title. If I use three backticks then I can specify the language and a filename that contains the code. If I just use indentation, specifying a language and filename is not possible (as far as I know).
Thank you.
@jr0cket
Hexo is a great way to easily generate content and publish it use Github pages.
See my previous articles on setting up Hexo and creating content
Its important to add the URL of your github pages site to the Hexo configuraiton
1 | # URL |
If your project uses a sub-folder, Make sure that the root line has a trailing forward slash, otherwise your URL paths will not be correct.
Projects use a sub-folder if they are deployed to the gh-pages branch of a repo. When you are using the main repo for a user or org (username.github.io or org-name.github.io) then these repos run the Github pages from the master branch, so no root should be required (except for a single forward slash which is set by default in hexo)
1 | root: /hexo-blog-test |
This will give /hexo-blog-test2014-name-of-blog-post and wont show the page up or if it does then probably wont include the CSS styles
]]>So you have installed Hexo (and nodejs), so now you are ready to start blogging. Use the following command to create a new blog post entry (blog posts are the default type of content, although this can be changed in _config.yml):
hexo new "Meaningful blog post title with a hint of SEO"
Hexo will create a new file under source/_posts using the name provided. You can then edit this file and start creating your content using Markdown.
When you have finished writing your content, you can generate your blog posts using the command:
hexo generate
This will convert your markdown content into a static website. Then you can view the site by running it on a server that Hexo provides:
hexo server
If everything looks good then you may want to publish the generated website somewhere it can be more readily accessed via the Internet. Once such place is Github Pages (cover this later).
Later on you may want to tweak your theme and general configurations for the website.
Just like with Octopress, you edit the _config.yml file and add your name, URL and any other details and settings you want to apply to the general blog.
In case you forgot how to set Hexo up, then it is basically:
Thank you
@jr0cket
Heroku creates a new “server” each time you deploy, so that the currently live application can still handle reuests until the new version is ready. Rather than a whole bloated server, Heroku actually creates a new Linux container with a running OS. This Linux container usually takes a second or less to create with a running operating system.
Every language you use to write your application needs some kind of runtime, eg. if you need Java you need the JVM, Ruby apps need a particular version of Ruby, Javascript probably needs nodejs and PHP needs a webserver. As part of the Heroku buildpack used during the deployment, the relevant libraries and platforms are brought in. Unless you change the configuration of your build or the buildfile you use, Heroku will always bring in the same version of the environment you need to run your app each time you deploy.
If your app is compiled, then the build process is run so you have a deployment made from your standard production build.
Environment variables are set for the applications and any services (caching, logging, monitoring, etc) or datastores (postgres, redis, mongodb) are therefore automatically connected too.
All the relevant processes are run and scalled (can you scale your app to a certain level when you deploy)
]]>Emacs is a tool that just keeps on giving and Org-mode is a fantantastic way to create text based content and manage it effectively. As Org-mode is just a text format then it can be easily converted by Emacs into other formats (markdown, pdf, html, etc). I’ll show you how to create other formats from Org-mode, so you can confidently write everything in Org-mode and generate any format you need.
In previous articles I have covered generating presentations from Org-mode using Reveal.js.
If you are writing anything more than a few paragraphs of text then it gets quite easy to become lost in your own writing. Having to scroll around to see what you covered earlier can slow down your creative process.
With Org-mode you can structure you content easily, as your “topics or table of contents” are your structure. Every heading and sub-heading can fold away the content underneath it, unfolding the only the parts of your writing you want to see.
Another useful aspect of Org-mode is that it hides the link part of the URL, so you only see the text part of the link. This helps keep your text easy to read.
As with many other languages supported by Emacs you also get colour highlighting for different styles along with spell checking and suggested words as you type.
[TODO: Insert picture of Org-mode - or maybe even a video]
I use markdown for my Jekyll based blog and website and as these are relativley small I often just write them directly in Markdown. However, if its a series of posts on the same topic then I can easily structure that series using Org-mode and generate the markdown content when I am ready to add it to my blog.
I also need to use markdown for the self-publishing book website, https://leanpub.com/. I write the whole book in Org-mode, again so I can structure it sensibly and jump to specific parts of the content easily. I can also see topics (headings) I have written about in each chapter of the book very easily by open and closing sections of the Org-mode file.
In Emacs, open your Org-mode file (or switch to the buffer containing it). Then export a copy of then content into markdown with one of the following commands
M-x org-md-export-to-markdownC-c C-e m m
Exports the current Org-mode file as a new text file of the same name but with the .md extension rather than .org.
When you export again, the .md file will be overwritten without warning, so if you want to make changes you edit the Org-mode file and re-generate the markdown file.
If you want to see the markdown file as soon as it is created, use the following command to open it in Emacs:
C-c C-e m o
If you do not wish to create a file from the export, the following command generated markdown and places it inside a tempory Emacs buffer:
M-x org-md-export-as-markdownC-c C-e m M
[TODO: what does this command do?]
M-x org-md-convert-region-to-markdown
The Markdown export is build on top of the http://orgmode.org/manual/HTML-export.html#HTML-export and anything not supported by the markdown syntax will be converted by that HTML export process. See the Org-mode website for more details on http://orgmode.org/manual/Markdown-export.html#Markdown-export and other formats.
For the header and sectioning structure the Markdown export can generate both atx and setext types for headlines, according to org-md-headline-style. ATX introduces a hard limit of two levels of headings, whereas Setext pushes it to six. Headings below that limit are exported as lists. You can also set a soft limit before that one (see http://orgmode.org/manual/Export-settings.html#Export-settings).
Thank you.
@jr0cket
Before you start with an update, check you Octopress projects files have been added to the Git repository or Stashed out of the way - as Octopress will try and overwrite them (although as its using git it will fail and warn you about a merge conflict).
git pull octopress master # Get the latest Octopressbundle install # Keep gems updatedrake update_source # update the template's sourcerake update_style # update the template's style
http://octopress.org/docs/updating/
Thank you
@jr0cket
In my previous blog on Octopress I covered the blogging workflow and the handful of rake commands that help you create and deploy your blog posts consistently.
Headings
Bold, italic
Images are always a good way to explain concepts or to just get attendtion for your writing.
To add an image to your post, you add the following code
1 | <img src="/path/to/image" class="[class names]" title="[width] [height] [title text [alt text]]"> |
Here is an example with my two cute cats:
1 | <img src="http://placekitten.com/890/280"> |
You can embed code snippets directly in the markup of the blog posts you write using the codeblock directive.
http://octopress.org/docs/plugins/codeblock/
These are okay but I have not figured out a way to stop Octopress examples from rendering incorrectly (unless there is an Octopress update that fixes this)
[TODO - figure out how to show code snippets that are also liquid calls]
I am used to using Github and Gists for sharing and collaborating around code, so as Octopress can use Gits then I have started using the gist directive.
See the http://octopress.org/docs/plugins/gist-tag/ for a few more examples.
You can add embedded videos from YouTube and Vimeo very easily, you just need to know the id of the video which is the last characters of the
For example, there is a great video by Lindsey Stirling at https://www.youtube.com/watch?v=DHdkRvEzW84, so to include this video in a post I would use the video id at the end of that web address (after the watch?v=). So I would add the following code to my code
youtube DHdkRvEzW84You can use either YouTube or Vimeo for your video souce using the following syntax:
youtube video-id vimeo video-idA beautiful video with amazing music from Lindsey Stirling:
]]>Themes can also be installed by passing a parameter to the rake install command. the default theme being “classic”.
Using the .theme folder for your themes helps ensure that your customisations do not get over-written by Octopress updates .
You can add hosted fonts just like you do with HTML pages using a link reference. There are a large number of fonts from Google.
1 | <link href='http://fonts.googleapis.com/css?family=Lato' rel='stylesheet' type='text/css'> |
I like the Ubuntu font so I add the Ubutu and Ubunto Mono font families using the following code:
1 | <link href='http://fonts.googleapis.com/css?family=Ubuntu+Mono|Ubuntu' rel='stylesheet' type='text/css'> |
You can select your own fonts to use by visiting http://www.google.com/fonts/ and adding the font families you like to your collection and Google Fonts will generate the line of code you need to add.
To add Ubuntu fonts directly to your CSS you would use the following:
1 | font-family: 'Ubuntu Mono', sans-serif; |
1 | sass/custom/_colors.scss |
1 | $header-title-font-family: |
Change width of the body, the size of the dates and article titles as well as the codeblocks in
1 | sass/custom/_styles.scss |
Example
1 | body { |
http://www.elegantthemes.com/blog/resources/free-social-media-icon-set
adding a CSS-styled header image isn’t immediately obvious—at least, not to web-tards like me. My first inclination was to do a bunch of surgery on ~/octopress/source/_includes/custom/header.html and stuff an image in there; that worked, but it didn’t take more than a glance at the CSS behind the Octopress default site to see that the method used there didn’t involve any additional code going into the header section. Plus, just adding an image in there didn’t really fit with the HTML5 fanciness of Octopress and Jekyll—it didn’t resize or reflow as the page was changed.
The key ended up being the realization that the header styling and its reflowing was coded in ~/octopress/sass/base/_layout.scss. True to form, that file has an override in ~/octopress/sass/custom/_layout.scss, and to that I made the following changes:
1 | body > header h1 { |
The changes are divided up into three sections: the first part styles the main title (“Bigdinosaur Blog”), the second styles the subtitle (“Tales of hacking and stomping on things”), and the third places and styles the background image. Each section also contains instructions on how the styles should change as the browser window’s width changes (the lines beginning with @media only).
The most important thing, and the thing that wasn’t obvious to me at first but is actually really obvious in hindsight, is that the initial parameters for each section describe how the thing should look at its smallest, and then each min-width section describes how the thing should look starting at when the browser window is that wide or wider. So, look at header h1. This is the styling applied to the main title in the header. When the browser window is anywhere from 0 to 431 pixels wide, the title should be right-aligned with a bit of padding on its left to keep it from overlapping with the background dinosaur (more on overlapping in a bit). This is how things get displayed on, say, an iPhone.
The instant the browser window is 432 pixels wide—which is the point at which the “Bigdinosaur Blog” text wraps to a single line—the text switches to left-aligned and the amount of padding changes, again to keep it from overlapping with the background dino. Another shift comes again at 768 pixels of width, and then final shift to the title’s most sprawling layout happens at 992 pixels.
The subtitle, styled in the header h2 section, has similar directives—it starts out right-aligned, shifts to left-aligned at a certain point, and the amount of padding around it shifts as the browser window moves. The challenge with the subtitle is that I wanted it to maintain a consistent position relative to the main title, and since I’m doing my spacing using em values (which are themselves relative units), each new width setting required tuning by hand.
The last section places the background image itself. In order to have the most control about where the image appears and where it reflows to, I’ve given it a position:absolute tag, which means that other styled elements ignore the background when figuring out their own layouts—hence all the fiddling about with padding for the header text. Instead of standard image floating behavior, an absolutely positioned image can sit on top of other page elements. This can be used to creative effect, like on the Octopress home page titlebar, but you do have to be mindful with the spacing and padding of your other elements so that they don’t get eaten.
In its most narrow configuration, the background image sits on the far left of the page, with 1.5 ems of space from the top of its section to ensure that it doesn’t poke up past the main title, and with background-repeat:no-repeat set so that it only displays once rather than tiling or repeating itself. I also found that if I didn’t explicitly declare the height and width of the image, it wouldn’t display at all. Finally, there are two width settings that reposition the image as the page widens so that it maintains a visually pleasing position relative to the title.
I mentioned it above, but it’s worth repeating: the values above are what work for my typeface choice and image size, and you will have to tweak your own to taste. Once I had decided exactly what I wanted to do and figured out what files to edit, it took probably an hour of making small changes and previewing and making small changes and previewing over and over again before I was happy with the way things lined up. I spent so much time fiddling, in fact, that I elected to abandon the idea of having the dino pic resize itself. Dinosaurs, I suppose, are meant to be displayed as large as possible, all the time, and would never consent to any funny-business resizing.
]]>So why go to a conference as a speaker?
Well the most obvious benefit is that you will probably get into the whole conferences for free. If you are speaking about something relevant to the company you work for, they may also pay for your travel & hotel expenses (if required).
Speakers can sometimes invite a friend along to the conference too.
Being a speaker at an event is a good way to get to network with the other speakers at the event. The organisers some times arrange a speakers dinner the evening before, so as well as getting wined and dined by the organisers you get more of a chance to talk with the other speakers and build good relationships.
In fact, presenters are usually the ones that get the most from a conference, they present there ideas and then have some one in the crowd as for “a real world example”. Putting yourself on the spot like that and learning how to deal with it puts you in a good place when you go back to work and have to deal with all sorts of other less than plesant situations.
Its fun being a speaker, you get respect for just standing up in front of a crowd and speaking.
Its a great way to develop your career. Are you tired of boring interview questions or dumb tests that only test your memory rather than your understanding? A reputation of speaking at conferences goes a long way to cut through the crap that you often get at interview time.
Working a crowd at a presetation helps inmprove you team skills and helps you understand how you can inspire and influence people. It is good training for real leadership.
I dont know of any speakers who ended up on the IT scrap-heap…
Attending a conference is a chance to get away from work for a few days and actually step back and think about things. It can be hard to see the big picture in terms of what you are trying to achieve at work when you are head down getting things done (or fire fighting).
Its good to find out what is happening in technology and see how others are applying the same tools and languages you use to great value. Even some small change in approach can make you more effective.
There is an opportunity to meet a lot of new people and discuss conserns and ideas with each other. Its a great chance to meet people in your situation and do some venting, talk about how you face your challenges, swap ideas and
Find out what people are doing and what they are excited about, why they get out of bed in the morning
Its good to put conferences on your CV - shows initiative, shows you are interested in learing and developing yourself
Its a great way to learn new things, or at least learn what things you should be looking at for the next 6 months - unless you like turning up to work and doing the same old crap week in week out !!!
It gives you something to talk about with your team when you get back to work, something other than what was on TV last night.
How boring is it to just work with someone who just turns up 9-5 and does nothing else. I want to work with people who are inspired, passionate and enthusiastic about what they do. As an employer, why would you ever hire someone who wasnt like this ?? Oh yes, because that employer has either no respect for thier staff or just wants them to do some grunt work - the IT factory in its worse sense.
Most employeers have no idea about IT and many do not need to know that much, except that they should respect the knowledge workers they hire and empower them to deliver the best possible service they can. Unfortunately managment has been trained to measure and manage people like a time and cost study, rather than considering the value that their staff can bring them.
Blinkered Manager: “What happens if I train my staff and they all leave”
Enlightened developer: “What happens if you dont train your staff and they all stay”
If you want a successful business then you need successful people, people who will help you drive the business forward and not be a blocker to the delivery of your ideas.
There have been quite a few organisations that are now able to deliver at the speed of thought, deploying hundereds of ideas a day and getting the best feedback you can in the world - the customers recieving your service.
]]>Bootstrap is an HTML5 toolkit from Twitter to help kickstart webapps and web content sites. It includes a base Cascading Style Sheet (CSS) and HTML for forms, buttons, typography, tables, grids, navigation and much more.
Bootstrap stylesheet provides an easy-to-implement 960 grid for efficient layout, as well as expertly crafted styles for typography, navigation, tables, forms, buttons, and more. To take care of everyday JavaScript touches, Bootstrap provides a well built set of jQuery plugins for drop-down menus, tabs, modal boxes, tooltips, alert messages, and more.
This helps you create a standards compliant, responsive, user-friendly, professionally built HTML5 website, right out of the box.
Bootstrap is under the Apache 2.0 license, provide a great deal of creative freedom. So long as you give the good folks at Twitter due credit for their work, you’re free to take, tweak, and customize everything to your heart’s content.
If you just want to use Bootstrap for your project you can simply include the minified libraries from a content delivery network
1 |
|
In the example, lines 8 & 9 include minified bootstrap using the netdna content delivery network (CDN), so where ever people view your site from around the world it should not slow down due to loading these styleheets.
You can now use elements from Bootstrap in your project and view the results anywhere you have an internet connection. To learn what these are, take a look at Get Bootstrap or Google for some of the very many examples out there.
If you want to see the styles that bootstrap uses or carry out some significant customisations, you can also download bootstrap to your laptop as normal CSS files. Its common practice to put cascading stylesheets into a folder called CSS and JavaScript in a folder called javascript.
If you are doing significant customisation then you could edit the twitter bootstrap files directly. Alternativley you can create your own CSS and JavaScript files that over-ride the bootstrap styles and scripts.
The following links will give you ideas on how to make the most out of Bootstrap:
Thank you.
@jr0cket
To create a new post, use the following command inside your Octopress project folder:
1 | rake new_post["Title of your blog post"] |
This will create a markdown file including frontmatter to apply the blog post style. The task creates the file under the _source folder and included the date at the start of the filename.
Now you can edit the file and simply add your content. Once you have written your blog post you can ask Octopress to generate the html for your new post.
1 | rake generate |
You can view the results locally, or simply deploy up to your chosen location (eg. github pages)
1 | rake preview |
If you are confident about the changes you are making, or have a test website you are deploying to, then you can use a single command to generate the new version of the site and publish it directly.
1 | rake gen_deploy |
This covers the bloggine workflow for Octopress. Next we will cover adding content in your blog post markdown files, inlcuding text formatting, images, code snippets, embedded video, etc
Thank you
]]>As a developer I want a lightweight tool to create and easily publish content interesting to other developers in the community. Although I can write HTML, CSS and JavaScript for webapps, I dont want to be slowed down writing these things when I am doing creative writing.
Using Octopress, which is a blogging framework on top of Jekyll, I can write my content using Markdown. As Markdown is just simple text with a few characters and indents used for formating, I can focus on the writing and make it as appealing as I can. I dont get distracted by the visual layout of the content and a standard design for the blog is consistently applied.
The only challenge I had intially was to get a working copy of Ruby running on my Ubuntu laptop. Jekyll and therefore Octopress requires Ruby version 1.9.3 or greater and Unfortunately I seemed to have a mix of 1.9.1 and 1.9.3. In Ubuntu 13.10 there is a strange stiuation where the 1.9.3 version of ruby was installed along side version 1.9.1 and therefore errors arrose when trying to generate the site.
To fix Ruby on Ubuntu, I loaded up Synaptic package manager and removed all Ruby packages and anything related, such as gem and bundler. Then I installed the package ruby2.0 along with the docs and dev packages for that version. With only the latest version of Ruby installed, Octopress worked perfectly.
I look forward to sharing my further experiences blogging with Octopress
Thank you.
@jr0cket
Github Pages are a great place for publishing your Reveal.js presentations or any static web content. For existing repositories you simply commit your content to a gh-pages
branch or you can create a specific user or organisation repository and commit to the master
branch.
Github Pages are great for any websites that is self-contained, in that there is no reliance on a database or other services running locally. You can even create great looking pages without any coding by using the Github authoring tool, as I have done with my Github user home page.
Existing code repositories
If you already have a repository for your code and want to add web page documentation, then you can simply add a gh-pages
branch and commit all your documentation to that branch.
Content only repositories
If you only have content then you can create a user or organisation repository. This is a specifically named repository in the form of name.github.io
where name is the exact name of your Github user account or the Github organisation you are part of.
As my Github user account name is jr0cket I created an repository named jr0cket.github.io
.
Once created, you can type in the name of this repository into your browser and it will display any content you have committed into the repository (and pushed it to Github).
Separating slide content into their own repository
As I planed to create a number of presentations, I use both an account repository as the home page and created a new repository called slides to host all my presentations. This allows all my presentations to be easily cloned or forked by others easily without getting content that is only relevant to me on my Github pages home page.
Keeping the presentations all in one repository keeps things simple should I define my own Reveal.js themes or if there are Reveal.js updates.
I added everything to the gh-pages branch (reveal.js, images, org & generated html files). Then I generate the Reveal.js slides locally using org-reveal in Emacs, so I can check they look okay. Once I am happy with the slides I commit the html and .org files to Git and push them up to Github.
Creating an user repository on Github is just the same as for any other repository, except that the name must match the form name.github.io - where name is exactly the same as you Github user name.
I created a new repository called jr0cket.github.io
, this has a web address (URL) of http://jr0cket.github.io
I used the Automatic Page Generator from Github to create the site without coding and with a handful of nice templates to choose from. You can of course add your own HTML, CSS & JavaScript if you wish. The Automatic Page Generator is in on the Settings page of your repository, under the Github pages section. This section shows you the repository URL and a button to generate a page for you.
If you are going to use your user or org repository for your slides, then jump to the secion on “Adding Reveal.js to your repository”
Creating a repository for your Reveal.js slides
If you don’t already have a Github repository for your slides (and are not using your user or org repository), go to your account on Github and create a new repository.
Then clone your Github repository locally (substituting the address of your repository)
git clone https://github.com/user/repository.git
Github pages publishes content only from the branch gh-pages (unless you are using a user or org repository). In your local repository, create a new branch called gh-pages. According to Github, the gh-pages branch should be an orphaned branch.
cd repositorygit checkout --orphan gh-pages
An orphaned branch is one that is not connected to another branch, in this case its not attached to master. Technically I don’t think gh-pages branch needs to be orphaned to publish your content, but this is the approach that Github recommends.
Once you have the gh-pages branch you can commit your files to that branch as normal.
git add .git commit -m "First pages commit"git push origin gh-pages
Pushing your Reveal.js slides at this point will not give you the desired results, as we haven’t added the Reveal.js files to the repository. So lets do that next.
You need to provide the JavaScript and CSS files from Reveal.js to make your slides display correctly. I copy the following folders from within the reveal.js folder into the root of my slides project
cp /path/to/revealjs/css ~/my-slidescp /path/to/revealjs/js ~/my-slidescp /path/to/revealjs/lib ~/my-slidescp /path/to/revealjs/plugin ~/my-slides
You also need to check that the HTML for your web pages references Reveal.js files correctly. The best way to do this is in the configuration for Emacs Org-reveal.
In my Org-reveal setup, I have defined the root for the Reveal.js files in my live-pack init.el file as follows:
(setq org-reveal-root "")
So long at this org-reveal setting is loaded, it shouldn’t matter which file you add it to in your Emacs configuration.
The HTML you generate with Org-reveal in Emacs should have references to the Reveal.js includes in the
section. Here is an example:<html lang="en"><head><meta charset="utf-8"/><title>(My presentation title)</title><meta name="author" content="(John Stevenson)"/><link rel="stylesheet" href="./css/reveal.min.css"/><link rel="stylesheet" href="./css/theme/jr0cket.css" id="theme"/><link rel="stylesheet" href="./css/print/pdf.css" type="text/css" media="print"/> <meta name="description" content="My presentation title"></head>
Then push the Reveal.js files to your Github repository (and any updated to your Org & html files)
git add .git commit -m "Adding Reveal.js files for presentation"git push origin gh-pages
If you added your slides to a user or org repository, then you should be able to browse to http://name.github.io where name is your Github user or org name (eg. http://jr0cket.github.io).
If, like me, you created a seperate repository for all your slides, you can brows them by going to http://name.github.io/repo-name where name is your Github user name and repo-name is the name of the repository you added Reveal.js and your slides to (eg. http://jr0cket.github.io/slides).
Note that you need to add the html filename to the URL to browse your presentation, or as I have done add links to the page on jr0cket.github.io
name.github.io
on your laptop, where name is your Github user name or organisation namegit init
git branch -m gh-pages
hub create -d "optional description of the repository"
If you want to specify the repository name using hub, use the command form - hub create account-name.github.io -d "optional description of the repository"
gh-pages branch to github - github push -u origin gh-pages
The -u
option sets github to be the default remote repository to and the gh-pages the default branch. So when you do a push or pull you dont need to specify remote repository or branch you can just do git push and git pull
See my Github page for a list of my presentations created with Emacs Org-mode and Reveal.js.
Thank you.
]]>In previous articles I showed how to setup Emacs Org-reveal & Reveal.js to generate your own presentations from Emacs Org-mode files. This time I’ll show you how to publish those presentations on Github Pages as I have done for my own presentations.
Github Pages are a great place for publishing your Reveal.js presentations or any static web content. For existing repositories you simply commit your content to a gh-pages branch or to the master branch of a user or organisation repository.
Github Pages are great for websites that is self-contained, in that there is no reliance on a database or other services running locally. You can even create great looking pages without any coding by using the Github authoring tool.
If you already have a repository for your code and want to add web page documentation, then you can simply add a gh-pages branch and commit your web content to that branch.
If you only have content then you can use a user or organisation repository. This is a specifically named repository in the form of name.github.io
where name
is the exact name of your Github account or Github organisation you are part of.
In my case I created a repository named jr0cket.github.io
, as my Github user account name is jr0cket.
Once created, you can type in the name of this repository into your browser and it will display any content you have committed into the repository and pushed it to Github.
Your user or org repository also forms the entry point for other project, so if you have a project called slides with web content in its gh-pages branch, you can see that content using the address: http://jr0cket.github.io/slides
As I planed to create a number of presentations, I use both an account repository as the home page and created a new repository called slides to host all my presentations. This allows all my presentations to be easily cloned or forked by others easily without getting content that is only relevant to me on my Github pages home page.
Keeping the presentations all in one repository keeps things simple should I define my own Reveal.js themes or if there are Reveal.js updates.
I added everything to the gh-pages branch (reveal.js, images, org & generated html files). Then I generate the Reveal.js slides locally using org-reveal in Emacs, so I can check they look okay. Once I am happy with the slides I commit the html and .org files to Git and push them up to Github.
Creating an user repository on Github is just the same as for any other repository, except that the name must match the form name.github.io - where name is exactly the same as you Github user name.
I created a new repository called jr0cket.github.io
, this has a web address (URL) of http://jr0cket.github.io
I used the Automatic Page Generator from Github to create the site without coding and with a handful of nice templates to choose from. You can of course add your own HTML, CSS & JavaScript if you wish. The Automatic Page Generator is in on the Settings page of your repository, under the Github pages section. This section shows you the repository URL and a button to generate a page for you.
If you are going to use your user or org repository for your slides, then jump to the secion on “Adding Reveal.js to your repository”
If you don’t already have a Github repository for your slides (and are not using your user or org repository), go to your account on Github and create a new repository.
git clone https://github.com/username/repository.git
Github pages publishes content only from the branch gh-pages (unless you are using a user or org repository). In your local repository, create a new branch called gh-pages. According to Github, the gh-pages branch should be an orphaned branch.
cd your-local-repositorygit checkout --orphan gh-pages
An orphaned branch is one that is not connected to another branch, in this case its not attached to master. Technically I don’t think gh-pages branch needs to be orphaned to publish your content, especially if there is nothing in the master branch, but this is the approach that Github recommends.
Once you have the gh-pages branch you can commit your files to that branch as normal.
git add .git commit -m "Adding Reveal.js files for presentation"git push origin gh-pages
Pushing your Reveal.js slides at this point will not give you the desired results, as we haven’t added the Reveal.js files to the repository. So lets do that next.
You need to provide the JavaScript and CSS files from Reveal.js to make your slides display correctly. I copy the following folders from within the reveal.js folder into the root of my slides project
cd /path/to/revealjs/css ~/my-slidescd /path/to/revealjs/js ~/my-slidescd /path/to/revealjs/lib ~/my-slidescd /path/to/revealjs/plugin ~/my-slides
You also need to check that the HTML for your web pages references Reveal.js files correctly. The best way to do this is in the configuration for Emacs Org-reveal.
In my Org-reveal setup, I have defined the root for the Reveal.js files in my live-pack init.el
file as follows:
(setq org-reveal-root "")
So long at this org-reveal setting is loaded, it shouldn’t matter which file you add it to in your Emacs configuration.
The HTML you generate with Org-reveal in Emacs should have references to the Reveal.js includes in the <head>
section. Here is an example:
<html lang=”en”><head> <meta charset=”utf-8”/> <title>(My presentation title)</title> <meta name=”author” content=”(John Stevenson)”/> <link rel=”stylesheet” href=”./css/reveal.min.css”/> <link rel=”stylesheet” href=”./css/theme/jr0cket.css” id=”theme”/> <link rel=”stylesheet” href=”./css/print/pdf.css” type=”text/css” media=”print”/> <meta name=”description” content=”My presentation title“></head>
Then push the Reveal.js files to your Github repository (and any updated to your Org & html files)
git add .git commit -m "Adding Reveal.js files for presentation"git push origin gh-pages
If you added your slides to a user or org repository, then you should be able to browse to http://name.github.io where name is your Github user or org name (eg. http://jr0cket.github.io).
If, like me, you created a seperate repository for all your slides, you can brows them by going to http://name.github.io/repo-name where name is your Github user name and repo-name is the name of the repository you added Reveal.js and your slides to (eg. http://jr0cket.github.io/slides).
Note that you need to add the html filename to the URL to browse your presentation, or as I have done add links to the page on jr0cket.github.io
Hub is a command line tool for working with git repositories and Github. Hub makes it easy to create and fork repositories on Github without having to visit the Github website.
name.github.io
on your laptop, where name is your Github user name or organisation namegit init
git branch -m gh-pages
Use hub to to create the repository on github - hub create -d "optional description of the repository"
– If you want to specify the repository name using hub, use the command form - hub create account-name.github.io -d "optional description of the repository"
Create and commit your content in the local repository on the gh-branch, then push the gh-pages branch to github github push -u origin gh-pages
– The -u option sets origin to be the default remote repository to and the gh-pages the default branch. So next time you do a push or pull you dont need to specify the remote repository or branch, you can simply do git push
and git pull
See my Github page for my published presentations, created with Emacs Org-mode, Org-reveal and Reveal.js.
Thank you.
@jr0cket
With a new version of Ubuntu this month, I asked myself if I would get more out of one of the many other Linux distributions. Here is what I learnt.
I’ve used Ubuntu as my main Linux distribution since I changed from Debian in 2005. I started using Debian in 1995, so if I did change distributions I wanted to stay with the .deb packaging system which I value so much.
Although I am weary of the reductions of features the Gnome team have made recently, Ubuntu Gnome was the first alternative distribution I tried and was surprised to find I quite like it.
My Ubuntu Gnome desktop using Gnome Shell and a few extensions
This is not any different from the normal Ubuntu install and everything went well on my Lenovo x201T.
I selected to install Ubuntu Gnome over the entire hard drive (SSD) and use an encrypted disk and LVM (just in case I want to re-organise partitions at a later date). I chose to get updates and multi-media codecs (for playing music and videos) during the installation too.
After about 20-30 minutes I had a new OS for my laptop, all ready to use. A quick reboot and within 10 seconds I am logging in to Ubuntu Gnome.
Ubuntu Gnome uses Gnome shell and there is a lot of commonality between it and Ubuntu Unity desktop. To my surprise though I found I quickly started liking Ubuntu Gnome for lots of little reasons. It helped that I had a quick look at the Gnome Shell cheat sheet which gives a great overview of the main features.
Gnome shell is really fast and responsive and I haven’t had any slow-downs as I increase the amount of apps running. As Ubuntu Unity is pretty quick too, then I don’t see any speed advantage.
Ubuntu Unity seems to use just a little bit more memory, but that may be due to more packages installed and extra services running (eg. UbuntuOne). Its not a significant difference.
Gnome shell automatically creates new virtual desktops as you add applications and deletes desktops when you close all apps on that desktop. I like to keep one app per desktop, so its great that you can launch an app from the dash with the middle mouse button (the Lenovo laptops have 3 buttons) and it opens in a new desktop. When I close the app, Gnome shell tidies away my desktop, helping me keep more organised. This is a feature I would love to have in Ubuntu.
Gnome Shell has vertically arranged desktops, so each desktop is stacked one on top of the other. I quickly came to prefer this over the default grid of Ubuntu Unity. Although you can change Unity’s grid layout with Ubuntu Tweak, I haven’t seen the ability to automatically create an delete desktops.
The Gnome Shell launcher similar to Ubuntu Unity, however in Gnome Shell its attached to the overlay rather than being their on the desktop. So with Gnome shell I only see the launcher when I press the Super key (as I always run my apps maximised). This keeps my desktop very simple.
Whilst the launcher in Ubuntu Unity has lots of great features to help you launch and switch to your apps, I found I didn’t really use them. I just set Unity to auto-hide the launcher
Gnome shell displays notifications on the bottom of the desktop rather than the top right corner in Ubuntu Unity. I prefer the placement in Ubuntu Unity, although they both could be smaller so they are less intrusive.
There were a few packages and services that came with Ubuntu Gnome I didnt require, but not many. The main packages I removed were:
To remove the packages I just used the command line, as I knew the specific package names it was quicker than launching the Ubuntu software center
apt-get remove --purge package-name
To find out if there were any services running that I didnt need I use the command line again to list the status of all services currently installed:
sudo service --status-all
From this command I discovered spam assassin and removed it as above.
Gnome Shell allows customisations via extensions (written in JavaScript and possibly other languages) and there is a website full of them. The Gnome Shell extensions are really easy to use, its just like using the Chrome or Firefox extensions.
Each extension on the website has an on/off switch. Switching on prompts you to accept that the package will be installed. For some extensions there is also a tool icon that you can press to configure the extensions once installed. You can manage your installed extensions from https://extensions.gnome.org/local/.
These extensions give a really easy way to add features and Gnome Shell and without them it would have diminished the experience amd I would have stopped using Gnome Shell then and there.
The only issue with these extensions is that they can become outdated and break, with each release of Gnome Shell.
AppIndicator Status
I use Dropbox to sync important files between different laptops (Linux, Mac) and although its easy to install Dropbox in Ubuntu Gnome, the status panel indicator for dropbox does not display. By adding AppIndicator extension then the dropbox icon appears and I can control syncing of my files again.
In Ubuntu Unity you can start and control the default music player (Rhythmbox) from the volume indicator. The Media Player Indicator adds that functionality in Gnome Shell. It worked for Rhythmbox although the Playlists didnt show up in the volume indicator.
The biggest thing that put me off Gnome Shell at first was the wasted space at the top of the screen. First there is the Gnome Shell menu bar, then the window decoration for the application, then the application menu and then the content of the app. From what I have read (cheat sheet) Gnome Shell will go the same route as Ubuntu Unity and put app menus in the top panel, making better use of the space. Until then, I find Hide Tob Bar very welcome. I have it set to auto hide and only show when the mouse approaches it.
Gnome Shell as screen casting software built in so you can record your desktop using Control+Shift+Alt+R
. Rather than have to remember that keyboard combo, EasyScreenCast gives you and indicator to control the recording.
EasyScreenCast seems to work really well and uses the webm codec by default, so you can just upload that straight to YouTube.
Fast user switch - enables you to switch users without having to go via gdm
Task bar - displays icons of running applications on the top panel. If I run more than one app per desktop this may be useful.
Uptime indicator - shows how long in minutes it has been since the last boot. Clicking on the indicator shows you the time Ubuntu Gnome was started.
Pomodoro time - gives you a countdown to timebox work into 25 minute sessions. This pomodoro technique helps you concentrate on one task and get it done well.
Monitor status indicator - a short-cut for the display controls to quickly manage your display settings. I had a few problems with a second monitor, not sure if its this extension of Gnome Shell.
I like Ubuntu Gnome and Gnome Shell enough to give it a try for a few more weeks until the final versions of Ubuntu and Ubuntu Gnome are released. My Lenovo X201T is my spare laptop, so it doesn’t matter if something breaks, I can still do work on my my Lenovo X1 carbon, running Ubuntu.
Things in Ubuntu Gnome are changing quite a bit and there is a tendency for Gnome Shell extensions to break with new releases. To see what is coming next have a look at the Gnome 3.10 features and changes.
One thing that may make a difference is that both distributions will be replacing X windows. Ubuntu has created Mir and the Gnome project is behind Wayland. Its going to be interesting to see which approach works out best over the next few releases.
I did try Arch Linux for a weekend and although there are some great things with the distribution, for now it just seems to eat too much time in setting everything up and learning the different tooling. Although there is a lot of documentation, I found myself having to read pages and pages of content and not always finding the answers I was looking for.
I am still using Ubuntu as my prefered Linux distribution. Gnome Shell has still a long way to come to offer the features I need and the extensions I want to use break to often to be fun fixing.
When Gnome Shell becomes more evolved and incorporates Wayland, then it will be time to give it another try and see how it stacks up to Ubuntu, Unity and Mir.
Thank you.
@jr0cket
Reveal.js has a whole bag of tricks to help you highlight the concepts in your presentations. I’ll show you how to write presentations with Emacs & Org-mode that make use of these features, whilest keeping your content as markdown text. I use a simple template with all the common features there as examples I can copy-n-paste.
I also have a Github pages site with example slides I have created.
In a previous article I showed you how to configure Emacs, Org-reveal and Reveal.js to create HTML5 presentations.
Using Emacs, create a file for your presentation and ensure that the filename has the .org extension.
C-x C f my-presentation.org
You can create a new file in Emacs just by opening a file with the new filename.
There is a special set of tags you can use to define the title slide, including the theme and style of the overall presentation.
At the top of the my-presentation.org
file, add Title
, Author
and Email
tags to create the tile slide.
#+Title: Presenting with Emacs#+Author: John Stevenson#+Email: @jr0cket
At first I could not figure out how to add a twitter handle rather than an email address, then I realised I could put anytihng for the email address. So I just put @jr0cket as the email address and it displays just fine on the rendered slides.
Once you have defined the overall configuration of the presentation, you can add a table of contents or include special formatting libraries like mathjax.
I never use the table of contents as unless you have a short presentation it will run off the bottom of the screen. Here is an example of not having a table of contents, but having mathjax available:
#+OPTIONS: toc:nil reveal_mathjax:t
You can choose from several built in presentations, including default, beige, sky, night (my favorite), serif, simple, moon
You can also make your own theme by creating a new CSS file and defining styles to for that theme.
Define which theme you want using the code:
#+REVEAL_THEME: night
There are several built in styles of transition effects to move from one slide to another. I find linear the most pleasing, as it simply slides the content in from the right or bottom to. Cube is quite a nice rotating cube in the middle of the screen, so you may not get the full benefit of a wide screen display. Zoom is a bit to much for my delicate eyes.
The available tranistions include: default, cube, page, concave, zoom, linear, fade, none
Define a transition before any of the slide content (before the first heading) using the code:
#+REVEAL_TRANS: linear
Each slide is defined by using a *
character in front of the title. * is the top-level header for an Org-mode file, so you can collapse each slides content using the TAB key to make it easy to navigate whist creating that content.
Using a single *
for a number of slide titles will create a series of slides you navigate horizontally. If you define a slide with two *
characters, then you create slides underneath the slide above. These slides underneath are navigated vertically, giving a 2 dimensional effect to your presentation.
* title 1* title 2** sub-title 2.1** sub-title 2.2* title 3
Each title is a seperate slide, however sub-title 2.1 and 2.1 are slides underneath title 2. If you are on the title 2 slide and you press the left arrow, you will got to title 3 slide. If you are on title 2 slide and press the down arrow, you will go to slide heading 2.1.
So with this simple notation you can create a 2-dimentional presentation.
You can place what ever text you want underneath the heading to for the slide content
* A very interesting slide**This slide is interesting because I am a geek :) - bullet points can be added in moderation - dont get too carried away with them
Links to other web pages and resources can be added by simply including a web address in double square brackets:
[[web address]] [[http://www.google.com]]
You can also mark text to be a link by placing the link text inside double square brackets as follows:
[[web address][clickable text]][[http://www.google.co.uk] [Google search engine]]
Any links defined will use the slide style for their colour, font and any animation styles.
You can include images in the presentation using the same kind of syntax for links. Simply add the relative path of your image within double brackets
[[./images/org-reveal.png]]
This will display an image from the file org-reveal.png in the images folder. The same form is also used if you want to include images from web
[[http://web-address/image-name.png]]
You can set a different colour or image background for each slide, over-riding the presentation them chosen. This is set by defining properties for each slide using the :PROPERTIES:
notation.
To define the colour of the slide background you can use an RGB coluor value or any supported CSS colour format. Here is a simple example of a slide with a red background
:PROPERTIES::reveal_background: #FF0000:END:
When setting a background image simply provide the relative path to that image. You can also make the background image slide in rather than fade in.
This slide has a background image
:PROPERTIES::reveal_background: ./logos/github-octopus.png:reveal_background_trans: slide:END:
You can animate specific parts of each slide using Fragment Options. You can make your content grow, shrink, roll-in and fade-out. You can also highlight the text in red, green and blue.
1 | #+ATTR_REVEAL: :frag roll-in |
1 | - all these bullet-points |
Once you have your presentation written you can generate the presentation with the command
M-x org-reveal-export-to-html
This command creates a single index.html file that contains your whole presentation, except for any images you have used. The .html
file will be have the same name as your org-mode file, so if you created your content in my-presentation.org
then you will generate my-presentation.html
.
If your links and images are all correctly referenced in your presentation, then simply opening my-presentation.html file in a browser will show you the end result.
I really liked the presentations generated by Reveal.js and Org-reveal makes is easy to create presentations without having to hand code any JavaScript. As my presentations are written in plain text then its easy to manage them with Git and collaborate with others via Github.
The next step is to get these presentations in the Cloud. I could use Heroku, although as this is just a static website and then Github pages makes more sense. I will cover deploying your presentations to Github pages in a follow-on article.
I may also create my own theme by customising one of the existing cascading style sheets (CSS files) should I have issues with projectors but at the moment the night theme works well for me.
Thank you.
@jr0cket
Creating presentations with Emacs is quick and more collaborative than with other tools I have used. Using Emacs Org-mode you can easily structure and navigate your content. Using Org-Reveal you can generate a great looking HTML5 presentation using Reveal.js from your org-mode content.
I’ll show you how to configure Emacs, Org-Reveal and Reveal.js so you can create content in plain text and generate a themed, animated slide-deck that supports syntax highlighting for lots of languages. As your content is in plan text its easy to collaborate around it with Github.
I use Emacs Live as a base configuration, although there is no dependency on anything in Emacs Live to make this setup work.
Reveal.js is a JavaScript library for creating slides for viewing in a browser, using CSS and JavaScript. You can write your presentations in HTML or use Slid.es to live edit and host your presentation in cloud. There are a whole list of Example presentations to get an idea of what it Reveljs can do. I recommend looking at the Reveal.js presentation first. There is also a beginners tutorial for Reveal.js to help you get going.
Using Emacs we don’t need to write directly in HTML as we will generate it from our text file using Org-mode. There is a dependency on Reveal.js library with this approach.
1) Download the latest version of reveal.js
2) Extract somewhere sutitable, eg, ~/apps/revealjs if its just for your account or /opt/javascript/revealjs if you have multiple operating system accounts.
To see an example presentation, open the index.html from the extracted Reveal.js download in a browser.
Org-mode is a great way to write notes, make presentations and organise tasks. It is built into Emacs so you don’t need to do any configuration to use it. Simply create a file with a .org extension (eg. my-presentation.org
) and when you open that file in Emacs it will automatically switch on org-mode.
Org-mode allow you to structure information simply and quickly. The headings and sub-headings can expand and collapse using the tab key, so you only see the level of detail you need.
The content is always a text file so you don’t have to worry about any proprietary formatting and as its text its easy to collaborate around using developer tools like Git and Github.
Org-reveal is a feature you add to Emacs to generate presentations using Reveal.js. I am using Emacs Live as a base configuration, so I simply added the org-reveal file to my own customisations of Emacs Live in my live-pack.
I download the Org-Reveal file from Github and placed it in my live pack config folder ~/.live-packs/jr0cket-pack/config/ox-reveal.el
Then I edited my live-pack init.el
file to load org-reveal at Emacs start-up
emacs ~/.live-packs/jr0cket-pack/init.el
Add a line to call the org-reveal script download from Github, with a path relative to the config folder of the live-pack
(live-load-config-file "ox-reveal.el")
If you are publishing your presentation on the web then you should include a copy of the css, js and plugin folders from the Reveal.js project.
My current approach is to fork the Reveal.js project on Github (so I can keep track of updates) and create my presentations inside the reveal.js folder created when I cloned the my fork from github.
;; Fork reveal.js project on Github;; Copy the URL from my forked repogit clone git@github.com:jr0cket/reveal.js.gitcd reveal.jsemacs my-presentation.org
I then set the org reveal root to be relative to my presentation. In this case my generated HTML presentation will look for css, js and plugin folders in the same parent folder as my presentation (reveal.js). In my live-pack init.el file I add the following to set the reveal root to be relative.
(setq org-reveal-root "")
If you don’t set this variable to any value (empty string is considered a value here), then the stylesheet and JavaScript includes in your generated presentation will look for CSS and JavaScript resources in a folder called
./reveal.js
.
Alternatively, you can set the location of Reveal.js to a specific file location. The location should be the full path to top level of the Reveal.js folder, this is also defined in my live-pack init.el file
(setq org-reveal-root "file:///var/www/revealjs/current")
If you set a global path then this is the path that will appear in your CSS and JavaScript includes in the generated HTML file.
Create a file for your presentation with a .org extension.
You can create a new file in Emacs just by opening a file with a new filename.
C-x C f my-presentation.org
In your new file you define slide titles using the *
notation. One *
for the slide heading (level 1 heading) and two *
‘s for slide bullet points (level 2 heading).
You can put anything you want under the slide heading and you dont have to use bullet points :).
Once you have your presentation written you can generate the presentation with the command
M-x org-reveal-export-to-html
This command creates a single .html
file that contains the generated presentation, except for any images you have used. The .html
file will be have the same name as your org-mode file, so if you created your content in my-presentation.org
then you will generate my-presentation.html
If your links and images are all correctly referenced in your presentation, then simply opening my-presentation.html
file in a browser will show you the end result.
You have seen how to set up Emacs, Org-reveal and Reveal.js so you can create great presentation without having to code in HTML. The next article in the series will cover how to write presentations with Emacs and Org-mode to make use of all the graphics options in Reveal.js, whilst keeping your content as simple text.
Thank you.
@jr0cket
I’ve added a new work to my vocabulary: Hacklag. Hackference Birmingham left me totally exhausted and yet once I had recovered I was highly motivated to try the things I had experienced there. So I am sharing my experiences from the weekend hackathon of fun, discovery and glorious food.
Previously I shared my experiences of the Hackference polyglot conference, detailing what I learnt from the great talks there.
The venue at Boxxed had a great open space that encouraged people to collaborate and provide an open and friendly workspace. There was plenty of table space, huge bean bags that turned into beds and sofas to lounge in, not that many of us took the time to lounge until the early hours of Sunday morning!
We started Saturday with some overviews of API’s and developer tools from the sponsors of the Hackathon, including Pusher, Heroku, Twillio, PayPal, Paymill, CloudFoundry and a few others. Each sponsor also described what prizes they had on offer. With a trip to their offices in Berlin, SoundCloud had arguably the best prize on offer.
During the day there was delicious food on offer and plenty for everyone. A good job as I didn’t get round to eating anything on conference day, unless you count a pint of Guinness as food :) I really enjoyed the curry of the Saturday evening and I also had a few cups of curry to keep me going through the night as there was a bit left over.
I met lots of great people at the event and I think I spoke to everyone there, it was a very friendly event. Some of the developers were quite experienced and some were relatively new and some were quite young and will become the future of our developer communities. Everyone got involved and seemed to have learnt a lot over the weekend.
There were some great ideas on the go during the hackathon, some that were perhaps a little too ambitious but great to see anyway. There were over 20 hacks on show at the end and as Mike asked me to be one of the judges, it was a challenge to choose the most deserving hacks after everyone had put so much effort into them.
This is a top 5 of my own favourites from the hack, not the actual winners (although there is some crossover).
I’ve met the team from HackSocNotts at a few hackathons now and they are a really enthusiastic and creative bunch. This time they were building a visual hack that would be a light-show at this years freshers fair, demonstrating how much fun you can have if you join in.
The team assembled a strip of 32 LEDs all wired up to an Arduino board and controlled by a Raspberry Pi. The aim was to allow anyone to set up a pattern with the lights via a simple website, making it very interactive. The hack consisted of two node programs communicating over web-sockets, firing codes into the register of the strip. The website was a simple Twitter bootstrap affair. The biggest technical challenge was working with node and the LED hardware, but eventually they got it working some time in the middle of the night.
Uber is a taxi ordering service which you can use from your mobile phone. You can see where the available cars are in your area. What the Uber team managed to do is reverse engineer the Uber API so they could track their fleet of cars from anywhere in the world. By entering a location in their web app, the Uber cars were shown on a Google map. It was a great app and a very slick presentation, very surprising since the team consisted of a 19 year old and a 16 year old.
Created by Andrew Nesbitt, Code tennis is a fun way to improve your skills with Git, especially when it comes to working with Git as a team. In the game you can be as Machiavellian as you like, thinking of commits that will actively cause your opponent more of a challenge when merging your commits to their local repository and pushing those commits to the shared Github repository.
The game involves each developer taking it in turns to push code to a shared repository on Github. A git push
flips the access to the Github repository to the other player, so you have to take it in turns.
However, whist waiting for your turn to push you can make local commits. Deciding on what to commit and how much of a challenge you can make for your opponent will help you understand how much you really know about the power of Git.
All changes pushed to the shared Github repository get automatically published onto Github pages.
The name “Code Tennis” comes from the gamification of image creation by graphic designers. They play Layer Tennis where each graphic designer takes it in turn to create a graphic on one layer of an image. Each turn adds another layer to the image by those playing the game to get an interesting mix of styles and very different end results.
As with graphic designers, playing code tennis get helps you discover different ways of using Git repositories in a fun way. Hopefully you will use these new skills for the benefit of your team :)
Using Twillio, Syd Lawrence set up a simple website that that streamed sound to any mobile that called a particular telephone number. Syd got a whole bunch of use to call the number and within a few seconds we had all become a distributed speaker system, blasting out Rick Askley!
It was a simple idea that made good use of an API to get the hack done. It also reminded me of fun things done by seb.ly with graphics and audience interaction.
As Syd was also judging then we couldn’t give him a prize (he wouldn’t accept one anyway). I hope that if he takes it forward then it is used for other songs that Rick Askley
This was an amazing hack. The team built a fully working game that looked really good and worked very well, they also made the game environment dynamic. Their game pulled a music track from SoundCloud and as it played the track was analysed and the pattern of the soundwave was used to determine where obstacles and power-ups should be placed during game-play.
Top prize winner: Super Pirate Battleships video cortesy of Mark Jolley)
There were lots of really great hacks I havent mentioned and so would just like to thank everyone for there hacks and making it a really entertaining and enlightening weekend.
You can see more of the hacks by looking at some of the videos from Mark Jolley of the hack showcase, or visiting the Hackference page on Hacker league. If you are not at work and feeling brave you can even check out Syd Lawrences’ twerking Video or the great photos from Andy Piper and myself.
I really hope Mike runs Hackference Birmingham again as I had such a great time. Hopefully he will get more volunteers to help him next time as he did a huge amount of work to make this all happen. Thanks Mike, you did a fantastic job.
Thank you.
@jr0cket
Hackference Birmingham was the first event I had been to that was both a conference and a hackathon. Both parts excelled my expectations. Its also the first big event I’ve been to in Birmingham outside the national exhibition centre (NEC) and the developers in Birmingham made me feel very welcome.
This is a reflection of what happened at the conference part of Hackference Birmingham.
I described this as a polyglot developer conference as there were great talks from developers with backgrounds in PHP, Clojure, Javascript, Node, Java and Ruby. There are many things that are common between languages, like good design, so its great to see ideas from such a broad spectrum.
I may have taken some poetic license with my description of these talks. This represents my interpretation of those talks and not necessarily what the speakers were actually saying! Hopefully its close enough…
The opening talk by Syd Lawrence was very inspiring and a great way to wake up sleepy developers. Syd encouraged us to stop watching Coronation Street and try tech stuff out instead. Its easier than you think and there are lots of API’s, tools and frameworks that make it even easier. (the amount of hardware hacking in hackthons demonstrates how easy it is to get something working).
Its easy to make excuses not to try something new but every day it is getting easier and easier to try things out. Over the last decade software development has truly become soft and malleable, so code is easy to change and using tools like Git its easy to change that code without hanging yourself.
In the last few years the same level of tinkering and malleability also applies to hardware. With arduino & raspberry pi kits along with tonnes of components its easy to build something with hardware and then pull it apart and build something else. Electronics is after all a lego box of components for you to experiment with.
This encouragement from Syd reminded me of the BBC children’s TV show from the past, Why dont you? which inspired me to go out and do fun stuff when I was so much younger. Now I am older, why shouldnt I have just as much fun :)
Lorna Jane Mitchell gave a run down of the do’s and don’t of API design. Having developed a number of API’s herself you could hear the experience dripping from her words.
I cant do justice to her talk so I suggest you take a look at some of the quotes I pulled from her talk and if you like what you read then go and buy her book… you wont regret it.
To me, the main point that Lonra Jane was getting across is that API designers need to engage with the community of developers to gain adoption and have a successful API.
Yours truly gave an impromptu talk about Git and Github, providing the audience a whole heap of tips and tricks to get the most out of these distributed version control tools. For those just trying out Git for the first time, I created a Git quickstart guide.
I also created a visual guide to Git and Github workflows:
The tips I shared included:
using git add
to help you be more selective in what you are committing without having to learn how to cherry pick
using git stash
to keep your work when you fall behind a shared remote (which I am sure we never do, right)
configuring git log
to be more valuable by showing a graph with repos, branches and tags (see my .gitconfig file for examples of aliases used for git log and other useful short cuts)
I also talked about the workflow around Git and Github and encouraged people to keep it simple. You can always add more to your workflow when needed, but jumping straight into something as involved as git flow may not give you the best experience. When you are comfortable with git and are working on team projects, then take a look at Git flow and see if its for you. There is a good overview of Git flow by Jeff Kreeftmeijer.
The ease in which a decent sized JavaScript project was created as part of the live demo in this talk by Martyn Davies has put this tool combo (Yeoman, Bower and Grunt) high on my list of new shiny things to try. I had know about Yoman for a while although hadnt found the excuse to use it. Now seeing all three tools working together (and me being a command line junkie) I will be using it for my Heroku demos. These tools give me a great way to go from scratch to continuous deployment of a live on the web app in less than 30 minutes
I can see Yoman, Bower and Grunt driving most if not all of my JavaScript app development, especially for AngularJS.
I didn’t see everyone’s talk as I got into some great discussions with some of the speakers and developers attending the event.
I did managed to catch the Clojure talk given by Joe Littlejohn and Mark Godfrey, speaking on how beautiful and powerful the Clojure language is. Its hard to sum it up in 30 minutes and even harder to share the experience without getting the audience to try the language out. The guys did a good job to get the assembled developers interested. If you want to know if Clojure is for you, then you can check out my eBook Clojure Made Simple.
I talked to several other developers who were looking at Clojure too and I gave them ideas on how to work with Clojure. I also helped out a few people with Clojure during the hackathon weekend.
Overall this was a great event and I came away felling I learnt a lot more from this conference because of the diversity than I did from very focused conferences like jQuery UK.
In my next article about Hackference Birmingham I’ll share my experiences of the Hackathon part of Hackference and tell you about a word I have added to my vocabulary: “Hacklag”.
Thank you.
@jr0cket
Sublime Text is a really popular text editor will great language support and a lot of plugin features that are geared towards software developers.
Although I’m usually in Emacs, lots of people have asked me how best to set Sublime Text on Ubuntu, so here is my prefered method.
As Sublime is not part of the Ubuntu package management system (apt-get), it requires a manual download and install. Download the latest version from the Sublime Text front page (it should give you a button specific to the OS you are currently using, i.e. Ubuntu).
The download will be an archive file like zip but using the Unix commands tar and bzip2.
You can extract the whole archive by right-clicking on the file in the file browser (nautilus) and selecting Extract here
You can also double clicking and selecting the Extract button when the archive manager app opens or use the following command in a terminal: tar jvxf “Sublime Text 2.0.2 x64.tar.bz2”
I usually place 3rd party software in the folder /opt
although you could use /usr/local
.
You just create an apps folder in your own home directory if you use only one login account with Ubuntu.
Create a folder to contain the Sublime Text app using the following command in a terminal:
sudo mkdir /opt/sublime
I am assuming that we will download new versions occasionally and have other apps installed in /opt.
Move the folder and all its contents extracted from the sublime text archive file:
sudo mv ~/Downloads/Sublime\ Text\ 2 /opt/sublime
Create a symbolic link called current
that points to the folder you have just moved.
ln -s /opt/sublime/Sublime\ Text\ 2 /opt/sublime/current
If you do upgrade the version of Sublime, simply download the new version and extract it into the /opt/sublime folder, then just delete the symbolic link and create a new one to point to the new folder.
Rather than add the sublime folder to the path and making it messy, I create a little bash script that simply calls sublime. Create a new file by launching an editor, use gksudo if you are launching a graphical editor as the file will be created in the protected part of the file system:
gksudo gedit /usr/local/bin/sublime
Add the following script to this file that will change to the folder where the sublime binaries live and then run its usual starup script. The $*
ensures that any parameters such as file names you pass to the script are passed on to the sublime start-up script.
#!/bin/shcd /opt/sublime/current./sublime_text $* &
Save the file and close the editor. You have make a new script called sublime on the executable path. However, we still need to give this new script permission to be executed.
Use the following command in a terminal window to make the bash script file executable for every user:
sudo chmod a+x /usr/local/bin/sublime
You can now call sublime from anywhere and even call it with a file name or path/file name arguments.
Enjoy Sublime text and if you find its not for you there is always Emacs :)
Thank you.
@jr0cket
Using the command line is a powerful and quick way of doing many developer tasks. The command line shell) for Linux & MacOSX is a whole world apart from the very basic experience of DOS. Zsh (Z Shell) makes the Linux & MacOSX shell experience even better.
I learnt to use the command line with bash, the default Linux shell. Although as soon as you play with zsh for a few minutes, you quickly get hooked. zsh gives you lots of features, including:
You can add libraries to bash and configure it to do these things as well, although I havent seen an projects to help you quickly do so.
Still not convinced, then take a look at Brendan Rapps presentation “Why Zsh is cooler than your shell“
You can just install zsh and configure it yourself. On the Mac, Zsh is installed by default. On Ubuntu its available in the software center or via the command line:
sudo apt-get install zsh
Configuring Zsh yourself would take a bit of discovery, so I prefer to use something a bit more out of the box. Luckily there are two projects to choose from that configure everything for you.
This is a popular project that provides an out of the box zsh setup and its really easy to use. However, something is making it a little slow when I tried it on the MacBook Pro and Linux. Comments around this project suggest its written in more of a bash way than zsh, so that may be the reason for a performance slow down.
After a few days I decided to remove oh-my-zsh and try an alternative project.
Prezto has been rewritten by the author who wanted to achieve a good zsh setup by ensuring all the scripts are making use of zsh syntax. It has a few more steps to install but should only take a few minutes extra.
In the root of your home account, clone the prezto github project using any git client.
git clone --recursive https://github.com/sorin-ionescu/prezto.git "${ZDOTDIR:-$HOME}/.zprezto"
If you don’t have a Git client either download it from the git-scm website or use the Ubuntu package manager to install the package called git (
sudo apt-get install git
).
All prezto files are contained within a foloder called .zprestorc
in the root of your home folder. In order to use Prezto configuration for zsh, symlinks are used.
The project gives you a script to run although this didn’t work for me and I just created the symlinks manually.
In the root of your home folder, create the sym-links using the Unix symbolic link command as follows:
ln -s ~/.zprezto/runcoms/zlogin ~/.zloginln -s ~/.zprezto/runcoms/zlogout ~/.zlogoutln -s ~/.zprezto/runcoms/zpreztorc ~/.zpreztorcln -s ~/.zprezto/runcoms/zprofile ~/.zprofileln -s ~/.zprezto/runcoms/zshenv ~/.zshenvln -s ~/.zprezto/runcoms/zshrc ~/.zshrc
Check that the links have all been created successfully. Type the command ls -la and you should see the following in your terminal (although possibly without colour)
zprezto uses a series of symlinks to configure zsh with lots of nice defaults
I have been thinking of changing the use of sym-links and just have the specific files include the Prezto files first, then add any customisations required. This would help to keep my changes in place when I updated Prezto.
Now you have zsh configured with prezto, its time to try it out. Open a terminal window and run zsh using the command:
zsh
Set zsh as the default shell
To set zsh as our default shell then run the change shell (chsh) command:
chsh -s /usr/bin/zsh
On Ubuntu, this didn’t seem to work. I also had to configure Gnome Terminal to run zsh as a custom command.
Now when I open a new terminal window or tab, the command line is running Zsh.
Several of the prezto zsh modules are switched on by default, however Git is not one of them. If you want to see the current branch you are working on in Git then add the git module to the zprezto configuration.
Edit the file ~/.zprezto
Find the section in the file that defined modules to load and add a line with the git module. Here is what that section would look like once you have edited it.
# Set the Prezto modules to load (browse modules).# The order matters.zstyle ':prezto:load' pmodule \ 'environment' \ 'terminal' \ 'editor' \ 'history' \ 'directory' \ 'spectrum' \ 'utility' \ 'completion' \ 'git' \ 'archive' \ 'prompt'
The default sorin them is okay, but takes up a bit much room on the prompt than I like.
I created my own theme as a slight variation from the default sorin theme. I removed >>> characters used to separate the prompt from commands as they seemed largely unnecessary. As I only use git then I didnt feel the need to specify the version control tool used (eg. git, mercurial). Finally, I changed the colours round a little.
I kept the right hand prompt as part of my theme. Its a quick way to show the status of any changes in your local git repository.
The prompt shows the current folder name, with any parent folders abbreviated to their initial. The path up to and including the home folder is represented by ~
.
When you enter a folder managed by git, then the right hand prompt kicks in and shows icons representing the current git status. Whilst in the folder you can see if you have changes that untracked, deleted or stage. You can easily tell if you are behind or ahead of the default remote repository. You can also see if you have some changes stashed away.
My zsh theme is available as part of my dot-files-ubuntu or dot-files-macosx repositories.
Whist oh-my-zsh is really simple to use, the Prezto project seems to have maintainters with greater experience of zsh.
On Ubuntu I am using prezto and although it is a bit more involved to understand at first, it runs really really fast. The only thing I wanted to change with prezto was the theme, so not really that much to learn.
Everything that I was doing with oh-my-zsh seems to work in Prezto without adding in extra plugins to the Zsh configuration.
So although oh-my-zsh is a great project, I’d recommend using Prezto to have a great Zsh experience. Take a look at my dotfiles on github (dot-files-ubuntu or dot-files-macosx) to see how I created a custom theme.
Thank you.
@jr0cket
Sometimes its the little things that make a difference and after seeing how easily customise the Clojure REPL prompt with Leiningen I had a little hack with words, symbols and colours and came up with something nicer (in my opinion).
The standard Clojure REPL prompt is practical, yet a little mundane to look at. As we see in the screenshot it gives a clear indication of the namespace we are working in, but little else. If you have other REPLs, run time environments or terminal sessions going then its all too easy to enter your code at the wrong prompt.
To make it clear that we are in a Clojure REPL I changed the colour of the namespace to blue, wrapped with green brackets (blue and green are the colours in the Clojure logo). I also change the symbol used in the font to be the cλ
symbol. I use the combination of c-lambda to denote this is the Clojure implementation of a Lamdba oriented language (is that such a thing or did I just make that up?). This c-lambda symbol is the same I use to denote Clojure-mode and nrepl-mode in Emacs.
See my article on Emacs mode line customisation to create
To configure your prompt you can edit the project.clj
file in the root of a Clojure project and add the keyword :repl-options
with a set containing your customisations.
Here is a very simple example that changes the welcome message you see when the REPL first starts, as well as changing the prompt to output a message followed by the current namespace:
:repl-options { ;; custom prompt prompt (fn [ns] (str "You are hacking in " ns "=> " )) ;; Welcome message when the repl session starts. :welcome (println "Its REPL time!")}
In the following example I have added colour using ASCII codes I found on Stack Overflow. It makes the definition of the prompt a little messy looking, however the prompt itself is much nicer than the standard one.
Remember to reset the colour at the end of the prompt definition or all your input into the REPL will be the same colour as the prompt.
:repl-options { :prompt (fn [ns] (str "\u001B[35m[\u001B[34m" ns "\u001B[35m]\u001B[33mcλ:\u001B[m " )) :welcome (println "Time for REPL Driven Development!")}</span>**
This customisation looks like:
To make the above customisation easier to read, here are the actual colours of the ASCII codes I used above.
\u001B[32m
is green for the brackets around the namespace\u001B[34m
is blue for the name space name\u001B[33m
is yellow for the Lambda character (yellow matches my shell prompt ~)\u001B[m
resets the colour changes back to the default (white in this case)If there was a way to use colour names rather than ASCII codes in the prompt configuration, that would make the configuration so much nicer to work with. This may be a limitation of the terminal though, rather than Leiningen.
Other customisations you could make to your REPL prompt include adding the project name, version, etc. As the customisation is specified in your Clojure project.clj
then your prompt can be as project specific as you like.
I am using Emacs for my editor, so a quick look on Stack Overflow showed me how to enter Greek characters in Emacs to create the Lambda character in the prompt. The way to add the lambda symbol to a file in Emacs is with the command:
M-x ucs-insert 03bb
The 03bb
code is Unicode for the lambda symbol - λ.
Assuming you like the custom prompt and want it in all your projects, you can use the lein-create-template plugin to create your own project template for lein new. So when you create a new project with leiningen you can run the command:
lein new my-custom-template project-name
Its quick and easy to customise your Clojure REPL prompt when using Leiningen, so why not make the developer experience just that little bit nicer and maybe prevent typing code into the wrong terminal window.
Thank you.
@jr0cket
Org-mode is a great way to track tasks and manage all those to-do items in one place, although Org-mode has a very simple workflow by default (TODO | DONE). To track your tasks in more detail you can define extra stages or create a completely workflow.
Previously I covered how to set up Org-mode & Org-capture for the built in workflow. In this article I show how to configure Org-mode to use my own custom workflow or define your own multiple workflows should the need arise.
I like to organise my work using Kanban, an agile technique that focuses on getting work done by managing workload and learning through fast feedback. To implement this Kanban approach I define 4 stages for my task workflow:
TODO - tasks I have not started yet. If I have an idea for a task, I can make a quick note and get back to what I was doing without loosing focus or worrying about forgetting to do something.
DOING - tasks I have started working on. I try to keep the number of tasks I am doing as low as possible so I am not task switching. This helps me get things done
BLOCKED - tasks that I started working on but cant continue with for some unexpected reason. I wont start working on these until I have more time set aside to unblock them. If I block a task with sub-tasks then I will not work on any of those sub-tasks either (I have not seen anything in org-mode to automatically block and unblock sub-tasks if its parent is blocked or unblocked, that would be useful).
REVIEW - tasks I have completed but want to check if there something I can learn or share from the experience of doing that task. This can help me define other tasks related to the one I just completed.
DONE - tasks that are completed. I keep the done tasks around for the week so I have a feeling of accomplishment and avoid repeating myself.
ARCHIVE - an optional stage to put tasks in if I want a longer term record of completing that task
You can create a new workflow for your tasks by defining setting a sequence of text strings to the variable org-todo-keywords
I am using Emacs Live as a base configuration, so I put all my Org-mode configurations into a file called:
~/.live-packs/jr0cket-pack/config/org-mode.el
If you are not using Emacs Live you can place them in ~/.emacs.d/init.el
.
Here is an example that implements my Kanban workflow:
(setq org-todo-keywords '((sequence "TODO" "DOING" "BLOCKED" "REVIEW" "|" "DONE" "ARCHIVED")))
The vertical bar |
defines the possible end states for your task. Org-mode can be configured to add content to your task upon entering an end state, such as setting a CLOSED
variable to the current date and time stamp. This is useful if you want track your time spent on tasks. I will cover this in a follow on article, or see the section on Progress Logging of the Orgmode tutorial.
You can also define multiple workflows so long as all the task stage names are unique. Here is an example of multiple workflows from the org-mode.org website:
(setq org-todo-keywords '((sequence "TODO" "|" "DONE") (sequence "REPORT" "BUG" "KNOWNCAUSE" "|" "FIXED") (sequence "|" "CANCELED")))
I haven’t found a use for this approach as yet, but will add it to my TODO
list to investigate.
The default colours for Org-mode tasks are pink for TODO and Green for DONE. As we are creating additional steps it helps me scan my task states if they are colour coded.
Here is an example of defining colours for each of the states of my Kanban workflow. Most of the colours are defined using the text of the name. The org-warning is used to set the TODO stage to the standard org-mode colour for TODO.
1 | ;; Setting Colours (faces) for todo states to give clearer view of work |
There are lots more customisations that can be made to Org-mode to help you manage tasks. Here are some aspects I am considering next.
By default Org-capture only has one template, the task template. This task template only a time stamp of when it was created and a link to the file. All the TODO items created with this template go under the main heading of Tasks, so I could create templates for other headings such as Personal, Financial, Household, etc.
When I mark my tasks as done, I’d like to have that tasked automatically date stamped so I know when I completed it. This would add a CLOSED
parameter to the task in question. If I also have time stamps for each of the states then I can track my cycle time and check to see if I am keeping too many tasks in the DOING state.
A lot more features of Org-mode can be found at the excellent Orgmode.org website.
Thank you.
@jr0cket
Emacs Org-mode has a feature called Org-capture that makes it easy to keep track of all the to-do’s that crop up as we work on projects. With Org-capture you can make comments across all your files and projects and link to them all from one place.
Here is how to configure Emacs Org-capture so you can quickly create new tasks relevant to specific files and easily manage them all in one place. If you are not familiar with Emacs Org-mode, take a look at my article: Manage your developer life with Org-mode.
I use Emacs Live as a base configuration for Emacs, although everything here will work with any setup as Org-mode and Org-capture are both part of Emacs itself. If you are not using Emacs live, you can place the configurations in your
~/.emacs.d/init.el
file rather that the locations specified here.
Org-capture creates a list of all those tasks you want to do across all the text files you are working with in a single file, by default this file is called .notes
and lives in the root folder of your account. However, the file managing your tasks should really have a .org
extension so that Emacs automatically puts it into org-mode when its loaded.
You should also consider creating your todo list file where it is easy to manage with Git or a synchronisation service like Dropbox.
Define a variable called org-gefault-notes-file
to set the path and file name for the todo file.
I put this variable definition in a new file I created to hold all my Org-mode configurations:
~/.live-packs/jr0cket-pack/config/org-mode.el
Then I edited this file and add the following definition for the todo file:
;; Define the location of the file to hold tasks(setq org-default-notes-file "~/.todo-list.org")
As I am using Emacs Live, I follow the convention of placing sets of configurations into their own file and calling that from my live-pack init.el. Editing my init.el
file I added:
~/.live-packs/jr0cket-pack/init.el
and added a new line to load in the configuration from the org-mode.el
file:
(live-load-config-file "org-mode.el")
I set up a keyboard binding for org-capture using C-c c
(control key and c, followed by c). I opened an existing binding file I have in my live pack
~/.live-packs/jr0cket-pack/config/bindings.el
and added a definition to call org-capture
(define-key global-map "C-c c" 'org-capture)
Create the file that will hold all your tasks by either opening and saving a file of that name in Emacs or using the command:
touch ~/.todo-list.org
Emacs is now setup to capture all your todos via Org-capture, so lets look at how we use Org-capture
Open up a source code file or other text file you want to work on. Create a comment in that file about a TODO / task you want to do. With the cursor still on your comment, use the org-capture command or the keyboard combo:
M-x org-captureC-c c
You are prompted to choose a template for the type of entry you want to create. By default there is only one called task. Press the letter t
to select the task template.
The cursor will now be in the Org-mode task file you created earlier allowing you to type in a descriptoin of the task. Updated the task list with this new task using the keyboard combo
C-c C-c
You can save the tasks file as usual with C-x C-s
.
To open the file that your task links too, or open a web addresses you have added to the task, place the cursor anyware on the link and use
C-c C-o
As has been mentioned previously, org-mode manages tasks using a plain text file, so its easy to add your own tasks by manually editing the file. You can indicate a task using the * notation.
1 | * Level 1 heading |
By default the org-capture function has only one template, Tasks. So all todo’s created with org-capture will be level 2 headings under * Tasks…
** description of task
When ~/.todo-list.org
file is in org mode, you may only see the text Tasks...
. The three dots after Tasks indicates that this is a heading that contains more underneath. Using the Tab
key you can expand the contents and repeatedly tabbing will cycle through different levels of expansion. To work on all headings at once, you can use the Shift-Tab key combination.
M - Enter
Shift- left/right arrows
M - left/right arrows
M-Shift- left/right arrows
M-Shift- up/down arrows
Shift - up/down arrows
Emacs Org-mode is a great way to organise your busy developer life - and life in general if you are that way inclined. As Org-mode is a part of Emacs already, then all you need to do is add a couple of lines of configuration and you are off.
As any Org-mode file is just a text file underneath, then you are not trapped into a format you cannt use anywhere else.
Hope you have a great time organising yourself with Org-mode.
Thank you.
@jr0cket
As a busy developer I end up working on several projects, documents & books at the same time. I want a simple way to capture notes where I don’t have to worry about formatting. I also want to keep a track on all the things I am working on. As I do most of my coding & writing with Emacs, then I was sure it had something that could help.
Org-mode is a really simple and beautiful way to take notes, create presentations, organise thoughts and help you manage tasks across all your work. The latest versions of Emacs (23.x / 24.x) have Org-mode built in, so you can use it straight away with M-x org-mode
.
Org-mode documents are plain text, so they are easy to write and understand even outside of Emacs. The magic is happens when Org-mode interacts with that text. Org-mode understands the structure of the text and lets you easily organise everything into something useful.
I have written a simple guide to configuring Org-mode and Org-capture, as well as a guide to creating your own task workflow for Org-mode.
Here is a quick YouTube video overview of Org-mode for Emacs by Richard Dillon, to understand the keyboard short-cuts used (key bindings) then see his Org-mode notes on Github. Or if you are already hooked on the idea of Org-mode then see the In-depth guide at the end of this article.
Hack Emacs: Introduction to Org-mode
You can also take a look at Carsten Dominik talking about Org-mode from the Google Tech Talks back in 2008, the content is still relevant.
Org-capture provides an easy way to create a list of all those tasks you want to do across all the text files you are working with. You create a comment in the file you are working in then with the cursor over that comment you create a new task using org-capture. This opens up a file that holds your current tasks and using a template it creates a task that links back to the file where you made your comment. When you open this link it takes you back to the file and to the exact position you created the task from.
I will show you how to set up and use org-capture with Emacs and Emacs live in the next article of this series.
You can easily create an interactive presentation with org-mode and more importantly for developers interact with real source code in a tool that knows how to process that code. If you want to publish this you can put your .org
file on Github or export your presentation as HTML and other formats.
so you dont need to spend time on creating fancy spinning presentations with JavaScript or yet another boring power point presentation and fill it with static screen shots.
The best place to start learning Org-mode is its website: http://orgmode.org/. I found the compact guide a great introduction and it got me going quickly. I will also be writing a few follow-on articles on specific topics like task management and presentations.
You can also watch the Emacs Org-mode In-depth video, again by Richard Dillon
Emacs Org-mode in depth
Thank you.
]]>nodejs is an important aspect in making JavaScript so popular for modern development and frameworks like Express make development with node more productive. It is really easy to get going with nodejs & Express and you can deploy your app live via Heroku too.
Express is a minimal and flexible node.js web application framework. You can easily create single & multi-page web apps or use it with other languages to build hybrid web applications. Express makes using node.js much less of a learning curve, although you can still get to the raw node power once you are ready.
Assuming you already have nodejs installed (install node on Ubuntu) along with npm ,the nodejs package manager, then you are good to go.
Create a folder for your application
mkdir first-node-express
Create a package.json
file to define your project and its dependencies. Express is treated as a dependency for the project and you simply specify the version of Express you want to include.
To see what version of express is available, use the node package manager to find out
npm info express version
Edit the package.json
file and define your project as follows
{ "name": "node-express-simple", "description": "A simple node express based website", "version": "0.0.1", "private": true, "dependencies": { "express": "3.3.5" }}
the name of the project should not contain spaces
Now the project dependencies are defined, use the node package manager to pull down those dependencies from the Internet.
npm install
You can view the dependencies of your project at any time by using the command:
npm ls
In a text file called web.js
define a simple route that will handle a request sent to the default address of your application, for example /
.
You can call this file anything you like, but its often web.js, app.js or server.js
// define a simple text responseapp.get('/', function(request, responce){ responce.send('Hello nodejs express World');});
In the above example we are using response.send() to add a Content type and Content-Length to the response so they dont have to define them manually.
In the same web.js
file as above, add code to listen on a specific port and also send any logging information to the console from where your node app was run from.
// bind to a port & listen for connections app.listen(3000);console.log('Node express app listening on port 3000');
It can be useful to define a $PORT variable and use that variable in your code, especially if you use multiple environments like development, testing and production. Also some platform as a service approaches provide a port variable on which your application must listen (eg. Heroku.com).
To run your application, use the command called node
and pass it the name of the file your application is in. In this case web.js
.
node web.js
You should see output on the console showing you that node is running and listening on the port you specified.
Node express app listening on port 3000
You can now open your new node express website. You should just see the text messages displayed in your browser.
To make the application a little more robust lets make a couple of changes to the port it runs on and the logging message.
Edit the web.js
file and change the app.listener
code to be set by an Heroku environment variable (or default to port 5000 if no variable set). The console log code is also changed to include the port the app is running on just to be sure.
var port = process.env.PORT || 5000;app.listen(port, function() { console.log("Listening on " + port);});
We are also going to tell Heroku the process we want to run for our application, using a simple text file called Procfile
the file name is Procfile without any extension and P should be capitalised, it should be in the root of your project folder.
Edit the Procfile
and add the following line to run a web process using node and our application file.
web: node web.js
I’m assuming you have Git already installed.
If you need to install Git, visit the Git-SCM Website or install the Heroku toolbelt
Commit your code to your local git repository using the following commands:
git initgit add Procfile web.js package.jsongit commit -m "new project created"
Assuming your project is managed with git and you have an Heroku account and the Heroku toolbelt, then you can simply create a space for your application on Heroku with the command:
heroku create
This adds a remote URL for the git repository on Heroku that your application will be deployed from. You can use git remote -v
to check it has been added.
Your code is managed by your local Git repository as one or more commits, so all you have to do is push those commits to Heroku and trigger a deployment.
git push heroku master
The final step to get your application running is to tell Heorku to run a process for your node server. The following command will use the process defined in the Profile you created earlier.
heroku ps:scale web=1
Now you can see your application running live on the Internet by navigating to the application address shown at the end of the deployment (URL) or simply type:
heroku open
Creating a web app with Nodejs and Express is pretty quick and deploying on Heroku is easy, giving you a live app you can continue to build upon.
Next I’ll look at doing more interesting things with Express, such as using it to generate an application skeleton.
Thank you.
@jr0cket
The Ubuntu font family has been professionally designed and is freely available from font.ubuntu.com.
The fonts are available in a range of weights as well as different natural languages. As developers there is also a really beautiful mono-type font too called Ubuntu Mono!
Here is a simple example of some Clojure code in the Ubuntu Mono font:
And a further example of some markdown (as used by Github, etc.)
Download the Ubuntu fornts zip file and extract it (open the zip file in MacOSX extracts it).
Drag and drop all the files with a .ttf extension (true type font) to the folder containing all the fonts on your Mac:
Now all your applications on the Mac should be able to use the Ubuntu fonts.
I use Emacs for most of my development on the Mac, but any app should be able to pick up the Ubuntu fonts you have added.
I have Emacs configured with the Emacs Live setup, so I simply add the Ubuntu Mono font as the default in the configuration file:
~/.live-packs/accountname-pack/init.el
The Emacs Lisp code to set the font to Ubuntu Mono as a font size of 16 (good for demos) is:
(live-set-default-font "Ubuntu Mono 16")
This code looks much better in Emacs with the new Ubuntu Mono font of course.
Chaning fonts may seem like a small change to make, but anything you can do to make your development environment as enaging and enjoyable as possible is worth doing. After all I certainly spend a lot of time in my developer environment.
Thank you.
jr0cket
Hackference Birmingham at the end of August is a great opportunity to discover new ideas from polyglot developers at a one day conference, then try those ideas out over a weekend hackathon.
I’d also forgotten that Birmingham is also a great city to explore, with lots of history and modern design to take in (including the Fazeley Studios venue). So I’m going to spend a little extra time discovering all it has to offer. All of this is within a few minutes walk of Birmingham New Street station.
The beautiful Fazeley Studios
The one day conference on Friday offers a diverse set of topics, covering everything from API design, MongoDB, NodeJS, Clojure and even Go.
There is a great line up of experienced speakers, although not the ones you see very often so its a chance to hear some different viewpoints. I am especially looking forward to hearing from Lorna Mitchell about her experiences with API design.
It will also be great to see the guys from Twillio, PayPal and SoundCloud. All these companies are highly innovative and doing some great things with technology.
As I have been drawn to the Clojure language for the last few years it will be great to hear from Joe Littlejohn and Mark Godfrey on why we should be looking at Clojure and what developers we can gain from the language. I am intrigued as to how they have been using Clojure at Nokia.
Hackathons are a great chance to focus on learning new things and improving your skills. With a host of companies there to help you try out their API’s and also win prizes for your app then it truly is a weekend for fun and profit.
I’ll also be running workshops on Git, Github and Heroku, to help you develop and deploy your applications collaboratively. I’ll be on hand to help out teams throughout the hackathon as well as writing some apps in Clojure and JavaScript.
An of course its just great to have some time to scratch that itch you have with the stuff you wanted to create but never had time. With a weekend to focus you can really get in the zone and get creative.
Birmingham is so easy to get to from most cities, that its a shame I havent taken the time to visit more often. There are some great hotels to stay at, such at the Rotunda with great views of the city.
If you are looking for culture then there are some world class galleries and museums. I like the sound of the Thinktank Birmingham Science Museu, a ten themed galleries of immense, inspiring, interactive fun with everything from full size locomotives and aircraft to intestines and taste buds. Another pleasure would be the planetarium which presents breathtaking images on a 360° domed ceiling.
You can see yourself on TV at BBC Birmingham’s Public Space at The Mailbox or go on a tour of the BBC studios. For the indulgent there is also the Cadbury World, a bit like Willy Wonka’s chocolate factory in real life :)
So there is a whole range of things to do for you or if you want to entertain your family whist you hack.
Talk a look at the conference schedule and speakers list. If you sign up before the 9th August you can get the early bird discount too.
Thank you.
@jr0cket
Learning to use Git to version your development projects can seem a little strange at first, although once you have a few basics it quickly becomes a natural and fast tool to use.
Here are some of the basics of the Git and Github workflow in word and pictures, created from my mission to teach the world (starting with London) to use Git effectively. If you just want an overview of the basic commands, see my Git Quickstart Guide.
Git has several stages in the basic workflow:
Working copy
: the project source code and configurations
Staging
: add the changes that you want to make a part of the next commit
Local repository
: the full history of your projects as a series of commits, contained within a folder called .git
in the root folder of your project.
The staging area allows you a little more room to consider what the next commit should contain. Its much simpler to change your mind about what will go into the commit by un-staging changes. You also do not have to be concerned about re-writing commit history.
Once you have made a commit, then you should avoid making changes to that commit. Its usually better to fix anything in another commit than to change the first one.
Once you share a commit with others, eg. via Github or CI server, then you should consult with everyone concerned before making a change to a commit.
You can version changes for your project to your local repository as often as you need without conflict as you are the only collaborator. This also means you can work off-line too.
When you want to collaborate on projects you can set up a shared repository that you work on as a team, pushing the commits you made in your local repository to the shared repository.
The most well known example of shared repositories is Github.
In the example, John has started work on a project on his laptop and created a local repository using the command git init
.
John then stages changes using git add filename
or git add .
if he wants to add everything. When John is happy with the changes he has staged and has though of a good commit message, then he creates a new commit with the command git commit -m "meaningful commit message"
.
John now wants to share code with others, so visits the Github.com website and creates a new repository (having first created an account and added his public key to his Github account).
John then tells his local repository about the new Github repository using the command git remote add remote-alias-name github-repo-url
- where remote-alias-name
is an alias used to refer to the remote repo and git-repo-url
is the web address of the Github repository as stated on its github page.
John can then push his changes contained within the local repository to the Github repository using the command git push remote branch
- where remote
is the alias for the github repository URL and branch
is master
as no other branches have been created at this point.
Carlos sees this new repository created by John on Github and decides to get a copy by using the command git clone remote-repo-url
- where remote-repo-url
is the web address of the Github repository as stated on its github page.
By cloning the Github repository made by John, Carlos has a new local repository and can see the full history of commits. Carlos can edit the working copy as well as stage and commit his own changes to this new repository. Carlos cannot push changes back to the repository on Github though, so if he did git push it would fail. To update the github repository, John would need to add Carlos as a contributor first.
Sam has also seen the Github repository that John created and rather than take a copy using git clone, she has used the Github website to create a fork. A fork is an exact copy of a Github repository, in this case Sam now has an exact copy of Johns repo but under her Github account and fully accessible by her.
Sam gets a copy of her forked repo on her laptop by using the command git clone remote-repo-url
.
Now Sam can edit the code in her working copy and commit those changes to her local repository. She can also push those committed changes to her forked repository on Github.
If Sam wants to share her new commits with John, then from the web page of her forked Github repository she can create a pull request. This sends a message to John to let him know that there are changes in the forked repository that he may want to pull into his Github repository.
Should John accept the pull request made by Sam, then he will also need to update his local repository using the command git pull remote branch
Once you are sharing changes thorugh remote repositories, you need to make sure you keep your local repositories up to date with other peoples changes that are pulled into those remote repositories, otherwise it may prevent you from pushing your changes…
Using Git and Github may feel a little strange at first, but once you have some practice and if you keep your workflow simple then using Git will become very natural and fast.
Thank you.
@jr0cket
As Heroku were a major sponsor we decided to give out prizes to 5 teams, even then it was still a challenge to choose only 5. We also gave out lots of swag and the t-shirts and moleskin notebooks went down a storm.
With so many diverse creations on show Hacked really lived up to its tagline: Learn ,Build, Share.
I ran a workshop introducing Heroku, a service to allow developers to deploy there apps quickly without worrying about complex scripts or managing servers. There were lots of questions about Heroku, Postgres database on demand and other addons. It was great to see enthusiasm from developers wanting to make the most out of the cloud.
I also ran a workshop on Git, so everyone could put their code up on Github or deploy on Heroku. As Heroku uses Git for code deployments, then once you are comfortable with basics of Git, deploying in this way seems very natural.
@neilmiddleton also gave a workshop on the new Heroku API, allowing you to create apps, scale them and monitor them from your own applications.
The BBC, Nokia and lots of other sponsors also gave great talks and help with their APIs. The BBC had a whole bank of TVs available to hack real TV apps on.
Everyone pretty quickly got into teams to start hacking. There were physical hacks, api hacks, music hacks, TV hacks and some really bizzar hacks going on all through the weekend.
When not running workshops, I interrupted teams hacking away to find out what they were up to.
The Heroku team had a few spare minutes free to build an app too. Using the Heroku API, we built an app that would show a snippet of your logs when ever someone connected to one of your running apps, showing the location of the users IP on a map.
It was great to get so many teams sharing their amazing creations. The diversity of the crowd produced a feast for the eyes and ears. I’ve only captured a few of my own highlights in this post.
One of the apps I liked the most was the Event board for organiser by @EChesters as running developer events on the scale of Hacked is a big challenge. The Hacked team did very well, although having a good app to managing all aspects of an event in real time would help any team run a event more smoothly. I especially liked the real time alerts mobile app. Lets hope this team takes the app further.
There were many hardware hacks at the event, especially with node copters, micro node copters, nano node copters and copters controlled by Playstation Move controllers. My favourite amongst these was Wild thumper, a node copter that could follow a remote controlled car just by attaching a small ring of lights to the car, that was really cool. Arduino powered controller for remote controlled car, with Raspberry Pi camera driving the copter.
There were cute hacks like the Bunzor Cam by @danielknell, @mfujica, @motoko_k and fudge the rabbit, because there are just not enough cute bunnies on the web.
Other cute hack involved a knitted darlek and a chrome extension that changed any pictures on a web page to that of a cat… great fun if you do a Google image search for dogs and watch them all change to different cats!
It seems the Hue Light boxes from Philips caught a fair bit of attention. These were a 3 bulb array that you could connect to over WiFi or Ethernet and control the colours and sequencing of the lights. The most useful hack for me was the BusBulb. This hack tapped into Transport for London open data on transport and gave you a lighting countdown to when you needed to leave for your bus. This would save me a lot of checking of my phone for the time and save batter.
It was tough deciding on winners when there were so many great submissions to choose from. I spent time finding out what the teams were building as its hard to get a true picture just from the 90 second demo at the end.
There was one app that all the judges quickly agreed was the winner, FlashMed. This app was quite simple but provided a very important service, managing a medication regime for the elderly. Most elderly people have to take a range of medicines and these are all colour coded to help them. However its easy to forget the schedule you need to take. So the app connects to a Phillips Hue lightbox and displays the colour of the medication at the time you are supposed to take it. Once you have taken it then the light will switch off. If you fall asleep then the light shows which medications you need to catch up on. Simple and effective
The peoples choice went to the crazy kids who won two giant lego Starwars kits, the death star and millenium falcon. That should keep them busy next weekend.
@theNeomatrix369 created a wrapper around the Heroku API to help Java developers create cool applications easily with the Heroku API.
The API Unifier is a lightweight Java library that brings together a collection of RESTful APIs under one roof! This simplifies the use and maintenance of dependencies on external APIs. This library creates an abstraction layer between your application and APIs from disparate vendors to increase cohesion, reduce coupling.
MusicMatch is a social music competition where you need to guess the correct 10 second clip to build up points to get you up the leader board. The quicker you answer the more points you get, but get the answer wrong and you and you lose points.
The application was developed with Nodejs and uses Nokia music API to get the music tracks. Redis (Heroku addon) is used to manage the leader board and the app was deployed on Heroku.
This app is a really fun idea and adds a different dimension to the experience at an event. With Boomerang you take a picture and throw it out there and see what picture you get back in return. You never get your own picture back, so you get to experience a little of what everyone else at an event experiences.
The team built this as a native android application with a back-end service running on Heroku to manage which images you received. The app could also be passed to your friends or strangers at the event if they have a NFC enabled phone.
This app helps people develop their ideas and get thought the barriers to turn those ideas into apps. 99hours connects people with those ideas to those who can help them out. The goal is to create a highly collaborative place to nurture ideas into projects. This collaboration is realised in features such as feedback from the community on ideas by up-voting, or providing a variation on the kick-starter model and allowing direct donations to a project you want to support.
Tom Morris created an app called pidgeon as a kind of location brokarage service, a personal api for your location. Deployed on Heroku, this app has a simple API to post location information into forsquare to give real time updates of where you are. To display map information on the website, the hack was written using Rails and used MapBox, OpenStreetmap and MogoLab Heroku addon. Sometimes you want to hide your location, so the app also had rules to hide your location when you are at home or other personal locattions. To test the app, Tom also used Macosx controlPlane to simulate different networks.
It does take a few days for the adreneline and lack of sleep to balance themselves out after a Hackathon. Lucklly then there is a few weeks before Leeds Hack. Leeds hack is great, especially if you want to get your children involved in coding.
I’ll be at Hackference Birmingham next, the first event of its kind in Birmingham, so it should be a great event. I’ll be doing workshops around Heroku & Git and it seems there is lots of interest around Clojure, functional programming on the JVM.
Mike Elsmore - I cordially invite everyone who went to @HACKEDio to come to @hackferencebrum and help me make something awesome http://hackference.co.uk
Thank you.
@jr0cket
Git log is a very powerful tool for tracking all your changes, even across different branches and multiple repositories. However git log default output is verbose and not a great way to visualise the commit history.
Fortunately Git is very customisable, both for humans and tools. This article covers one way to creating your own customised output for git log that helps you work with branches and track changes through local and remote (eg. Github) repositories.
In a previous article I covered the different git log options that could be combined into a good visualisation:
git log --graph --decorate --relative-date --oneline
This is a very simple way to configure the log, but there is a lot more you can do to tweak this.
For any git output you can use the --pretty=format:
option to define your own visualisation of the information. There are some built in formats you can use with this option or with a bit of googling its not to hard to create your own specific layouts and colours.
Lets look at an example git log configuration:
git log --graph --date=relative --pretty=format:'%Cred%h%Creset -%C(yellow)%d%Creset %s %Cgreen(%cr)%Creset'
Show the git log graph with date relative times to the last commit made. Commit numbers are in red, branches and remote repositories are in yellow, commits in white and relative commit times in green.
Lets add commit author details to the configuration too:
git log --graph --date=relative --pretty=format:'%Cred%h%Creset -%C(yellow)%d%Creset %s %Cgreen(%cr) %C(bold blue)<%an>%Creset'
The author information is added to the end of each line in blue.
This example shows you the full history of your git log
git log --graph --full-history --all --color --date=short --pretty=format:'%Cred%x09%h %Creset%ad%Cblue%d %Creset %s %C(bold)(%an)%Creset'
A simpler git log in graph form
git log --graph --pretty=format:'%Cred%h%Creset - %C(yellow)%d%Creset %s %Cgreen%cr %C(cyan)[%aN]%Creset'
You can also create a simple commit graph by date, without showing the numbers. This is useful if you are just going off the branches or tags.
git log --graph --date=short --pretty=format:'%Cgreen%cd%Creset - %C(yellow)%d%Creset %s %C(cyan)[%aN]%Creset'
You can add these commands and many more to your git config file as aliases to save your typing them all out and having to remember them too. You can use git config or add them directly to your ~/.gitconfig
file as follows:
There is a complete guide to git formats and codes, however these are probably the main codes you need to know
output text in the colour colour-name
%Ccolour-name
reset the output text colour
%Creset
commit number / hash (in short form due to the --abbrev-commit
option)
%h
repository (–decorate)
%d
commit message
%s
time stamp / commit relative
%cr
author / account name
%an
Since git version 1.7.6, git config has gained a log.abbrevCommit
option which always abreviate commit numbers in any git output.
git config --global log.abbrevCommit true
If you are using the --oneline
option on git log, then the commit number is abreviated regardless of this setting.
Have fun configuring your git log as if you use git on the command line you will be working with the log quite often. However, dont spend all your time tweaking the format of the log, you still need to write some code for your apps :)
Thank you.
@jr0cket
Its not often you get a chance to make a difference the way people live their lives. As my role of judge at the recent Accessibility hackathon by Barclays I met lots of teams spending their weekend doing just that.
The hackathon started with an amazing set of stories from the charities involved. These stories gave the teams a great insight into the challenges people in these communities faced. The presence of the the accessibility community through the hackathon helped teams stay focused and create relevant apps that would make a significant difference.
With all the great ideas generated by the teams taking part, it made the judging quite tough. Although not as tough as hacking an app together in less that one weekend :)
At the end of the hackathon, each team had 3 minutes to present there app, which is really no time at all. However, as a judge I had been going round the teams over the weekend to get to know them and find out what they were doing. This also gave me insight into how they had progress over the weekend. One of the things we were looking for was if the team could carry on developing there apps afterwards, so their capability and cohesiveness played a factor in our final decision.
It was vital to have members of the accessibility community on the judging panel to be able to judge the impact of each app presented. There were several judges who had physical challenges who related closely to the value of each teams app.
With 19 teams to choose from, the judges had a challenge on their hands to come up with 3 winners. At one point we asked if there could be a couple more prizes. The apps that really stood out for me though were:
What follows is a summary of what I thought of some of the apps presents.
I really liked the concept this team opened wiht “We have all experienced sound loss”, it helped make the project very relevant. Also the way the team got everyone to stand up and clap to simulate the experience was very striking.
The project itself was great. Having a smart phone as a hearing aid takes away some of the stigma around the hearing impaired. Although phones can cancel out background noise in phone calls, this Android application can eat the sounds that you don’t need. As the app cancels out the background noise in near real time, you can then listen to only that which is valuable, based on filters defined for different types of hearing loss. The team had already created a number of options to help you find out the best sounds based on a persons hearing ability and situation.
This was a very striking project and is high on the list as it also has implications for a wider audience, not just those with hearing loss. As the app was available on the Android Play store in about an hour after they presented, the project seemed very sustainable.
This team only came together at the hackathon and found a vision inspired from talks given by the charities. There vision was simple and very relevant to the theme of the hackathon. Photos are everywhere and people love to share them with family and friends. However, its not possible to share photos in an easy way with those who are visually impaired
Their app, Visual Eyes, returns a meningful description of any picture provided. I liked that the team used random images from Facebook as they are representative of the images people share. As the images were random, then you saw how credible the software was at describing the images. I was very struck how detailed the descriptions could be, including if people were wearing sunglasses!
This app was very impressive and therefore high on my list due to the detail of description of each picture. The team had already integrated it their app with Facebook and there were many other integration possibilities. I was very confident this team would carry on developing their app.
The team were looking to open source the whole processing so that costs from 3rd party services are taken out of the process. The team are also considering the use of tags to help make the description even more relevant.
This app stood out immediately. The ability to record your favourite journeys and play them back to help you find your way seemed like a real win for those with vision issues. It would give those people a lot more confidence when they are navigate to their favourite places.
This app could also be useful for a wider audience, for example to help navigate to a place in a new location or a foreign country.
This app really stood out when the final part of the app was shown, the assisted guidance for the last few meters. To be able to call someone who can direct you using the camera on your mobile device and be guided in real time was a great idea. It can be a challenge finding entrances and then navigating steps and doors, so this is a great way to deal with that issue too.
The app uses existing phone technologies and WebRTC so the team seemed to have a fully working app come time for the demo.
The team had an eye on future features, such as pre-program points of interest (Banks, restaurants). This demonstrated that they are willing to take this app further.
The team created a way of helping those with physical challenges to interact with HTML5 based apps, especially games. The team created different modes and controls to help users find the best way of interacting.
I liked that the team had simulated using their app using a device that restricted movements in the hand and what they produced looked quite effective.
This team also had future plans for their apps, including integrating voice recognition, so it seems that they will carry on with their development efforts.
The team develop a real time transcription of conversations taking place, aimed at those with hearing disabilities. They had tried to get hold of some Google Class equipment so that they could have had real time sub-titles when talking to other people.
The team instead created a simple and clean mobile app, allowing you to open up a “channel” in which two or more people could talk and the text of their conversation would be displayed in a similar form to modern text apps.
The team did a great demo, although there was some doubt about how effective this would be if there was background noise. The team seemed keen to keep on with the development if they got positive feedback, so if they can also include filtering of the background noise I believe they have a valuable app.
I appreciated that the team invested time in the experience of being blind and accessing the web. That they discussed ideas with the people from RNIB helped them identify a real need, that the key desire people had was to go faster. Screen readers linearised the experiences when people acutally wanted a content driven experiences
The app had a very simple user interface, press a key and say a word. You are then sent to a link that matches that word. This is acceptable for websites your are familiar with.
For other sites you don’t know well, then its used like a search that returns the links at the start of the page so you don’t have to go hunting for them.
As their app works as a browser extension, then it works for all web sites without specific configuration.
It was great that the team have considered future functionality, like related terms and filtering search criteria. I can see this app being quite useful to many.
The team had a great presentation and I really appreciated the use of using Alice as a persona to help us understand who the audience was the were trying to reach.
The concern they were talking was memmory loss which affects a great number of people. Without a good memory your experiences from a human perspective is about having your independence.
The team continued to tell the story around the persona. Alice does not always eat properly, because she forgets if she hasnt eaten. The app the team developed reminds Alice of key meals, helps her select from different meals and talks her through the making of the meal she has selected. The meals can be put together by family members, doctors or nutritionist, to give more diversity to Alice’s diet.
Although this was a great concept, I felt that the team had not developed the application far enough in the time they had. There were unanswered questions and I hope that the team are able to get more of the app developed.
The team chose a really powerful sounding topic, remenicance therapy. This was a great technique for helping family and friends to engage with those with dementia By creating a wide range of media to form a collection that would trigger memories about events and people, it would help those with the condition feel more positive and help them relive experiences.
The challenge was to create something that would easily create this experience and be significant improvement on the basic photo collections you can do with many online services. The app would need to help the supporting family members create these collections easily and relate them to specific memory categories. An app would also need to help the family members by relating images to each other automatically, I guess in the same way that Amazon relates other products.
The sole developer on this personally driven project - his grandmother has difficulties with her hands and finds interaction with computing devices almost impossible. However, she has a very active mind and the developer wanted a way to help her engage with the Internet which most of us take for granted.
The project was quite simple, more like a proof of concept as no real substantial application was created. The developer used an open source project and a Chrome extension to support the leap motion device. Whilst this is a great device, I was looking for something specific to be built from this concept.
Although this was a enthusiastic developer that may create some good ideas, he didnt really create much of an app to realise this concept.
I liked the idea of improve accessibility of other apps by identifying libraries that apps that are used, then sending in patches to make them have accessibility features. This was a great effort by one developer, although if its only one developer I was not sure on the impact. This wasnt an app that made it easier for people to improve libraries or even encourage other developers to get involved.
Its a very worthwhile effort on this sole developers behalf. I would have like to have seen something that would help lots of other developers do the same thing.
Thank you.
@jr0cket
Outdated: please disregard this article as it is out of date. I install node in my local filespace on Ubuntu now as its so much easier to manage. Basicaly I download the Linux binaries and put them in ~/apps/nodejs/current, then add ~/apps/nodejs/current/bin to my path using my shell profile (~/.profile). This makes using npm -g really easy and does not require the sudo command.
nodejs is a very popular framework for JavaScript development, but as I found out at the MongoDB hackathon its not that straight forward to get going. So here is a quick guide to get going with Node.js on Ubuntu.
Whilst there is a nodejs package in Ubuntu, it is version 0.6.9 and therefore quite a way behind the current version on the nodejs website. So lets do a manual install with the latest version, 0.10.1.
I since found an alternative approach using ppa’s but haven’t tried it out.
Download the install archive file and extract it. I chose to do this in a folder called apps in my home folder. Alternatively you could install it in /opt/
or /usr/local
mkdir ~/apps/nodejstar zvxf node-v0.10.1.tar.gz
As we are doing a manual install, we need to build nodejs to get the actual executable files. This requires a C compiler on your laptop which is not installed by default. So either use the Ubuntu software center to install the package g++
or use the command line
sudo apt-get install g++
To compile nodejs, first we run configuration to check all the neccessary external libraries are there and then we make node:
./configuremake
Add the following to your environment in your ~/.bashrc
file (or .zshrc
file if you are running zshell). I moved the node executable file created by the compile process into a folder called bin, so I knew which was the right file to run. Then I added that folder to the path.
export NODEJS_HOME=/home/jr0cket/apps/nodejs/binexport PATH=$PATH:$NODEJS_HOME
I am using an environment variable called NODEJS_HOME as a convienience. You can just add the whole path in one line.
The node package manager is a great way to get additional libraries into your node projects. It does not come with node itself, so you have to install it seperately. Npm also needs node installed first.
On the node package manager website, the install process is defined as the following command:
curl https://npmjs.org/install.sh | sh
In my manual install (not using Ubuntu packages) then node and npm are created in different folders. So I put the npm executable file in the same bin folder I created previously for node, which I had already added that to the executable path.
Once npm is installed you can search for and install packages. If you the -g
option for npm install then the modules will be installed globally, otherwise any modules will be local to your project in an npm-modules folder.
Search for modules:
npm search mongodb native
Install modules locally or globally:
npm install mongodbnpm install -g mongodb
You can run an interactive session for nodejs (the node REPL) using the command:
node
Then you can just enter JavaScript code and it is evaluated immediately. You can also run code in files by using the command:
node filename.js
So lets create a simple “Hello World” app for nodejs in a file called web.js
1 | var express = require('express'); |
Running this with node web.js
we get “Hello World” as the output.
nodejs is one of the languages supported on Heroku (a cloud service that gives developers a sane way to deploy and scale their apps). Deploying this nodejs app on Heroku is therefore really trivial.
Heroku can usually work out what to do with many projects, based on the language and framework used. However, just to be specific lets create a Procfile
to tell node which is our entry point to our application. In this case we want node to start with the file web.js
web: node web.js
Lets version the project with git
git initgit add .git commit -m "Initial project setup"
Then we can create an app on Heroku that we can deploy too - you will need an Heroku account and download the Heroku toolbelt.
heroku create
Heroku adds a new remote to our git project called heroku, so we can push our code to our app.
Now that our project is ready to deploy, lets push all the code to the heroku application you created using git push, specifying the branch you are pushing (usually master
)
git push heroku master
Now open the node website in a browser using the URL given after the upload of your code via git push, or just the command
heroku open
There is a nice article about nodejs on heroku with examples of wiring node up to various data sources too.
Now for the fun part, learning how to program in nodejs and seeing how much JavaScript I can remember. Here are some resource I found in the few hours I spent trying to learn about nodejs.
David Crockford has lots of great resources to help you write great JavaScript:
Good luck with your JavaScript and node projects.
Thank you.
@jr0cket
I took Dale’s project for a test flight and here are my experiences!
I am using Ubuntu 12.10 and FlightGear is in the software center, so its easy to add it. Be aware that the file is 635MB in size (1.3GB once installed), so you need a decent Internet connection and a fair bit of space.
You can of course use apt-get
on the command line too:
sudo apt-get install flightgear
Whilst there are GUI tools to run FlightGear, I just went for the command line. Following Dale’s guide, I ran the emulator with a specific Telnet port. I am assuming this is what the library uses to communicate with.
Now you should see a plane cockpit, ready and waiting for you to jump into the controls.
I created a basic Clojure project using Leingen, of course.
lein new my-flight
Editing the my-flight/project.clj
project file, I added a dependency on Dale’s flightgear project
1 | :dependencies [[org.clojars.dalethatcher/flightgear "0.1.0-SNAPSHOT"]] |
The project file should look like this:
You may have a newer version of Clojure than in the above example.
I could write a few Clojure functions to control the airplane, but I dont know how responsive it will be. So instead I fired up the REPL, connected to the flight simulator over the telnet port and started issuing command.
Much more fun and much faster feedback.
1 | (use 'flightgear.api) |
It works. I am controlling the plane and am trundling off down the runway.
I am assuming this control interface mimics what you have to do in the simulator, as otherwise I’d have prefered the starter motor to turn itself off. I know very little about flying planes.
All this has been fairly easy so far. Well easy compared to actually being able to fly the plane without crashing after 30 seconds.
Using the Clojure REPL I can issue commands to tweak the flight of the plane, adusting thrust, flaps, etc. As its a single propeller plane, it tends to vere about a bit, so needs constant input to keep it flying.
I think the best chance of flying this plane is to write a Clojure program to do it for me. Luckily, Dale’s project included Telemetry information such as position, velocity and orientation.
Its going to be great fun learning to fly and I havent even looked at the game options such as weather (I may turn all that off at first!).
The FlightGear game and Dale’s Clojure project should give me hours of fun (assuming I can find the time).
Thank you.
@jr0cket
Thank you.
@JR0cket
There are a few little tweaks that I find make using http://www.ubuntu.com desktop just that little bit nicer. The easiest way I have found to make these changes is using Ubuntu Tweak.
The easiest way is to go to the Ubuntu Tweak website and click on the Download Now button. This asks you to save a .deb file. Double clicking on this .deb file opens the Ubuntu software center and lets you install the software and any depenencies.
Having used a MacBook Pro for work for the last 6 months I got used to the reversed way of scrolling, introduced to make desktops scroll like tablets. After a few weeks I grew to like this “reversed” scrolling so wanted it for the new laptop.
In the next version of Ubuntu, 13.04, this reversed scrolling is called Natural Scrolling. For Ubuntu 12.04 it can be switched on using Ubuntu Tweak in the section Tweaks > Accessories
I usually like to have one application running per desktop and often have quite a few apps running at any one time. Whilst Ubuntu has 4 virtual desktops by default, I prefer to go one level bigger and have 9. Again this is easily done with Ubuntu Tweak in section Tweaks > Workspaces.
With nine virtual desktops I can now get going with some coding, once I have set up my development environments. That will be in the next post.
Thank you.
@jr0cket
So I bought the Lenovo X1 Carbon for development and an important part of that is having some good tunes to listen too. As I also travel a lot, its also useful to have a good display for movies and screen-casts.
Well, the X1 Carbon give great results in both sound and vision.
Ubuntu comes with Rythmbox music player and manager installed by default, so all it took to test the sound was to copy over some mp3 and flac audio files.
When installing Ubuntu, I selected the option to install the software needed to play proprietary music formats like mp3
The sound came through brilliantly through stereo speakers located near the front of each side of the laptop. There are two thin slits that let produce great sound without letting any dirt in.
As noted in my first post on the X1 Carbon, the volume controls work just fine in Ubuntu (although the mic mute button does not work).
To test the playback I fired up YouTube and played some HD def music videos. I have been enjoying Lindsey Sterling the last few months, so I fired up a few of her videos. There is a great one where she is in a man made giant ice structure.
The video playback is just as great as the sound and not sign of jumping even with High Definition video.
A screen grab of Lindsey Sterling, Crystallize from her YouTube channel. The screen-shot doesn’t really do the actual video playback justice. Even on farily low brightness, the display really shows off the quality of the screen.
With a matt screen in widescreen format and IPS giving lots of brightness, the Lenovo X1 Carbon will be a a great portal movie player on long trips.
Finally I tested my Logitech gaming headset and Ubuntu detected them correctly and they show up in the Sound settings.
More adventures with Ubuntu on Lenovo in future posts.
Thank you.
@jr0cket
I have a lovely new Lenovo X1 Carbon and to make it even better I am installing Ubuntu. The installation should be a breeze as Lenovo laptops are usually well supported, the only thing I configured was in the BIOS. I wanted to check the boot order and see what the boot menu key was so I could install Ubuntu from a USB memory stick (boot menu key is F12).
Pressing the little “Thinkpad” button next to the volume controls whist the laptop is first booting gives you an option to go into the bios.
Once the BIOS control panel had loaded up, In the overview section I noticed that Secure Boot was enabled. So I looked through all the sections and found an option to turn it off. I also changed the boot order so that USB memory sticks can be used to boot from. Saving the changes rebooted the machine and I pressed F12 on restart to select the USB stick I had created for the Ubuntu installation.
Apart from thinking of a good name for my new laptop, the install was really easy. I decided to use the whole hard drive (SSD) space for Ubuntu and ditch windows 8 completely. There were 3 recovery partitions that come with the laptop if I wanted to keep windows for a later date. I did not.
Disk partition information from: sudo cfdisk
I decided to encrypt the whole laptop and this works really well. For the rare occasion I shut down or restart the laptop, I get prompted as Ubuntu starts up to enter the password to unlock the encrypt drive.
I also decided to install Logical Volume Managment (LVM), just in case I needed to play around with the partition sizes. As I have a 180GB SSD hard drive, I probably wont need to but it should not add a noticeable overhead.
One thing that is missing is a swap partition, but the only upshot of this on a laptop with 8GB is that hibernate has knowhere to write to, so its currently disabled. I’ll probably manually partition the laptop when Ubuntu 13.04 comes out (25th April).
To finish off the install I just chose a name for the laptop and the usual username/password and everything was done in less than 30 minutes. I didn’t need to do anything to boot into the installed version of Ubuntu.
Next I’ll check out how well sound and video works.
Thank you.
@jr0cket
After a bit of research on the level of http://www.ubuntu.com support, I decided to get a Lenovo X1 Carbon for my new development machine.
If you have never seen the X1 Carbon, its like a really special edition of a Mac Book Air, except much more awesome and more powerful. Here are my impressions so far.
The things I value the most are:
The most important thing is that it runs http://www.ubuntu.com and it runs Ubuntu very fast!!
I have not found anything that does not work as yet (although its only been 2 hours).
WiFi network - this worked without any problems (even after suspend). I did pick up a USB ethernet connector just in case, but have not needed that as yet. The WiFi is very fast, especially when connected to a 5GHz network. The WiFi also works with 2.5GHz networks too.
Back-light keyboard - use Fn + Space
keys to cycle through 2 different levels of brightness and off. Unlike the Mac, there is no low-light level detector, but I can provide that service myself :)
Display brightness - use Fn + F8 / F9
to change the brightness of the screen and there is a decent stepping range of brightness.
Volume level & sound mute - these buttons all work, although the microphone mute button does not seem to work.
Suspend on closing the laptop lid works just fine and the WiFi network came back along with everything else when opening the lid. The Ubuntu installer does not create a swap space by default (or this may be because I selected an encrypted disk partition), so hibernate does not work at present.
Lock Screen button Fn + F3
works just fine and is a quick way to put the screen to sleep.
External monitor also tested okay. I plugged in a Dell 24” monitor using the Display Port to VGA adaptor (additional purchase) and got the full 1920 x 1200 output. The Lenovo display can also run its display of 1600x900 at the same time and I notice no loss of responsiveness in either display.
Web Camera works very well and I tested it out via a Google hangout with myself.
The Lenovo X1 Carbon laptop is a pretty impressive piece of kit on paper. I was excite when I was reading about it and worried it would not live up to the hype.
I didn’t have to worry. From the moment I pulled it out of the box it has been a joy. I still cant believe how light it is, it feels half the weight of any laptop I’ve ever held. Despite the light weight, it feels very robust and seems like it will last a long time.
Using the laptop is a joy, mainly down to the keyboard. Its a full size keyboard and has the keys laid out in there correct places. I dont have to go hunting for the @ ~ |
and #
keys.
Battery life seems pretty good. I have been writing this article on an off over the last 4 an a bit hours. There is still an hour and a half left on the battery indicator. Admittedly I haven’t run any websites running flash or played any games, but I am pretty sure I can last all day at a conference using WiFi. I will test out the 30 minute quick charge over the next few days.
Update: The Lenovo X1 Carbon charges up really quickly, easily charging to over 80% capacity in 30 minutes and full charge in about 45 minutes.
Compared to the Mac Book Pro I was given via the company I work for, the Lenovo X1 Carbon wins on every count.
In the next few blogs I’ll cover setting up this great laptop to be an awesome development machine.
Thank you.
@jr0cket
When 100 developers and 1 robot signed up for the February edition of Hack the Tower, across many technical communities in London, I could tell it was going to be a big event.
Heading out for a full day of coding @HackTheTower - excited about what people will create today #LSDC #LondonScala #LJCjug #LdnClj #robots
Developers arrived from different communities, including
@sandromancuso Yeah our little team is awesome, I believe we’re the last ones still coding :) @HackTheTower idea is great, I truly enjoy it!
Hack the tower is an open space where developers can collaborate on projects.
As the host I encourage people to form groups along share interests or goals, so they can learn things from each other and lean on each others experiences. To that end, I ask anyone with a project or idea to share it at the start and encourage people to join one of these projets. Most people had some idea of what they wanted to work on, although quite a few changed their minds when they heard about the robot project.
I spent part of the day working on Clojure projects, including setting up Clojure on Windows 8 (not known as great developer platform). I also helped people get to grips with git and managing multiple repositories as well as a guidance on using Heroku and MongoDB for the London Scala website project.
Much of what we do at Hack the Tower is powered by cloud services for developers. Without tools like Github, Heroku and Google search, coding applications would be so much harder.
We got a brief reminder of this when we broke Github :)
…and github is down for maintenance!!! :O @HackTheTower #LondonScala
Luckily Github was not down for long. As git is distributed, we were able to save our changes locally or topped up on Coffee whist we waited a few minutes for Github to come back.
Everyone’s instant favourite project seemed to be the NVO robot. Its an amazing piece of kit. Essentially a programmable robot that can by default can play Japanese music and do Tai Chi.
You can program the robot visually, by dragging and dropping actions and wiring them up together. You can create a sequence of positions and get the software to work out the moves necessary to go from one position to another. Just like digital animators use in software like blender.
You can drill down into each of these actions and program the robot in python or several other languages.
Many thanks to @jr0cket for organising @HackTheTower today! Introduced a bunch of developers to #NAORobot, learnt stuff and had fun too
The robot has stereoscopic cameras and can do face recognition, in that it recognises a face when it is in front of it. This means the robot will talk to you when you when it looks at you, although it cant tell one face from another by default. The robot has pressure sensors and fingers so it can interact with its environment.
There were a lot of developers from LSug group and they ended up split into three smaller groups to focus on different problems.
Some of the team were working with MongoDB, some working on the RSVP via meetup. All the events displayed on the Lsug website can now be joined directly, without having to visit the meetup site. Perhaps the total number of Yes RSVP’s can be added to each meetup?
@villademor Experimenting with codingboard.org, #Scala on @HackTheTower #LondonScala with @balopat, @gnorsilva among others!
Coding Board is a small web application allowing developers to share code with each other in a hands-on session. When we want to talk about the decisions we took as we approached a problem, its nice to have the code itself shared on the screen in a syntax highlighted way.
Balint Pato started this project as a Christmas gift for the London Software Craftsmanship Community using:
The project is under an open source license and the code is available on Github for you to clone and fork.
we went live: Syntax highlighting on edit, max 24 hours long boards, loads of small fixes, altogether 10 pull requests! @HackTheTower #LondonScala
Read a blog of the days events for this project from Balint Pato himself.
Two of us helped out a developer relatively new to Clojure, although they did have some past experience with Lisp. We helped them get ther environment set up, which was a bit more of a challenge as the were running Windows 8.
Luckily its still fairly easy to set up a working Clojure environment on Windows, although just about every command seemed to ask for the Administrators password! On the Leiningen website, there is reference to a 3rd party bat file for getting going with windows. The problem with this bat file is that its dependant on either wget or curl, neither of which were available on this machine.
We got round the problem by manually doing what the leiningen bat file did, downloading the .jar file and putting it in ~/.lein/self-install/…jar
A problem still remand with running lein. The version in the .bat file was different from the ..jar file, so lein attempted to use and download a different version, which it couldnt find. As we didnt have curl or wget to download the version in the bat file, we simply changed the bat file manually.
Some other aspects to setting up Clojure on windows 8 included:
Another team formed around the Salesforce platform. The were developing a tool to extract data from charity sites like Virgin Just Giving, helping fund raising organisations improve their fund-raising capabilities and getting a better view on where funds were coming from.
The data captured is filtered for the valuable data and the tool would allow you to match the incoming data with existing information you have.
The project is open source and available on Github.
A team was also working on Java and some of the technical activity around the Java Community Process (JCP). The JCP is a way for others to help shape the future of the Java language and define the specifications for the language.
I did wonder at one point if we would still be here coding through Sunday as there were teams coding well into the evening. By about 6pm everyone had got headed off into the beautiful London night.
villademor @sandromancuso @HackTheTower @balopat @gnorsilva we really had a good time Sandro! Shame we couldn’t catch up with you!
sandromancuso @villademor Seems you guys are having loads of fun. Shame I could not make it. /cc @HackTheTower @balopat @gnorsilva
Come along and join the fun. If you are a developer who likes to learn and share experiences with others, then all you need is a laptop and some enthusiasm (laptop optional).
Sign up at either:
Thank you.
@jr0cket
Leiningen is a project automation tool (think build tool and them some) that uses a Clojure macro to make it easy for Clojure developers to manage their project lifecycle.
A Clojure project managed by Leiningen uses a simple clojure file called project.clj
which allows developers to define a whole range of stuff about their projects. To get started you only have to define a name, a version of Clojure and any dependencies in your project.clj
and Leininge does the rest.
So lets take a quick look under the hood of Leiningen and its defproject macro to see what is going on.
The defproject macro when run creates a simple map of your project to work with. Here is an example map for my project, generated by the command
lein pprint project.clj
If you add something to your project.clj
file and wonder what is has changed underneath, then looking at the project map is very useful.
Using the project map to understand what dependencies you have pulled in could be a great way to streamline your project, or help debug it if something when wrong after adding a new dependency.
Leiningen also merges your profile configuration ~/.lein/profiles.clj
along with your project.clj
settings when creating the project map. This can be seen in the above example. Near the end of the file is a :plugins keyword
, the following 3 lines are plugins I defined in my profile. Leiningen will work out the smartest way to merge your profile.clj
and project.clj
. If in doubt, you can check the project map.
Here is the source code for the defproject
macro:
1 | (defmacro defproject |
You can also see the source code of the defproject macro in context of the Leingingen project at its Github repository.
Thank you.
@jr0cket
Its easy to create a new repository on Github website and then use your git tool or command line to clone it or add that remote repository to your project on your development machine. It would be even easier if you could just do it all from the command line with one command. Well, if you install Hub then you can!
Its easy to install hub as its essentially a compiled Ruby script that used your git client to do a lot of the work for it. If you are using homebrew on Mac OSX then you can run:
brew install hub
I havent got round to using homebrew yet, so I just installed hub in my home binaries directory:
curl http://defunkt.io/hub/standalone -sLo ~/bin/hub
Then I just make hub executable and I am good to go
I could alias hub as the git command as suggested by the hub website, however I want to see the advantages of hub before I fully commit to it.
In this example I am putting my configuration files onto Github (because after I installed rvm it started rewriting things) so I can manage them better and share them with others.
As usual, I start by creating a local repository for my project files. This case I am in the home directory.
To start with I am just going to add my global git configuration files to the repository. I’ll add more later.
Using git status
I can see I have the desired files ready to be committed. So lets commit them to my local repository with a suitably clear message.
Now my git global configuration files are committed locally, so if they change I will be able to compare then to what is in git.
So far I haven’t needed to use Hub, but now I want to share these configuration files via Github. I could go onto the website and then come back to the command line and add a remote for the Github repository I just added. Using hub, I can just stay in the command line.
Using hub create command I can create a repository on Github, specifying the name of the repository and using the -d option I can also include a description
A repository on Github has been created and the remote address was automatically added to my local git project. Yay!
To make absolutely sure just this first time, I have a quick look on the Github website and sure enough there is my new repository.
Okay, so now I have a shiny new repo on github, its time to push my changes to it from my local repository. Again, we are back to just using git commands.
To check everything is up to date on both the local and remote repositories, I do a quick git log and see (thanks to my git log customisations) that the remote repository (origin/master) is at the same commit version as my local repository (master).
There is a lot more to hub that I will try out, but the most immediate use is to be able to create a Github repository without having to switch from the command line.
Thank you.
@jr0cket
Lots of developers are using git, especially when working on projects together. However there is not one single developer tool that every one uses, so there is potential for a lot of unwanted files to end up in your project.
Rather than pollute the .gitignore file for the project with every development tool under the sun, its much more effective to add development tool specific files to your own global ignore file ~/.gitignore_global
.
In the ~/.gitconfig
of my home directory I have a section called [core]
where a global excludes file is defined
[core] excludesfile = /Users/jstevenson/.gitignore_global</span>
By adding file name patters to the .gitignore_global
file for Emacs, I can add my own personal excludes without adding unnecessary stuff to each project I work on. It also means its one less thing to remember when I am working with git projects.
In the root of your home directory, simple create or update the file .gitignore_global
with all the file names and patterns that relate to the tools you use.
To help you out, here are some ignore patterns for some of the most common developer tools. There are lots of ignore patterns on the Git Ignore github repository
I use Emacs for much of my development projects, so here are some ignore patters I add to my .gitignore_global
file
1 | *~ |
I also create a lot of developer content using Emacs Org-mode, so here are the ignore patterns I add for this.
1 | .org-id-locations |
.*.s[a-w][a-z]
1 | *.iml |
1 | nbproject/private/ |
Thank you.
@jr0cket
Monki Gras conference has only just had its second outing and already its become a bit of a legend. Its one of those conferences that is highly social and highly stimulating and also quite exhausting in a good way. Here is some of the excitmemet I managed to capture.
Amazingly this years event only started half an hour late and was even bigger than last year. Here are some highlights from the 2013 event.
In the passed, companies turned to mass production to optimise for productivity and by consequence turned people who work in that environment into faceless drones.
What we need are tools and practices that support people rather than replace people.
As developers we have a thirst for learning how to use our tools well and how to adopt and adapt a variety of practices to improve our work. This is now starting to become wide-spread across many other industries.
Craig Kerstiens & Matt Thompson - Heroku
Some revellers enjoyed a rather liquid breakfast, for those that felt it was just a little too early for beer then it was coffee time with Heroku.
Matt and Craig Kerstiens talked about how the team at Heroku, the Herokai, manage to maintain the collaboration within a growing startup.
Heroku now has 85 people, loosely organised into 21 teams. Overall the company manages 5000 internal heroku apps and schedules 500 releases a day. Much of the code is available in close to 200 public Github repos.
As a developer you spend a lot of time with your head down working and that limits your level of communicating. A good balance is important for a healthy company. Communication however is different from interruption and its well agreed fact that one interruption costs 20 minutes. What is less well understood is that a developer gets typically 2 hours of uninterrupted working in an 8 hour day.
Actually, its very hard to make a single cup of coffee at the Heroku office. All the coffee making machines are geared up for several cups. So you have to find someone to share coffee with you and you end up having a conversation as you are waiting.
Making Coffee in this way is also a great way break the ice. Its easy to learn and as a simple craft you can show new people how to make coffee as a way of introduction to the company. The Coffee mentioning role gives a way to demonstrate and convey some of the values of the company at the same time.
Its an unwritten rule in Heroku that when someone has their headphones on it means “Do not disturb”. This allows developers to focus on their work without haviing to justify that focus to anyone else.
In Heroku this approch is seen as an engineers thing and sometimes others in the company dont get it at first.
Every Thursday is sacred at Heroku and no meetings should be scheduled. This allows engineers to easy to turn down a meeting on makers day without feeling awkward.
On Wednesdays Heroku have their all hands day right after lunch. Because of this interuption, engineers typically arrange all their meetings that day. This makes the rest of the week pretty effective for getting things done. It also encourages others to think about the value of a meeting.
sjmaple Great heroku talk! At ZeroTurnaround you’re not allowed to book meetings on Wednesday or Thursday! productivity++ #monkigras
Sometimes the best conversations happen at random, so lunch is catered every day. As well as a great perk it also is very communal. The dining area has a few long tables for about 12 people, helping group discussions. The eclectic variety of food make people more willing to communicate, often asking “how do we eat this”.
Friday is beer day. This is more than just drinking beer, Herokai are encouraged to suggest drinks that should be ordered. Its also a great way to get everyone reflect on the week just gone.
There is an increasing number of remote employees and maintaining regular communication is tough.
There is also the effect of the Allen curve, which shows the exponential drop in freqnuecy of communication between engineers as the distance between them grows.
To help everyone understand the challenges and crowd source for ideas, Heroku hold a remote week where their office is closed. Everyone in the company works remotely, from home, on the road or out and about in their location.
This type of activity could also help with focusing on common tools and service consolidation. As each team has ownership of their own practices, then tools and services have exponentially spread. Some concensus and culling of stuff would be help communication.
Mazz Mosley & Nick Stenning - GDS
Imaging you are a craftsman with years of experience, what would happen if all of the people you dealt with were gone? Could you imaging the emmense chain of resorces that allow you to practice your craft?
I think I can safely say that nobody understands quantum mechanics - Richard P. Feynman_. There are very few people who claim to understand quantum physics, although every JavaScript programmer fundamentally relies on the principles of quantum mechanics. Rather than make JavaScript developer spend years studying quantum physics they use black box abstraction.
We have relationships with people who can do all the things we need to do our almost everything we use is an abstraction that allows us to use it effectively rather than trying to understand how its made. The exception being soap which is a harder abstraction than the process it is supposed to encapsulate.
Or in my words “Developers are people too” @jr0cket
You should understand the complexity that you pass on to your users, especially if you want to keep them!
kenneth reitz the user api is all that matters everything else is secondary
In 12 weeks, a dozen people built alpha.gov.uk website from scratch to deployment and much rejoycing was had by all.
In 8 months, a team of 48 people built the beta version of the website. In october 2012, the real site was launched using a team of 200 people.
So how did they scale the team in a short amount of time?
No rockstar, wizzards or ninjas were hired. These types of developer egos all seem to drink from the ego boosting cool aid, making the same kind of mistakes as they have the same kind of attitude. Rockstars are bullsh*t, Rockstars are not webscale!. Rockstars are not used to listening to there users and that includes those other developers they work with every day. A good team needs diverse set of people, to create a passionate team.
Assembling a team is a skill in its own right.
At GDS it was about hiring people who understood what the company was trying to achieve. When something is hard and not very well defined the best way to deal with this is to give it to people, lots of diverse people who understand the goal you are working towards and have a diverse set of experiences to draw from.
On paper, going from alpha to beta to production in such a short time frame you need to leave your ego at the door to get stuff done
Mazz, Uncle Bob & Stan Lee: With great diversity comes great collective intelligence and power!
Ted Nyman - Github
Why do you love someone? If you love someone for intelligence or bone structure, then you should also love people who have even nicer examples of these things.
Perks do not make people happy, they come and go and you cant build culture with tokens. Token freedom perks are transitory and eventually make you wonder why a positive thing is only available a small part of the time. If your company said you could go out in the sun for two hours once a month then you have to come inside. You would quickly come to realise that going back inside is not where you want to be.
The real way you make people happy is in the organisation of the people in the company. At Github there are no formal managers. Cultural and technology adaptations grow naturally from this. For example, everyone becomes part of the traditional management functions and that role becomes dispersed. Everyone becomes responsible from hiring and ensuring people are happy.
If you create the structure that lets the culture form, then a culture grows to reinforces that structure. The structure at Github being that we dont have a structure. Everything that people need taken care of get taken care of as otherwise people complain. Sometimes this means people doing things for themselves, or collaborating with others to get it done.
There are probably good managers out there, Ted just cant thing of any, well except for Julius Caesar, he was a good manager!
The challenge remaining is that nothing actually scales, this is especially true when it comes to people.
There is so much more to Monki Gras that what I managed to capture here (or would care to share in public). The conference is really engaging and it will take a while for all the ideas and practices I experienced to peculate through my brain.
The evening event was amazing too, with fine food arranged to match the Craft brewed beer we were sampling. Its a good job the conference ends on Fridays, so I could recover over the weekend.
Thank you.
]]>Git is a great developer tool for managing and sharing code. Its really easy to get started with, especially with services such as Github and their excellent try.github.com website. I quickly became comfortable with the basic developer cycle:
git initgit status git add filenamegit commit -m "useful message"git push;; back to git status...
To keep track of changes when you just have a local repository is easy with git status
.
When you start sharing a remote repository then changes are distributed and developers start using git log
to track changes across repositories. The challenge with git log
is that by default you have to scroll through a lot of text to see what is happening. This gets a bit tedious really quickly.
Luckily, the git log
output is very configurable so its really easy to get a clearer picture. The most useful options to git log include
--abbrev-commit
- only shows the last part of the very long commit name, the sha. This is now a default option since Git 1.7.x
--graph
- show an ascii art graph of the commit history, also known as the commit graph.
--pretty=oneline
or --oneline
- print each commit entry on a sigle line, which can be scrolled horizontally to see longer commit messages. The one-line value is one of several built in formats to the –pretty option and in this case can be used as an option on its own.
--decorate
- shows the forks, branches and tag names relative to the commit history, helping you keep track of latest commit on each branch and across all your remote repositories. Decorate therefore provides a quick way to see which commits have been merged or pushed.
Putting all these options together you get a much simpler and easier to follow view of the commit history.
Rather than type git log and all these options each time (or scroll through your shell history), you can create a git alias as a shortcut for this long command line
I create an alias called lg
for git log as follows:
git config --global alias.lg 'log --graph --oneline --decorate'
This will add the alias called lg to your ~/.gitconfig
file. You could also edit this file directly and add aliases manually.
<pre>`[alias] lg = log --graph --oneline --decorate
Visualising the commit graph is my must-have tool when using git, I use it nearly as often as git status
. The commit graph shows a history of commits and the position of repos in that history. When there are branches, this is rendered as a tree-like structure and it is easy to see the relative status of your local and remote repositories attached to the project.
Most common status in git is to have your local repository ahead of the remote masters in terms of commits, with HEAD pointing to you local repo. Its quite common to do a group of related commits locally before pushing then to a shared remote repo. When the remote repo is behind your local repo, this is quite obvious from the commit graph, as its on an earlier commit version and therefore a different line of the graph.
You can see when a push happens to a remote repository from your local repo, as the branch merges into the trunk. When everything that has been committed locally has been pushed then you can see the remote branch at the same commit version as the local.
In the situation where you have multiple repositories, for different stages of the development workflow (for example testing, staging, CI), the commit graph really makes the status of your different repositories really clear. You can see at a glance the commit version each repo is on. The commit graph also helps you understand which commits to push to which repos. This is also invaluable when merging two longer running branches (should you get to that situation).
In the next article I will cover how to create your own design for the git commit graph, creating several aliases for different levels of information
Thank you.
jr0cket
Sometimes reading a big book or looking at a long list of commands is the last thing you want to do when discovering how to use a new tool. So it was great to find a very visual way to show the git commands and how they work.
The Git Interactive Cheetsheet from NDP Software does exactly that. By clicking on different stages of your development workflow, you can see the related commands that you can use. Hover over a specific command and you get a short description of what it will do. The site also shows you the direction in which those commands work, supporting your understanding of those commands.
It would be great if more tools have this kind of visualisation around them, especially involving the developer workflow that they support.
I have created some basic visualisation of developer workflows using Inkscape, an open source drawing tool. The results can be seen at my developer guides on Github pages.
Thank you.
jr0cket
Thanks to our hosts, Make Positive, there was plenty of pizza to warm everyone up and plenty of drinks to cool everyone down again. Make positive have a very roomy office to work in and its a great space to talk to other developers and admins involved in forcedotcom projects.
We had a great talk from Rob Cowel, giving his insight into developing applications and system integrations across three cloud platforms: forcedotcom, heroku and IrisCouch (CouchDB).
I also gave a quick update of Salesforce news, up coming events, new organisers for the community and a collection of resources for developers getting started with the force.
London Salesforce Developers Meetup January 2013 from John Stevenson
t of people whist not playing ping pong. As always there is a good mix of people, including Salesforce staff, the Make Postive team, developers from Tquila and many more.
I met a developer who has been working on a blog, www.cloudfollows.com, with others around the world aimed at those relatively new to the forcedotcom platform. A quick glance had me very interested. It looks a well presented site with lots of handy tips.
I caught up with Salesforce MVP’s Francis Pindar and Keir Bowden and they are keen to run some workshops to help people gain experience with the platform. We’ll be running our first workshops in Tower42 on the 11th April. There will be room for approximately 10 developers.
There is always so much conversation going on and I often hate to break it up for the talks.
I gave a quick overview of coding events we are running for the community. This includes Hack the Tower and the upcoming coding dojo for Salesforce developers at Tquila.
John Mahoney, Clerisoft.com gave a quick demo of Steroid, a custom components framework for the forcedotcom platform. It provides a library of re-usable custom components for both desktops & mobile devices. Clerisoft developers pick ideas that are requested on … but are not planned to be added to the platform by Salesforce engineers.
John was looking for feedback on the concept, what components developers would find valuable and any for pepole to go try them out.
Keir Bowden, Salesforce MVP gave a quick run through of the developer certification process. Each level of certification has been designed to help you grow your skills and get great roles in industry. Salesforce and it customers really value the certification process, as it gives a measure of confidence in the ability to deliver projects successfully.
Keir is also driving the formation of the EMEA TA review board, which is a peer review process for the top level of Salesforce developer certification.
Keir has now experienced the review board from the inquisitor side, being involved in the first EMEA review board. As Keir is now on the EMEA review board he is no longer in a position to offer advice on how to pass the TA certification.
Keir invited Chris Eales along to share his experiences, as Chris is the latest Technical Architect to pass the certification level.
The next monthly meetup for the London Salesforce developers is at Make Positive on the 27th March. If you want to speak about anything please get in touch or leave a message on the meetup event.
Sign up at: http://www.meetup.com/LondonSalesforceDevelopers/events/96135922/
See you there.
Thank you.
@jr0cket
Heroku is a great platform to deploy your web apps, in a way that just works for developers. What isnt obvious is you can also deploy static sites too.
As Markdown is now common way for developers to create documentation, why not use Heroku to deploy your markdown driven content site.
The Salesforce developer evangelist team are doing just this, creating workshops written in markdown. The workshops are deployed on Heroku and we collaborate via Github. This is a really effective way to collaborate as we are remote workers and often on our travels.
Markdown is really easy to learn and really easy to read. Its much better to read in its raw form than most Wiki Markup languages. If you have a good editor (Emacs & Emacs Live) then reading and writing markdown is a great experience.
Its also pretty easy to convert Markdown to different formats such as HTML and PDF.
I picked up all the markdown syntax from working with Github readme.md files and from writing markdown in Emacs. SimpleCode.me also has a really good getting started with markdown guide.
Any editor can be used two work on the content for the workshops, this is another beauty of markdown. I recommend Emacs with Emacs Live setup or you are using MacOSX, then Mou gives you live rendering of you content as you type.
To make the markdown render in HTML and PDF similar to the style used on github, a fairly simple css file is added to the project.
As Heroku and Github are both going to be used then the projects are versioned with Git. A git repository is created on Github at the start of a new workshop. A github organisation is used to keep al the projects together. The new Github repository is cloned and development of the content commences.
As its a static site then there is not much need for a .gitignore file, assuming you have a ~/.gitignore_global file for any backup files that your editor creates.
Once the workshop content is good enough to deploy, a new Heroku application is created. A specific build pack is used to tell Heroku how to assemble and deploy the markdown as a web application. This build pack defines how the HTML is generated from the markdown, based on a css file included in the project. The whole app runs on a HTTP server called SimpleHTTPServer, written in Python.
The app is created on Heroku app using the markdown build pack created by James Ward. The command line for this is:
heroku create workshop-name --buildpack https://github.com/jamesward/heroku-buildpack-markdown.git
A procfile is a simple text file that tells Heroku what to do with you application when its ready to run it. For the markdown site we simply start up a simple HTTP server which runs on python (we dont need all the bells and whistles of something like Apache).
The web:
directive at the front tells heroku to create a process that listens to requests from the Internet. As we are not specifying a port number, it will pick up the default port to listen on from the Heroku environment variables.
web: python -m SimpleHTTPServer $PORT
As soon as you are ready for your markdown content to go live, simply push your local repository up to the Heroku repostiory with the git push command.
git push
If you have more than one remote repository specified in your git configuration, then all you need to do is specify the specific repository to push to. By default the heroku create command adds a remote called heroku.
To check what your heroku repository is called you can use the command:
git remote -v
To push to a remote repository called heroku, use the command:
git push heroku master
It is really easy to create content based on markup. Collaborating on this content is really easy when using Github and deploying this content as a static website is only a git push away with heroku.
Other aspects were are adding to this workshop creation process include:
Thank you.
]]>Emacs is a really powerful tool for Clojure development, although without a guiding hand it can be a bit of a learning curve. Using the Emacs Live its really simple to get a fully featured development environment for Clojure. I will show you how to get Emacs Live installed and how to start using it for Clojure.
I also recommend using EmacsForOSX if you are on a Mac.
Emacs Live is a collection of packages for Clojure that include:
Emacs Live required Emacs 24 or greater, everything else is self contained.
You could just clone the github repository, but the provided install script makes sure everything is set up correctly and also creates a separate folder for your own personal settings. This allows you to tweak Emacs Live to your own style without it getting clobbered by any updates.
Run the following in a terminal window (Mac or Linux):
Before anything is installed, the script will move any old Emacs configuration to ~/.emacs.d
to a folder called ~/.emacs.d-old
.
Once all the Emacs Live configuration files are installed, the script asks you if you want to create your own personal configuration. If so, a new folder will be created called~/.live-packs/your-current-username-pack
.
Its really easy to add your own key bindings and other configurations to Emacs Live, using the personal pack the script created for you. The personal pack has an init.el
file in which you can add short simple configurations or load in longer configurations from the config
or lib
folders.
Emacs live makes several changes to the default key bindings of Emacs. If you want the default key bindings back then you can simply switch off the Emacs Live key bindings by adding the following to the file ~/.emacs-live.el
(live-ignore-packs '(live/bindings-pack))
Alternatively, you can learn to love the Emacs Live bindings, or tweak a few in your own personal pack. I have added a keybinding for launching the Clojure repl and a pair of key bindings for changing the font size, making it easier to change fonts when giving a demo.
To make the change in my personal pack, I added the following to the file ~/.live-packs/jstevenson-pack/config/bindings.el
1 | ;; Simpler key bindings for making text in buffers bigger and smaller |
To keep your init.el
file easy to work with, larger customisations can be defined in their own .el
files under the config diretory. Then simply add a line to load in these config files in the file ~/.live-packs/jstevenson-pack/config/init.el
See the example where I tweaked the mode line for Emacs when developing Clojure
As all the configuration files are hosted on Github then a simple git pull
will bring in any new version. As the install script clones the github repository, the remote github repository is already set up.
From inside your ~/.emacs.d
folder you can simple do a git pull
when you know there is an update (notices are posted to the Emacs Live Google group).
If you want to know if you are on the latest version or how many versions you are behind, you can use git fetch
to get all the latest changes without applying them. The output of git fetch will list any versions that have been created since you installed.
Emacs Live has documentation using the Emacs Live theme on the Github pages for the Emacs Live project.
For a developer new to Emacs and Clojure development, getting a great environment to work in is easy. Learning how to use that environment well will take practice, but this is the case with any tools. Muscle memory will kick in pretty quickly, so the more you use Emacs the more natural it will feel.
Thank you.
@jr0cket
The Git Father. The only t-shirt to wear when teaching other people who to use git and Github.
One day I will actually iron my t-shirts :)
Thanks to Clearvision for creating such a great t-shirt. Check out their Go Git website for ideas on adopting git in your organisation.
Thank you.
@jr0cket
Emacs is fun to configure and if you have the basics of LISP or Clojure then its pretty easy too. After reading how to replace the text on the modeline I decided to customise my mode-line to make it more efficient for Clojure development. I’ll cover how I tweaked the mode line and added this customisation to my Emacs Live based configuration.
Instead of a long list of Major and Minor modes that are active, I now have symbols representing those modes.
In the screen-shot you can see I have the following modes running
λ Clojure mode
τ undo-tree
γ yas
υ volatile highlights
ηζ nREPL minor mode
α auto-complete
φ paredit
Some other modes are active, but hidden with a null string as I am assuing they are running all the time.
Adding these to the Emacs Live configuration I use is easy, assuming you used the “bro-grammer” script provided by +Sam Aaron. This script creates a ~/.live-pack
folder where you can add your own keybindings and configuration without it getting hit by Emacs Live updates.
I created a file called clean-mode-line.el
, based on the one in the Mastering Emacs article. The file is located in my personal live-packs folder at:
1 | ~/.live-packs/jr0cket-pack/config/clean-mode-line.el |
The code for the mode-line tweaks is a Github Gist:
To use this new mode-line tweak, we ask Emacs Live to load the configuration in clean-mode-lime.el. To do this, edit the init.el
file in your live pack
1 | ~/.live-packs/jr0cket-pack/init.el |
Then add the following code:
When you open a Clojure document, the mode line now displays the major and minor modes as symbols.
Starting the Clojure REPL using M-x nrepl-jack-in
gives you a similar modeline, this time with the major mode being nrepl-mode
.
Switching back to a Clojure file after running nREPL shows Clojure
as the major mode and nREPL
running as the minor mode.
The custom mode line was really easy to set up, thanks to the great info in the Matering Emacs article. The tricky part was finding the specific name for the nREPL minor mode that was running. Other than that it took a couple of minutes, most of which was deciding which symbols to use. I added a few others at the end of the file in case I change my mind or you want to use something more meaningful to yourself.
I havent tried this with Swank, but I assume that all it would take is adding of the swank mode to the clean-mode-line.el file.
When I get round to using other modes, I will see if I can add other symbols to my configuration where it makes sense. Let me know if you find this useful and what symbols you use.
Thank you.
@jr0cket
Secure Shell (SSH) is an invaluable tool to help developers manage code and data over different computers and services, eg. Github, Heroku. By creating a public/private key it also means you dont have to enter a username & password each time you use the service. Ideally you should create a public/private key using a long passphrase, so that is what I will cover here.
To make using SSH a great experience to use and yet keeping it secure as possible requires you to set up an public / private key combination that is protected by a long pass-phrase. Specifically you are protecting your private key as you distribute your public key (which is why its called public). Imagine the pass-phrase as a kind of long password, which you will add to something called a keychain on your laptop so you only have to enter this long password once.
Of course not, that would be a real pain.
When using a password protected SSH key with Mac OSX and Linux you can add your SSH key password to the keychain (keyring in Linux, but its the same thing) of your login account.
When you first connect to github using your newly added key you will be prompted with a dialog box to add the password for your SSH key to your keychain. Enter the password for your keychain in this prompt, it should be the same as your computer login password (unless you specifically changed it).
Creating an SSH key pair with a long pass-phrase is just the same process as that without, except you obviously specify the long password.
In the following example, I am specifying the email I used for the Github account I own, using the -C
option for ssh-keygen
.
I am also using a custom file name. In doing so, I need to provide the full path to the file or otherwise ssh-keygen fails to create the file. It seems that even the ~/
shortcut to your home folder also fails.
As I am using a custom name for the keys, then I will need specific a host configuration before I am done.
If your public key is called id_rsa.pub then you should not need a host configuration. As I am using a custom name to generate the SSH keys, I need to add a host definition to my SSH configuration. Its pretty easy to add a new definition, simply edit the ~/.ssh/config file and add a definition as follows
The adding of keys to your Github account is a very poor experience for the developer, as it requires a cut-n-paste rather than allowing you to upload your key file.
Adding keys to Heroku is much nicer, they have a toolbelt that automatically detects your public key file and upload it.
I had a few problems when copy/pasting my key from the editors that come with the Mac, until I found reference to the command pbcopy
.
Open up a terminal and enter the following command to copy your public key into the Mac’s clipboard. Then simply paste the key into the Github webpage for adding a new key.
pbcopy < ~/.ssh/id_rsa.pub
Bitbucket is not much better, although at least they tell you about pbcopy in the documentation for adding a key. When I used Assembla.com, at least you could upload your key public key as a file.
Once you have uploaded your public key, don’t forget to give it a quick test to make sure its all working. Using the command line, use the ssh command to connect to github
ssh -T git@github.com
This command will use your SSH key to connect to Github and show you if you have successfully set up your key for your account on your Mac. Unlike normal SSH access, you cant actually do anything once you connect.
Thank you.
]]>In part one I showed how easy it is to version a project using Git from within Emacs, using the Magit package. This time we look at the git log within Magit.
Working with the log gives you a lot more detail about your changes, helps you compare local and remote repo commits. All of which helps you understand when you should push your code.
On the command line you can use git log to see your change history, although it can be a bit fiddly to set up git to give you a pretty view of those logs. In Magit you can just get on a explore the logs
Inside the Magit buffer, press l
to show the log menu and then either l
for the short for log or L
for the long form of the log.
l l - short logl L - long log
Selecting the short log details allows you to see more commits, but you only see the commit message and not the files that have changes.
In the following examples both the remote (github repository) and local repository are at the same commit - e447b51
. So you can easily tell if there are any local commits you have not pushed to Github.
Selecting the long log output, l L
, you see more details of each commit, including the files changed, author and timestamp.
To see the changes within a commit, move the cursor over a commit number in the log and press space
. This brings up another buffer which you can scroll through. You don’t even need to switch to this new buffer as if you keep pressing space
it will scroll through the text of the change.
The magit log also has a margin that shows the name and relative time of each commit. This can be very useful information to have at hand, although it does take up more space in the buffer.
To toggle the magit log margin, use h
or M-x magit-log-toggle-margin
In the following example, the local repository is ahead of the Github repository by one commit. The magit log can be used to compare commits.
Move the cursor over the first commit and press .
(full stop). Then put the cursor over the second commit and press =
.
To exit buffer that opened the diff, simply press q
in the Magit buffer.
I tend to just use the short form of the log and compare commits every now and again. If I havent pushed a few commits up to Github for a while, its a handy way to check if I should push and what I am pushing.
Of course if I write good commit messages and commit often to my local repo, then its much easier to tell what I am pushing from just the short log.
Thank you.
@jr0cket